2.SETTING ITEMS (ADMIN)
Setting E-mail Functions 173
2 SETTING ITEMS (ADMIN)
2
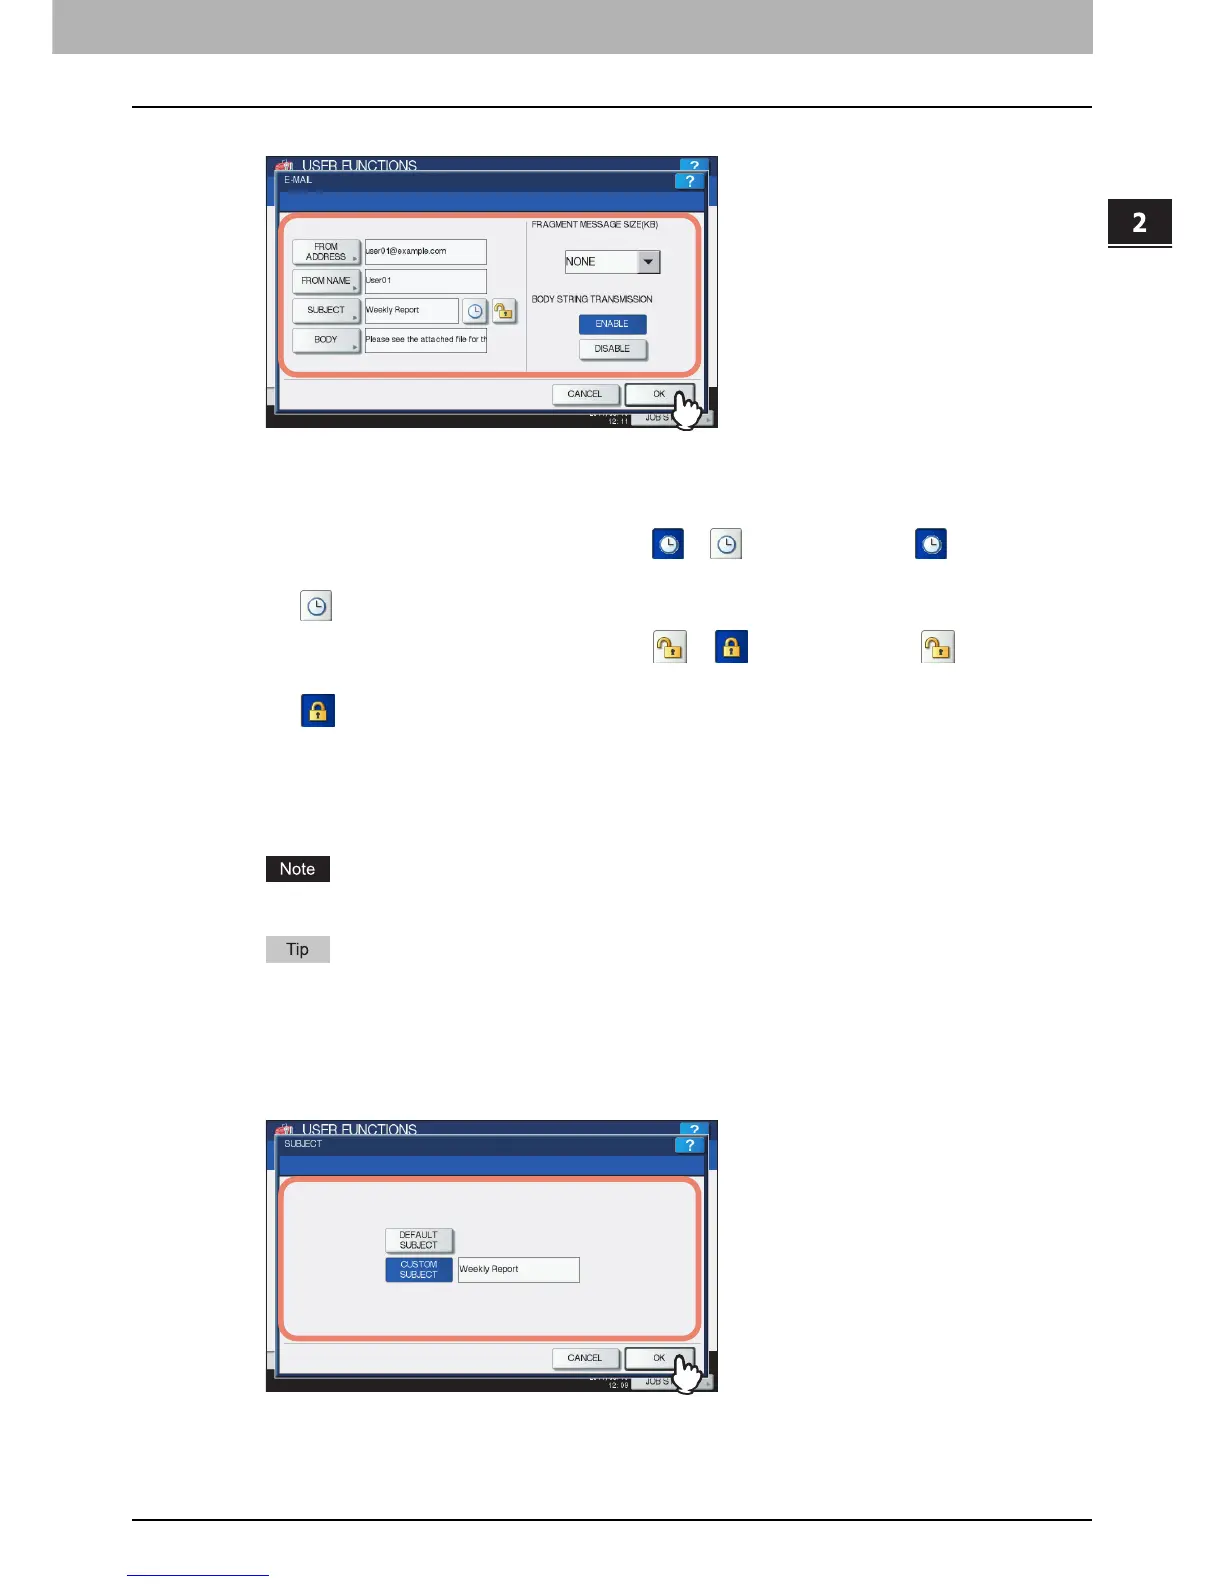
Specify the following items as required and press [OK].
[FROM ADDRESS] — Press this button to enter the e-mail address of this equipment.
[FROM NAME] — Press this button to enter the identification name of this equipment.
[SUBJECT] — Press this button to set the default e-mail subject. The E-MAIL SUBJECT screen appears.
For details of this screen, see “Operations in the E-MAIL SUBJECT screen” below.
[Date/Time Added] — Press this icon to switch it from to or vice versa. Display to add the current
date and time to the subject.
Display to deactivate this setting.
[Subject Changed] — Press this icon to switch it from to or vice versa. Display to enable a user
to edit the subject.
Display to deactivate this setting.
[BODY] — Press this button to enter the body message.
FRAGMENT MESSAGE SIZE (KB) — Select the desired fragment size from the drop-down list. Press [NONE] to
disable the fragmentation.
BODY STRING TRANSMISSION — Press [ENABLE] to enable the body string transmission, or [DISABLE] to
disable the body string transmission.
To enable Scan to E-mail, you must enter an e-mail address in the [FROM ADDRESS] box.
When you press each button ([FROM ADDRESS], [FROM NAME] and [BODY]), the on-screen keyboard is
displayed. Enter the value using the on-screen keyboard and press [OK] to set the entry. You can also use the
digital keys on the control panel to enter numerals.
Operations in the E-MAIL SUBJECT screen
Select the default subject or your desired one, and press [OK]. When you press [OK], you will be returned to the E-
MAIL screen.
[DEFAULT SUBJECT] — Press this button to set the default subject.
[CUSTOM SUBJECT] — Press this button to specify the desired subject. When you press this button, the on-
screen keyboard is displayed. Enter the value using the on-screen keyboard and press [OK] to set the entry.
Up to 128 alphanumeric characters can be entered for the subject. You can also use the digital keys on the control
 Loading...


