Toshiba XXXXXXX(<SanSerif1>X/X)
–38–
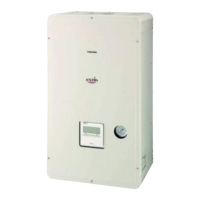
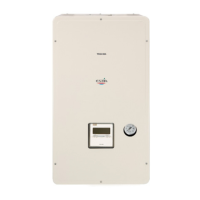
Hydro Unit
Installation Manual
• Stick the optional insulator for cooling to the bottom
of the Hydro Unit.
Settings for hot water supply
• Prepare the optional hot water cylinder.
• Procure a motorized 3-way valve (refer to “Control
parts specifications” on page 21 for the details.)
locally and perform piping. Connect the valve cables
to terminals TB05 (7), (8) and (9) of the Hydro Unit.
• Set DIP SW12-1 on the Hydro Unit board to OFF.
(Refer to page 30.)
• Connect the power supply unit for the hot water
cylinder heater to terminals TB03 L and N of the
Hydro Unit.
• Connect cables between the Hydro Unit and the hot
water cylinder as follows:
Hydro Unit terminals TB03 (1), (2), and earth — Hot
water cylinder (1), (2), and
earth
TB06 A, B, and earth — Hot
water cylinder A, B, and earth
Settings for 2-zone temperature control
• Procure a motorized mixing valve (refer to “Control
parts specifications” on page 21 for the details.)
locally and perform piping. Connect the valve cables
to terminals TB04 (1), (2), (3) and (4) of the Hydro
Unit.
• Procure a buffer tank locally.
• Procure a water pump locally, and connect its cables
to terminals TB05 (1) and (2) of the Hydro Unit.
To inhibit interlocking the water pump with the
internal pump of the Hydro Unit, set DIP SW10-3 on
the Hydro Unit board to OFF.
• Set DIP SW12-3 on the Hydro Unit board to ON.
(Refer to page 30.)
Attach the temperature sensor (TFI) connected to
terminals TB06 C and D of the Hydro Unit near the
hot water inlet of the Hydro Unit.
• Fix TFI sensor on the room heating supply pipe by
using the connector procured in locally.
• Cover the cables with insulation tube (minimum 1
mm) or conduit so that the user cannot touch them
directly.
• Cover the TFI sensor's cables and sensor with
insulation tube (minimum 1 mm) shown in the
diagram on the right.
▼ Fig. 8-03
▼ Fig. 8-04
Setting for second remote controler
• Prepare the optional second remote controller.
• Connect the cable to terminals TB07 A,B of theHydro
unit and remote controller.
• Set dip switch1 on the second remote controller
board to ON.
• <Room thermo control>
Press long the TEST + SET + SELECT
switches on the remote controller to
change the Hydro Unit function code, and change
address 40 to 1,and then press the SET button
to enable the function.
M
TFI

 Loading...