Do you have a question about the Toshiba HWS-G1901CNMR-E and is the answer not in the manual?
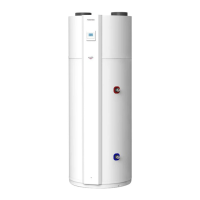
Details dimensions, weight, insulation, connections, and power supply.
Covers energy class, COP, heat up times, capacity, and operating ranges.
Illustrates PC board layout and terminal connections for various components.
Provides a system schematic showing electrical connections and component interactions.
Diagram of the refrigerant circuit with labeled components.
Diagram of the water circuit with labeled components and connections.
Describes the standard AUTO mode operation for heating water.
Details the ECO mode for energy-efficient water heating.
Explains BOOST mode for rapid heating using heat pump and electric heater.
Covers the emergency BACKUP mode using only the electric heater.
Describes SILENT mode for reduced fan speed and noise emissions.
Explains HOLIDAY mode where heating is off except for Legionella control.
Allows programming hot water delivery for a specific number of days.
Enables operation during low electricity price periods.
Describes ventilation modes for air distribution.
Details control using solar PV signals for heating.
Enables Solar, Floor Heating, or Cooling functions.
Smart grid integration for controlling heat pump operation.
Allows external control of ventilation via 0-10V input.
Adjusts fan speed based on external signals like humidity or CO2.
Lists Modbus codes for monitoring various parameters.
Details Modbus codes for reading and writing set points.
Initial checks before contacting support.
Procedure to verify the unit's power supply voltage.
Ensuring adequate cold water flow to the unit.
How to operate the unit in BACK-UP mode during errors.
List of error codes displayed on the remote controller.
Analysis of error codes, possible reasons, and solutions.
Troubleshooting steps for temperature sensor errors.
Troubleshooting steps for high pressure switch errors.
Troubleshooting steps for evaporator temperature errors.
Troubleshooting steps for high evaporator temperature errors.
Troubleshooting steps for low evaporator temperature errors.
Troubleshooting steps for filter replacement alerts.
Procedure to reset errors and return to normal operation.
Overview of the control panel and its functions.
Accessing operational data, temperatures, and errors.
Description of available operating modes like AUTO, ECO, BOOST.
Configuration of temperature set points for different modes.
Details on additional functions like Ventilation, Low Tariff, PV.
General settings including Reset and language options.
Advanced settings accessible only by qualified installers.
Regulations for repair, dismantling, recycling, and disposal.
Instructions for cleaning the evaporator and fan.
Procedure for cleaning the condensate drain.
Covers maintenance of water circulation components.
Maintenance and testing of the pressure relief valve.
Procedure for checking and replacing the magnesium anode.
Step-by-step guide to removing the front panel.
Instructions for removing the top shell and cover.
Procedure for disassembling the evaporator housing.
Steps for replacing the heating element.
Guide for replacing safety breakers.
Procedure for replacing the anode.
Instructions for replacing the solenoid valve coil.
Steps for replacing the fan assembly.
Guide for replacing the BT1 temperature sensor.
Instructions for replacing the BT2 temperature sensor.
Guide for replacing the BT3 temperature sensor.
Steps for replacing the BT4 temperature sensor.
Procedure for replacing the compressor.
Instructions for replacing the refrigerant tube kit.
Guide for replacing standard and deluxe PCB boards.
Steps for replacing the unit's display and frame.
| Energy Class Cooling | A++ |
|---|---|
| Energy Class Heating | A+ |
| Power Supply | 220-240V, 50Hz, 1Ph |
| Refrigerant | R32 |
| Operating Temperature Range (Heating) | -15°C to 24°C |
| Operating Temperature Range (Cooling) | 46°C |