10
Initial setup
Initial setup
ON / OFF
FAN
TEMP.
SWING/FIXTIME
MODE
VENT
UNITSET CL
FILTER
RESET
TEST
TIMER SET
In FAN operation
1, 2, 3 4
In all modes
Display when stopping the swing
Initial setup
Series of
operation
Fan/Heat
operation
Cool/Dry
operation
Unit No. 1-1No display Unit No. 1-2
Unit No. 1-4 Unit No. 1-3
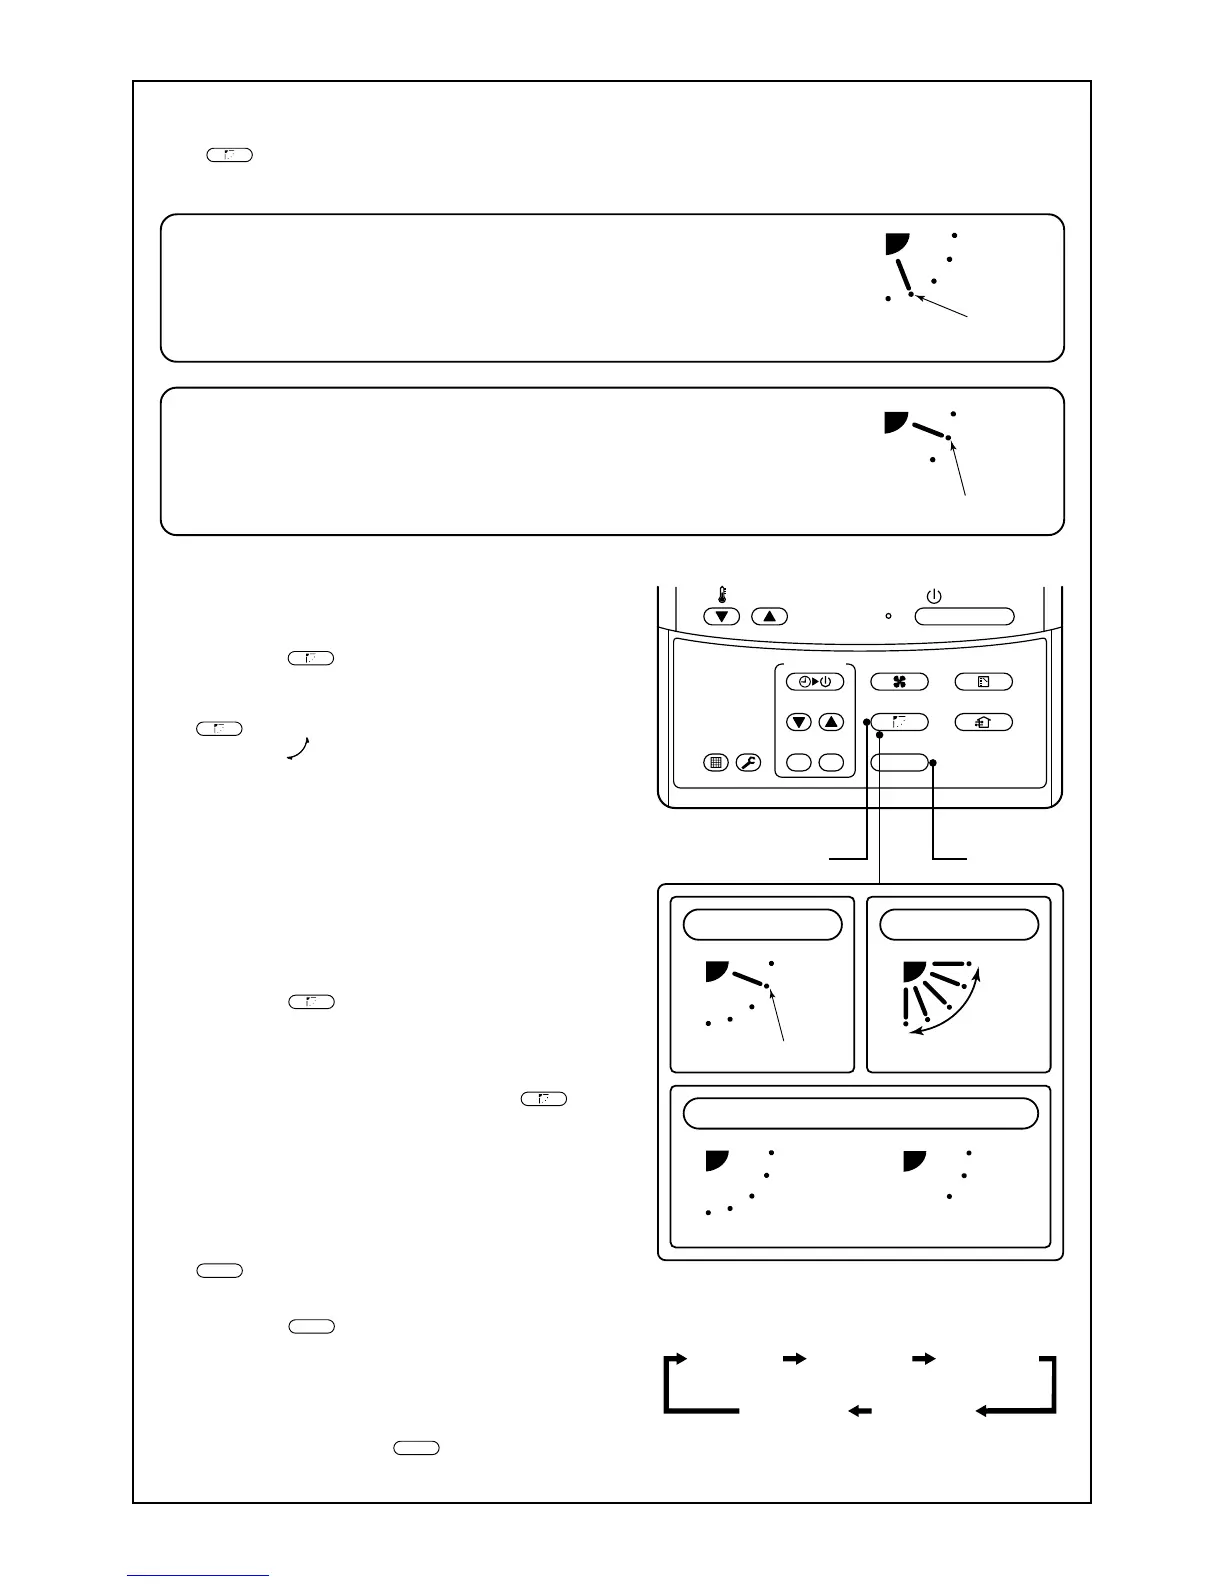
How to set up the air direction
Push
SWING/FIX
button.
1
Every pushing the button, the air direction changes.
In Heating operation
Set the air outlet flap downward.
If directing it upward, the hot air may not come to the foot.
How to adjust the the air flow direction,
using the swinging function
2
Push the
SWING/FIX
button.
Set the direction of the air outlet flap to
the lowest position and then push the
SWING/FIX
button again.
• [SWING ] is displayed and the air flow
direction will automatically change either
upwards/downwards.
In the case where one remote controller con-
trols multiple indoor units, each indoor unit can
be selected and its air flow direction can be
adjusted.
How to stop the flap from swinging
3
Push the
SWING/FIX
button again while the
horizontal flap is moving.
• The horizontal flap can be stopped at any
position desired. If you wish to return the flap to
it original upwards position, press the
SWING/FIX
button again.
* During the cooling/drying operation the hori-
zontal flap will not stop at its most downwards
facing position 9 (reduce the risk of water
dripping), but will instead move to the 3rd
position from the top (as shown in the figure).
4
UNIT
• To set up the air flow direction individually,
push the
UNIT
button to display each indoor
unit No. in a group control. You can then set the
air flow direction for the displayed indoor unit.
• If there is no display, all the indoor units can be
operated collectively.
• For every push of the
UNIT
button, the display
will alter between units as shown in the figure.
In Cooling / Dry operation
Set the air outlet flap Upwards.
If directing it downwards, the dew may form on the near side of the air discharge
port and could drip.
 Loading...