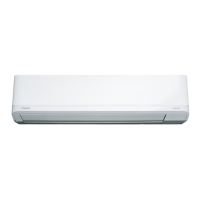
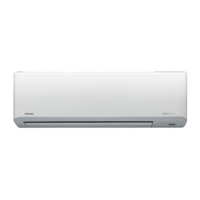
INDOOR UNIT DISPLAY & UNIT OPERATION
1
PANEL
This indoor unit can be operated with the unit operation panel or using remote
control.
Operational contents will be followed the one which was operated later.
If change the set temperature with operation panel of unit, temperature indication
will be changed, but the temperature display on the remote control will not change.
If set the air fl ow only with the upper port, a little air fl ow may happen at the lower
port.
6 7892
1
4
%
5
&
Remote control
light receiver
!"#$ 3
1 OPERATION button : Unit operation ON/OFF button, turn off FILTER CHECK
Indicator.
2 MODE button : Operation mode (Auto
→
Cooling
→
Heating
→
Auto
→
• • • )
※ CHILD LOCK function : Press MODE button for 3 seconds. (It is possible to
operate even when stopping.)
To cancel CHILD LOCK function, press MODE button for 3 seconds once
again.
When CHILD LOCK function is activated, 3 beeps will sound.
When press MODE button to cancel the function, a beep will sound and then
3 seconds later 3 beep sound may occur.
The indicator button will be invalid while the child lock function is activated.
(When press the button, 1 beep will sound).
Operation with remote control during the CHILD LOCK function works.
This function is cancelled when the power supply is off or failure.
3 AIR OUTLET SELECT button : Cooling, Auto (Upper & Lower
→
Upper
→
Upper & Lower
→
• • •)
Dry (upper only)
Heating (Upper & Lower
→
Upper
→
Lower
→
Upper & Lower
→
• • •)
On cooling operation, whichever air outlet is set, only Upper is used when the
room temperature approaches the set temperature.
During stop operation : Open/close the lower air outlet grille.
When the TEMPERATURE indicator display “CL” the lower air outlet grille
will be in closed status.
When the TEMPERATURE indicator display “OP” the lower air outlet grille
will be in open status.
4 TEMPERATURE button (Up) : Setting temperature increase by 1°C (17°C
→
18°C
→
• • • 30°C)
5 TEMPERATION button (Down) : Setting temperature decrease by 1°C
(30°C
→
29°C
→
• • • 17°C)
6 COOL and DRY indicator (Blue)
7 HEAT indicator (Orange)
8 AUTO indicator (Green)
9 OPERATION indicator (Green)
! HI-POWER indicator (Green)
" FLOOR indicator (Orange)
# TIMER indicator (Yellow)
$ FILTER CHECK indicator (Red)
% TEMPERATURE indicator (Blue)
& AIR OUTLET indicator (Green)
2 PREPARATION BEFORE USE
Preparing Filters
1. Open the air inlet grille and remove the air fi lters.
Insert direction of
(+) and (-) correctly
2. Attach the attachment fi lters (see detail in the
accessory sheet).
Loading Batteries
1. Remove the battery cover.
Pull the cover
away fi rmly.
2. Insert 2 new alkaline batteries (AAA type)
following the (+) and (–) positions.
Removing the batteries
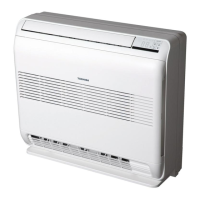
Upper air outlet grille
1. Remove the cover, and take out the batteries.
Main operation part
2. Reattach the cover.
• Please dispose of the batteries according
to the local regulation.
Clock Setup
1. Push CLOCK • by tip of the pencil.
If timer indication is fl ashing, go to
the next step 2.
2. Press or : adjust the
time.
3. Press : Set the time.
Lower air
Remote Control Reset
outlet grille
Air inlet grille
1. Remove the batteries.
2. Press .
3. Insert the batteries.
3 AIR FLOW DIRECTION
Press : Move the louver
1
in the desired vertical direction.
Press : Swing the air
automatically and press again
EN
2
to stop.
ES
FR
For horizontal direction, adjust
3
manually.
IT
Note:
DE
• Do not move the vertical louver manually by others.
• The vertical louver may automation positioning by some operation mode.
• On heating operation, in case of AIR OUTLET SELECT is set as Lower,
upper louver is not operate even if swing is set by remote, though receiving
PT
history is recorded.
• When changed the air fl ow to up/down or upward blowing, the swing
operation will be performed.
PL
• At the time of FLOOR WARMING OPERATION, the air will blow downward
only and it cannot order to swing operation with remote control.
CZ
4 REMOTE CONTROL
1 Infrared signal emitter
a
RU
2 Start/Stop button
3 Mode select button (MODE)
4 Temperature button (TEMP)
CR
5 Fan speed button (FAN)
6 Swing louver button (SWING)
HU
7 Set louver button (FIX)
8 Weekly timer setting button
9 Memory and Preset button (PRESET)
i
d
TR
! 8°C heating operation button (8°C)
b
" High power button (Hi-POWER)
c
f
# Economy button (ECO)
g
e
NL
n
$ Comfort sleep button (COMFORT SLEEP)
l
k
j
% Floor warming mode button (FLOOR)
m
& Clock Reset button (CLOCK)
e
GR
h
( Check button (CHECK)
) Reset button (RESET)
~ Filter reset button (FILTER)
SV
o q
p r
FI
5 WEEKLY TIMER OPERATION
Please see operation manual in WEEKLY TIMER OPERATION MANUAL.
NO
AUTOMATIC / COOLING (DRY) / HEATING
6
DK
OPERATION
1. Press : Select A. Cool , Dry , Heat .
RO
2. Press : Set the desired temperature.
Min. 17°C, Max. 30°C.
BG
3. Press : Select AUTO, LOW , LOW+ , MED , MED+ , or
HIGH .
EE
※ AUTOMATIC OPERATION : Choose cooling or heating operation automatically.
※ In DRY OPERATION mode, it can not select air volume.
SK
SI
LV
 Loading...