Do you have a question about the Toshiba RBC-AXU31UM-E and is the answer not in the manual?
Critical warnings regarding the installation process.
Critical warnings related to the operation of the unit.
Warnings about reinstallation and self-repair.
Cautions for installing the remote controller and unit.
Cautions to observe during the operation of the unit.
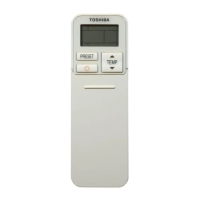
Step-by-step guide to inserting new batteries.
Instructions on how to take out old batteries.
Information on battery types and lifespan.
Guide to setting the remote controller's clock.
Describes the initial clock display after battery insertion.
Visual guide to the clock adjustment interface.
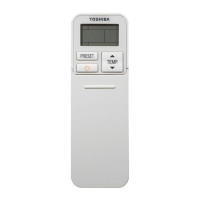
Overview of the remote controller's capabilities and limitations.
Explains the function of the signal transmitter.
How to start and stop the air conditioner operation.
How to select different operating modes.
How to adjust the temperature setting.
How to select the fan speed.
Controls the automatic swinging of the louvers.
Adjusts the fixed direction of the louvers.
How to set the timer to turn off the unit.
How to set the timer to turn on the unit.
How to cancel timer settings.
Activates the high power operation mode.
Recalls memorized operation settings.
Activates the comfort sleep mode with timer.
Activates the quiet operation mode.
Overview of all possible indicators on the remote display.
Indicates when the remote is transmitting a signal.
Shows the current operating mode (Cool, Dry, Heat, etc.).
Displays the set temperature.
Shows the selected fan speed.
Displays timer settings or current time.
Indicates when the Hi POWER mode is active.
Shows when a preset mode is memorized or active.
Indicates the Comfort Sleep timer operation.
Indicates the Quiet operation mode.
Shows when the louvers are swinging.
Important note regarding display differences.
Button for manual operation without the remote.
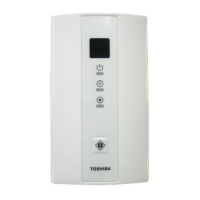
Component that receives signals from the remote.
Indicator lamp for errors or status.
Green indicator lamp for power status.
Green indicator lamp for timer reservation.
Orange indicator lamp for heating or error status.
Cautionary note about operation mode disagreements.
How to operate the unit in various modes.
Instructions for using the auto changeover mode.
Important cautions for automatic operation.
Steps to activate the high power mode.
How to deactivate the high power mode.
Conditions where Hi POWER mode cannot be used.
Steps to activate the quiet mode.
How to deactivate the quiet mode.
Restrictions on using quiet mode.
Note on potential reduced performance with quiet mode.
Guide to setting and memorizing preferred modes.
Limitations for COMFORT SLEEP and Auto modes.
How to activate Comfort Sleep mode and select timer duration.
Instructions for setting ON and OFF timers.
Important considerations for timer operation.
Steps to set the timer for operation.
How to cancel an active timer setting.
How to set both ON and OFF timers together.
Steps to set ON and OFF timers sequentially.
How to set combined timers for daily activation.
How to cancel any timer operation.
How the clock display changes during timer operations.
How to adjust the louver's fixed direction.
Recommended louver position for heating.
Recommended louver position for cooling/dry.
How to initiate automatic louver swinging.
How to stop the automatic louver swinging.
Important cautions regarding louver adjustment.
Guidelines for aiming the remote's transmitter.
Instructions for wall-mounting the remote controller holder.
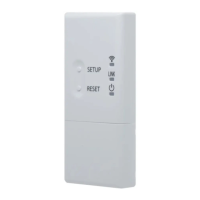
Steps to set up a wireless remote controller as unit B.
Notes on A-B selection and factory defaults.
How to start the unit using the temporary operation button.
How to stop the unit using the temporary operation button.
Requirement for the temporary operation button usage.
General checks to perform before seeking repair.
Instructions for contacting the dealer for support.
| Brand | Toshiba |
|---|---|
| Model | RBC-AXU31UM-E |
| Category | Air Conditioner |
| Language | English |