2.USING TEMPLATE BUTTONS
Recalling Templates 17
USING TEMPLATE BUTTONS
2
When the Authentication screen is displayed, enter the user name and the password to complete
the user authentication.
If you select a template for which the automatic start function is enabled ( is shown on the button), the
equipment automatically starts the scanning operation. (End of procedure)
If you select a template for which the automatic start function is disabled, the Scan menu appears. In this case,
proceed to step 3.
Ask the administrator for the user name and password.
3
Press [Scan].
When the equipment has scanned more than 1000 pages in a job, the “The number of originals exceeds the
limit. Do you want to save stored originals?” message appears. If you want to save the scans, press [Yes].
When the temporary workspace is full on the equipment’s internal storage device, a message appears and the
job is canceled. The available workspace can be viewed on the [Device] on TopAccess.
If the number of jobs waiting to store scans in the equipment’s internal storage device exceeds 20, a message
appears to indicate that its memory is full. In this case, wait a while until memory becomes available again or
delete unnecessary jobs from [Job Status].
To preview your scans, press [Preview] and then select the scan function.
To learn how to preview your scans, see the reference below:
Scan - USEFUL FUNCTIONS - Previewing Scans
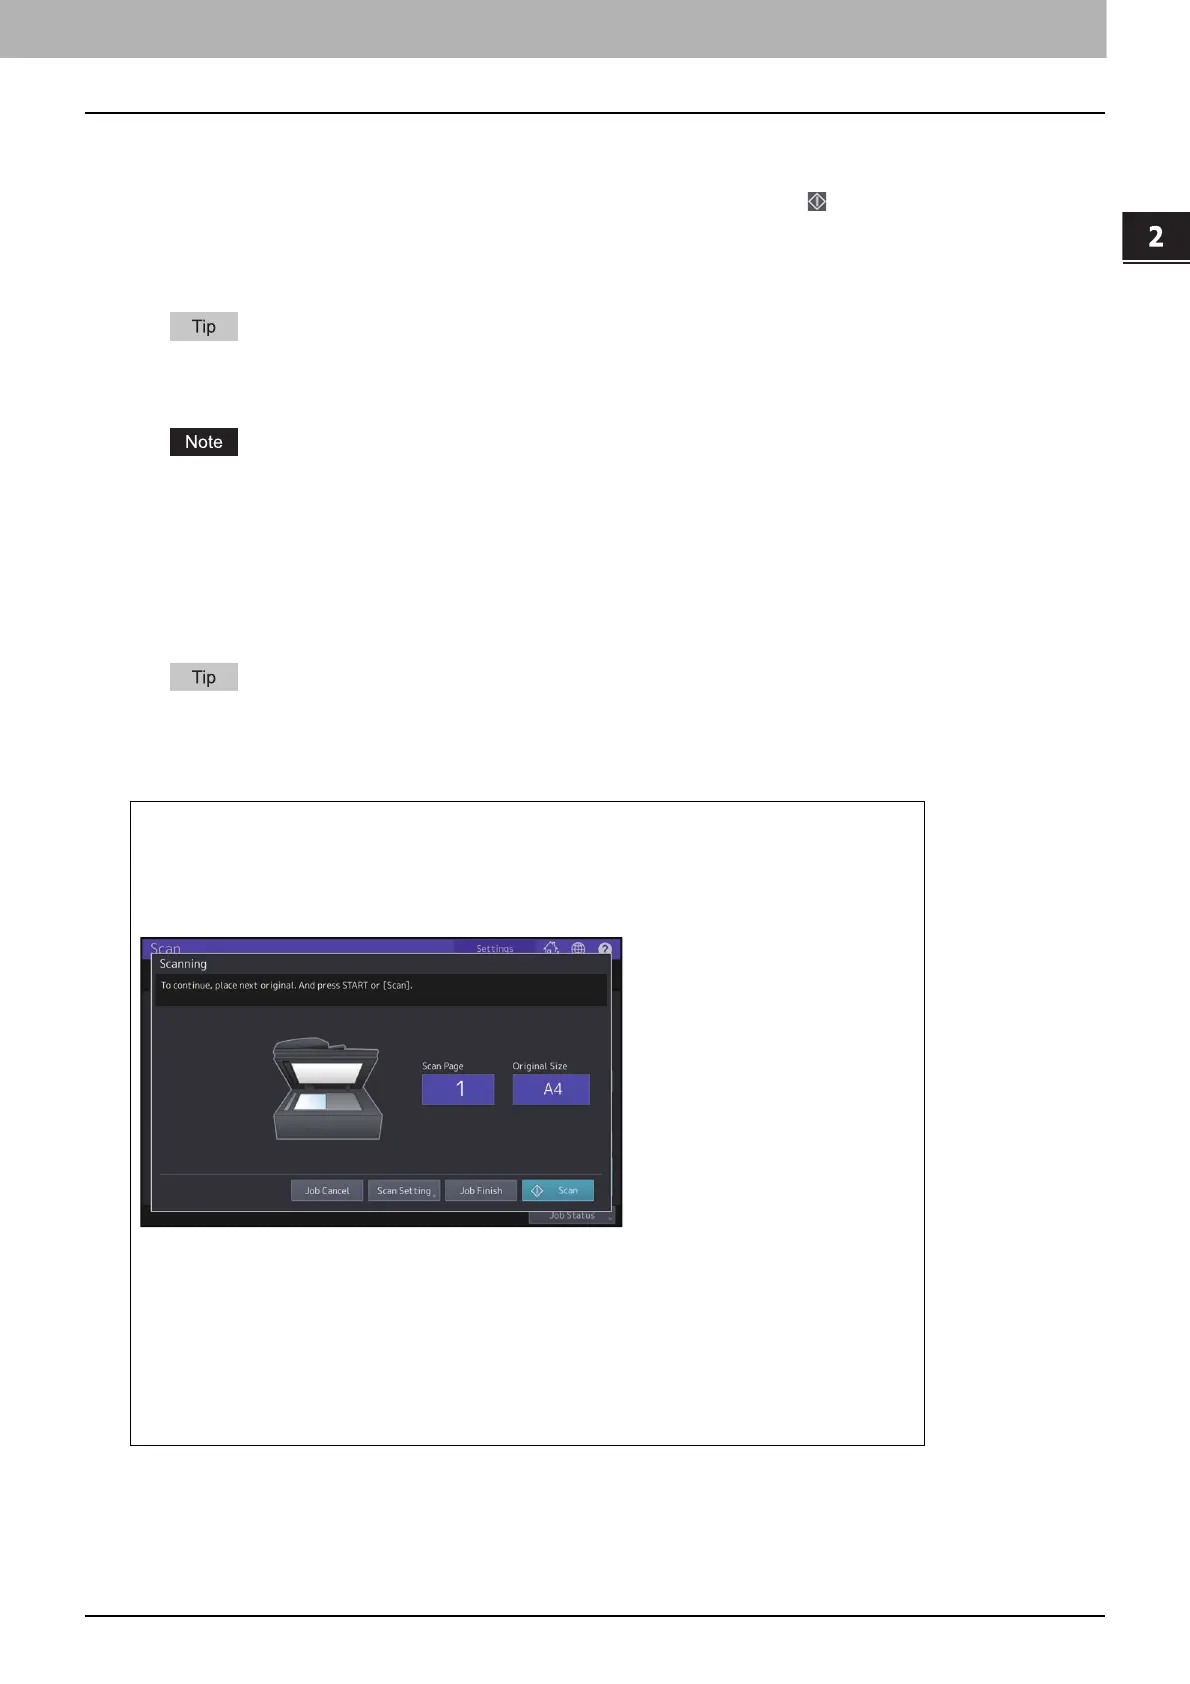
Scanning the next original
When the original is set on the glass or [Continue] is pressed during scanning on the ADF, the
confirmation screen for the next original will be displayed. In either case, when you set the
next original and press [Scan], it will be scanned. Follow this procedure as many times as
necessary. When all of the scanning is finished, press [Job Finish].
The above screen is not displayed under the following conditions:
- You scan the original from the ADF without pressing [Continue] to scan additional
originals.
- A scan preview is displayed.
To cancel the operation, press [Job Cancel].
To change the scan settings, press [Scan Setting]. For details, see the reference below:
Scan - USEFUL FUNCTIONS - Changing Scan Settings