Do you have a question about the Toshiba TRM and is the answer not in the manual?
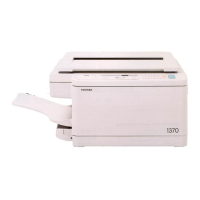
This document provides instructions for using a Toshiba Digital Copier, outlining various functions and features for different copying needs.
The Toshiba Digital Copier is designed for making copies of documents, with capabilities for standard A4 copies, enlarging from A4 to A3, enlarging and reducing in increments, reducing from A3 to A4, and adjusting the lightness and darkness of copies.
1. Standard A4 Copies: To make a standard A4 copy, place the original document face down with its long edge to the left side of the copier. If more than one copy is needed, select the desired number of copies. Then, press the green button to initiate the copying process. After copying, collect the copies and pay the cashier.
2. Lightening and Darkening Copies: For adjusting the copy's lightness or darkness, press the "Light/Dark" button located on the left side of the control panel. Scroll down using the arrow buttons to highlight "Manual" and press "Set." Use the Left/Right arrow buttons to select the desired setting for lightness or darkness, then press "Set" again. Select the number of copies required, press the green button, and then collect the copies and pay the cashier. The control panel displays "LIGHT/DARK MANUAL" with adjustable settings.
3. Enlarging Copies from A4 to A3: To enlarge an A4 original to A3 size, place the original document face down with its long edge towards the topside of the machine. Press the "paper supply" button on the left side of the machine. Scroll down with the arrow button to highlight "A3" and press "Set." Next, press the "Reduce/Enlarge" button. Scroll down to highlight "A4>A3" and press "Set." Select the number of copies required, press the green button, and then collect the copies and pay the cashier.
4. Enlarging and Reducing in Increments: For incremental enlargement or reduction, place the original document face down with its long edge to the left side. Press the "Zoom up/Zoom down" button on the circular panel. To increase the copy size, press the up arrow to select the required setting. To decrease the copy size, press the down arrow to select the required setting. Once the desired setting is chosen, press "Set." Select the number of copies required, press the green start button, and then collect the copies and pay the cashier.
5. Reducing Copy Size from A3 to A4: To reduce an A3 original to A4 size, place the original document face down. The document will only fit one way. Select the number of copies required. Press the "Zoom" button on the left side of the panel. Scroll down to highlight "AMS" (Automatic Magnification Selection) and press "Set." Press the green start button. The machine panel will then display "select original size." Scroll down to "A3" and press "Set." Select the number of copies required, press the green button, and then collect the copies and pay the cashier.
All copies made on this machine must be paid for. A3 copies are priced at twice the cost of standard A4 copies. The instructions emphasize proper placement of originals for different copy types, as well as the sequence of button presses on the control panel for various functions. The control panel features a "Light/Dark" button, a "paper supply" button, "Zoom up/Zoom down" buttons, arrow buttons for navigation, and a "Set" button for confirmation. A green button is consistently used to start the copying process.