This function allows you to start a new recording at a specific
position on the cassette while maintaining a very smooth scene
change.
1
Insert the cassette to be edited in your VCR.
2
Press the
button to start playback.
3
When you reach the position from which you wish to start the new
recording, press the PAUSE/STILL button.
4
Press the F.ADV button as often as necessary to advance frame
by frame, until the exact recording position is located.
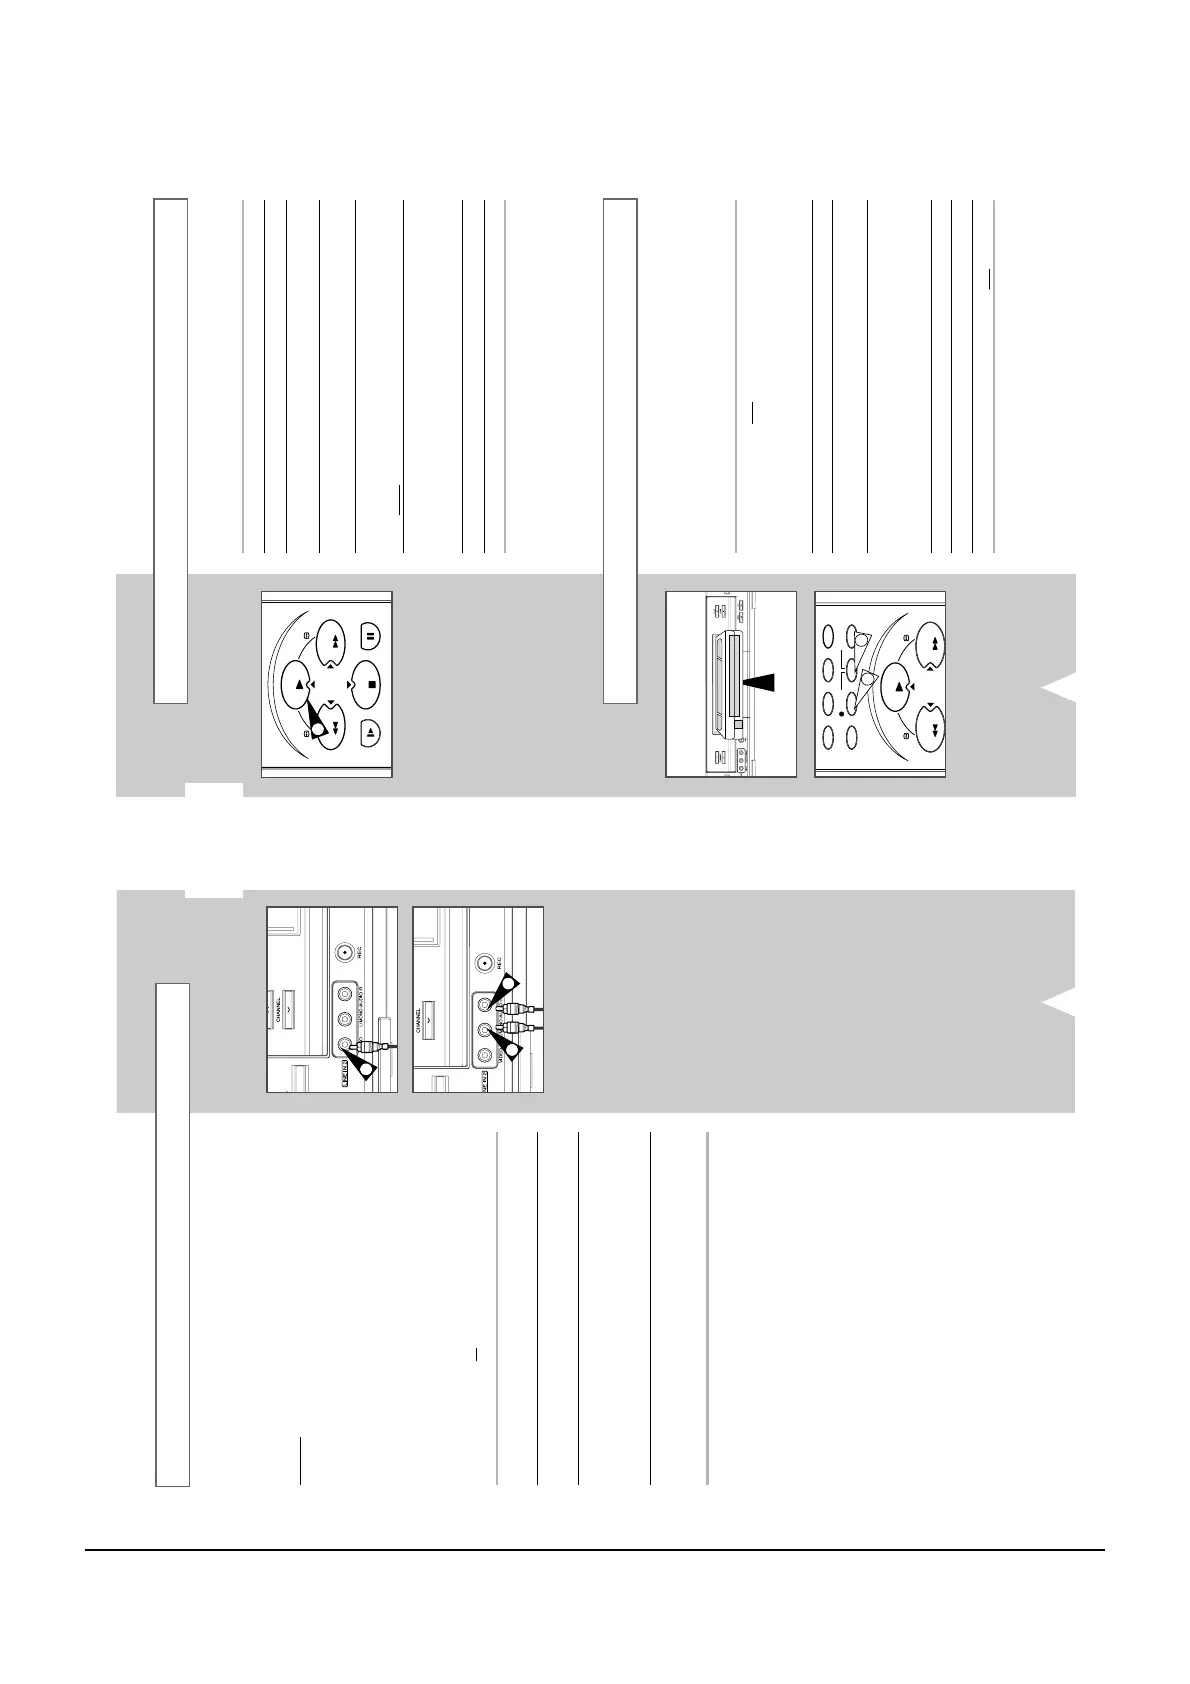
5
While the VCR is in still mode, hold the REC button down for
a while to activate the Assemble Edit function.
Result
: Record symbol flashes in the display.
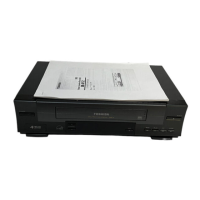
6
Select the source from which you wish to record by pressing:
◆
The CH (
or
) buttons for television channels
◆
The I.SELECT button for the LINE IN 1 or LINE IN 2 input
sources
7
Press the
button to start recording.
8
When you have finished recording, press
■
.
➢ ◆ A smooth edited scene will only be achieved if there
are of the same video system.
◆ There might be some noise in the picture at the end of
recording
GB
34
You can copy a cassette to your VCR from another video source,
such as another VCR or a camcorder.
☛ It is an infringement of copyright laws to copy
prerecorded cassettes or to re-record them in any form
without the permission of the owners of the
corresponding copyright.
1
Connect the VCR, from
which the cassette is to be copied, to the
appropriate RCA audio and video input connectors on the rear of
your VCR, as indicated on page 10.
You can also use a RCA audio and video cable to connect the
LINE IN 2 input on the front of your VCR.
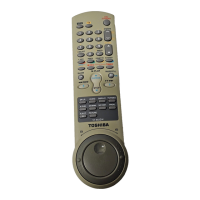
2
Insert a blank cassette in your VCR.
3
Insert the pre-recorded cassette in the other video source (VCR or
camcorder).
4
Press the I.SELECT button to select the appropriate input on your
VCR:
◆
LINE IN 1 for the rear input
◆
LINE IN 2 for the front input
5
Start playing back the cassette to be copied.
6
Hold REC down for a while to start recording on your VCR.
7
When you have finished recording, press
■
on both VCRs.
➢ If you wish to view the cassette being copied:
◆ Your VCR must be connected as usual to the
television (see page 9 for further details)
Using the Assemble Edit Function
Recording from Another VCR or Camcorder
MENU
PLAY
REW
TIMER
REC
CLR/RST
FF
COUNT/TR
INDEX
F.ADV
CURSOR
OK
SLOW
PLAY
REW
STOP
FF
PAUSE/STILL
CURSOR
2
6
6
GB
33
Connecting an RCA Audio/Video Input Cable
You can connect other audio/video equipment to your VCR using
audio/video cables if the appropriate outputs are available on the
equipment chosen.
Examples
: ◆ You wish to copy a video cassette with the help of a
second VCR (see page 34).
◆ You wish to play back and/or copy pictures taken
with a camcorder (see page 34).
◆ You wish to dub a prerecorded video cassette with
sound from a stereo system (see page 35).
☛
◆ Regardless of the type of connection chosen, you
must always connect the coaxial cable supplied.
Otherwise, no picture will be visible on the screen
when the VCR is switched off.
◆ Make sure that both the television and the VCR are
switched off
before connecting the cables.
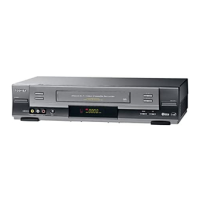
1 Connect one end of the RCA A/V cable into the VIDEO INPUT
socket on the front of the VCR.
2 Plug the other end of the A/V cable into the appropriate output
connector on the other system (VCR or camcorder).
3 Connect one end of the RCA audio cable supplied into the AUDIO
INPUT sockets on the front of the VCR.
➢
Take care to respect the colour coding of the left and right
channels.
4 Plug the other end of the audio cable into the appropriate output
connectors on the other system (VCR, camcorder or Hi-Fi sound
system).
1
3
3