Visit WWW.TOTALPOND.COM for information and tips.
EN
EN
6
Please call Customer Care before returning item to store: 1-888-412-6001
7
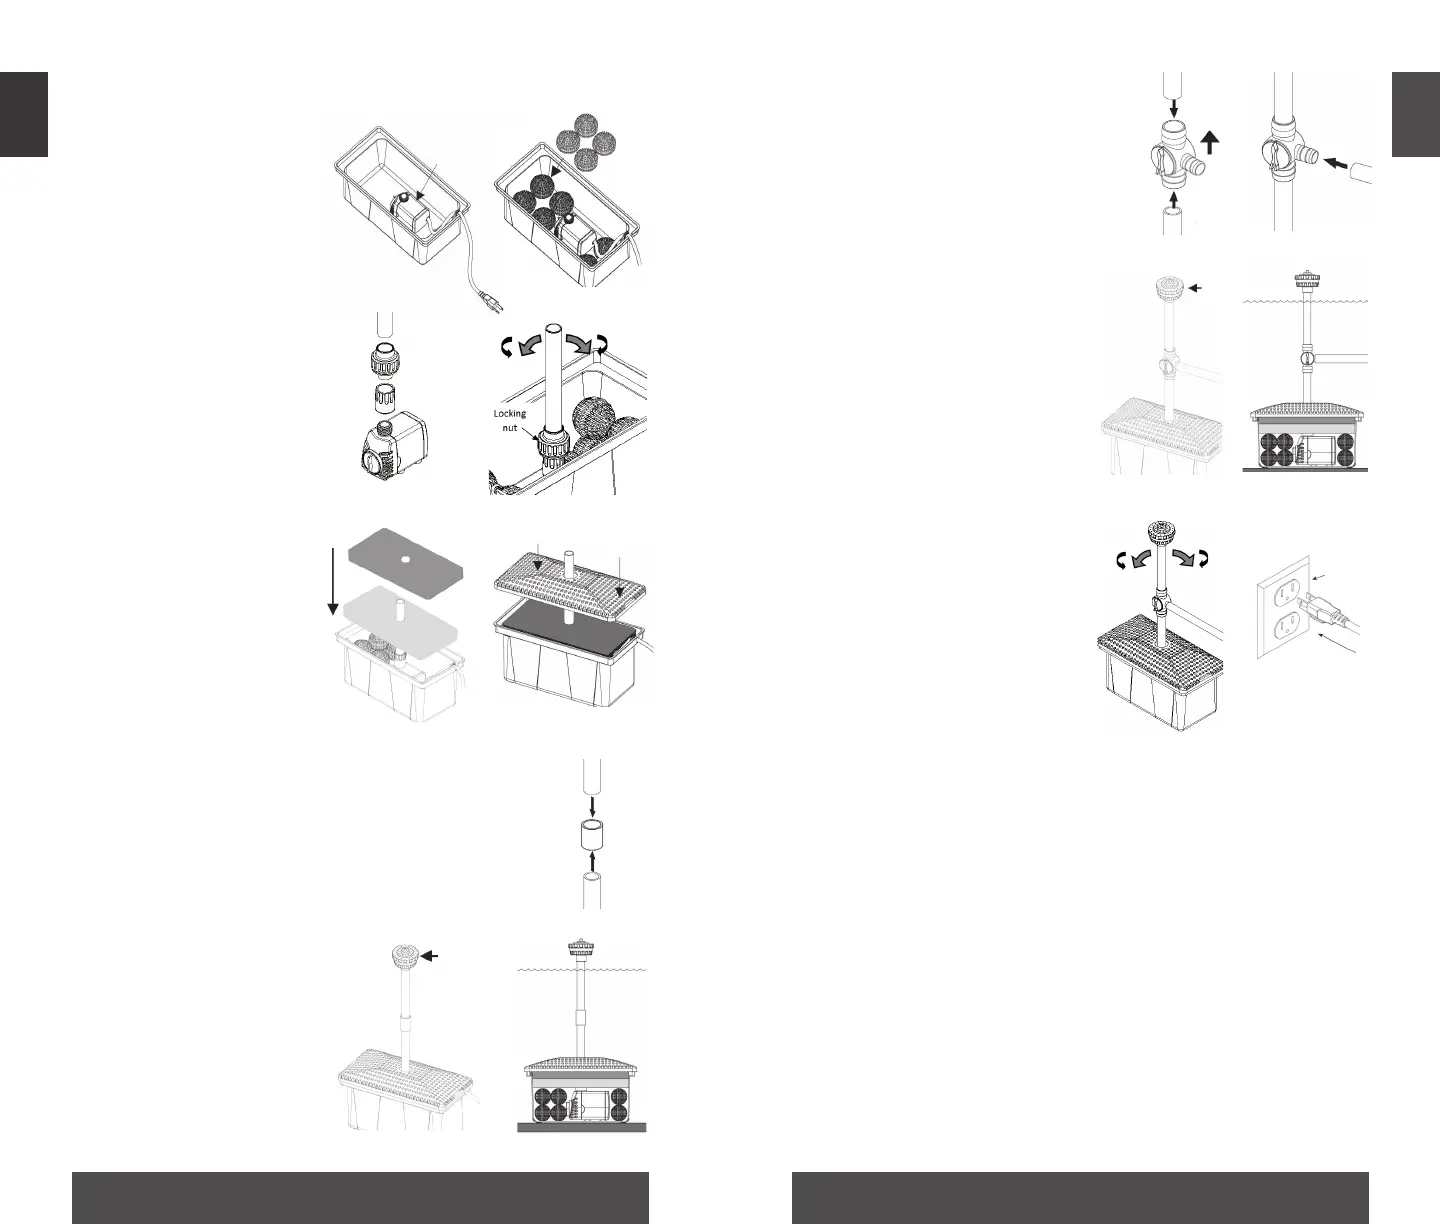
Step 1. Place your pump
inside the lter box close
to the center with the
pump outlet facing up.
Route the pump power
cord through the grove
on the back corner of the
lter box.
Step 2. Place bioballs
around the pump.
Step 3. Connect the
extension tube to the outlet
of the pump using the
supplied adapters.
Step 4. Tighten the locking
nut for a secure t.
Step 5. Place the ne
lter pad (blue) over the
bioballs and pump and
add the course lter pad
(black) on top.
Step 6. Place the lid over
the box. It should snap
closed.
1 2
OPERATION INSTRUCTIONS
3 4
H
K
L
I
5
C
D
6
This kit includes a coupler and a diverter
valve. To ow water to the fountain nozzle
only, proceed to step 7. To ow water to the
fountain nozzle and a spitter, skip to step 10.
Step 7. Connect the two extension tubes with
the coupler.
Step 8. Connect the
fountain nozzle to the top
of the extension tube.
Step 9. Place the
assembled lter kit in
water, and skip to step 14.
7
8
H
H
J
F
Step 10. Connect the extension
tubes to the diverter valve. Make
sure the arrow is pointing up and
the diverter valve is connected as
shown.
Step 11. For the use of the
diverter valve, connect 1/2 in.
ID tubing onto the outlet of the
diverter valve. Connect the other
end of tubing to a water feature.
NOTE: Tubing and water feature
are not included.
Step 12. Connect the fountain
nozzle to the top of the extension
tube.
Step 13. Place the assembled
lter kit in water.
Step 14. Utilize the pivoting
base to achieve a more vertical
fountain display if needed.
Step 15. Connect the pump into
a properly grounded electrical
outlet.
NOTE: If the diverter valve was
used, you can adjust the ow
control as needed.
9
H
H
G
10 11
12
F
13
GFCI
outlet
14
15
Max Flow Rate
338 GPH (at 0 ft.)
Waterspray effect, H x W
max. 2.3 ft. x 1.6 ft.
Power Consumption
23 watts / 0.4 amps
Cord Length
16 ft.
SPECIFICATIONS