5
ENGLISH
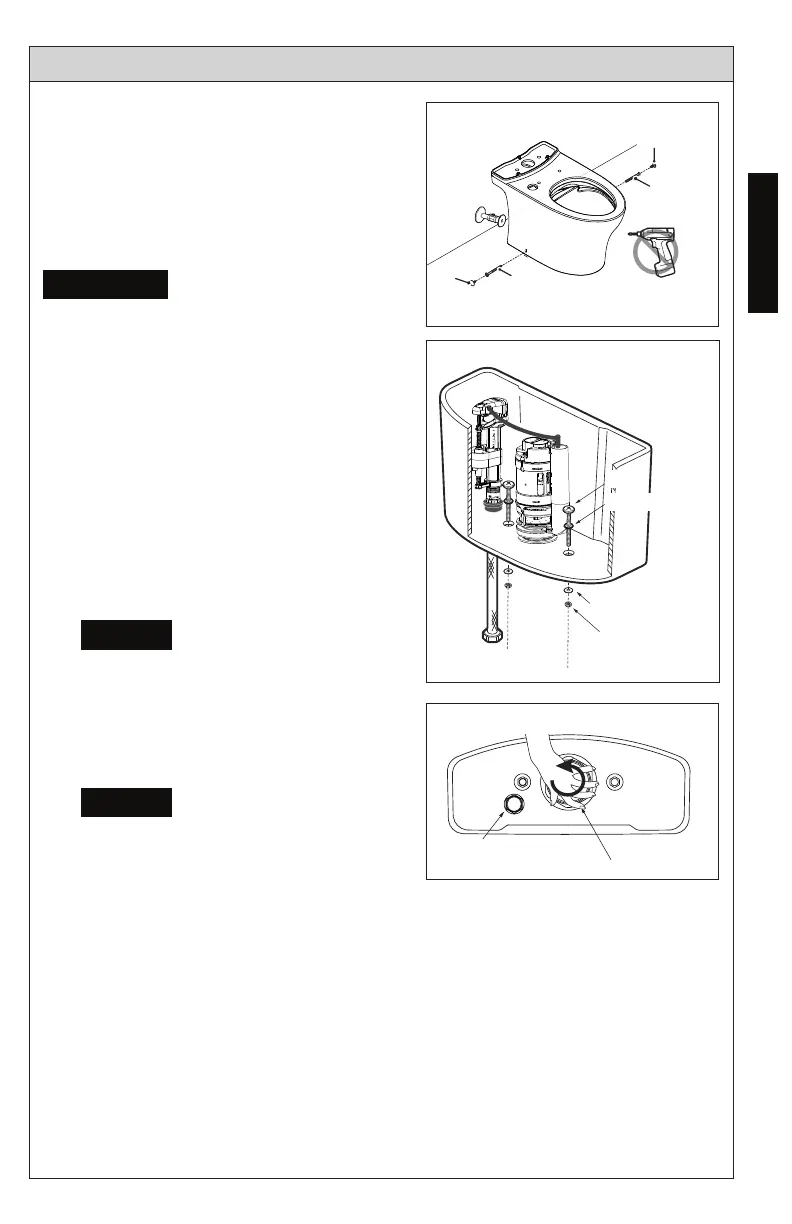
6. Install the tank-to-bowl mounting
hardware to the tank (ill. 5).
Do NOT overtighten
hardware, as it may break
the china and cause
personal injury or property
damage.
7. Place the tank upside down onto
some padding. Inspect the smaller
ll valve nut and larger ush valve nut
for a secure connection (ill. 6). Try to
tighten the nuts with your hands. If
loose, tighten the nut hand tight and
an additional 1/4 turn for the smaller
ll valve nut and an additional 1/2
turn for the larger ush tower nut.
Make sure that the ll
valve does not turn
and hit the tank while
tightening.
8. Connect the water supply hose (not
provided) to the ll valve (ill. 5).
The water supply hose
must be connected to
the ll valve BEFORE the
tank-to-bowl installation.
TOTO recommends
using a longer exible
supply hose.
9. Place the tank-to-bowl gasket onto
the ush tower nut (ill. 7). While
pressing down, spread the gasket
over the nut until the gasket touches
the bottom of the tank. A slight gap
between the tank bottom and the
gasket is allowable.
INSTALLATION PROCEDURE
⚠CAUTION
Nut
Metal washer
Rubber washer
Bolt
Cap
Cap
ill. 4
5. Install the side screws to the
mounting blocks. Cover the
screw head with the provided
screw caps (ill. 4).
ill. 6
ill. 5
NOTICE
NOTICE
 Loading...