7
PART 2. BREWING A CUP
Setting Up Your Brewer
IMPORTANT: DO NOT use the brewer until it has been set-up for its first use.
NOTE: If the brewer has been exposed to temperatures below freezing, allow the brewer at least two hours to reach room temperature before using it. A frozen
or extremely cold brewer may not operate properly.
1. Unwrap the electrical cord and remove all pieces of adhesive tapes.
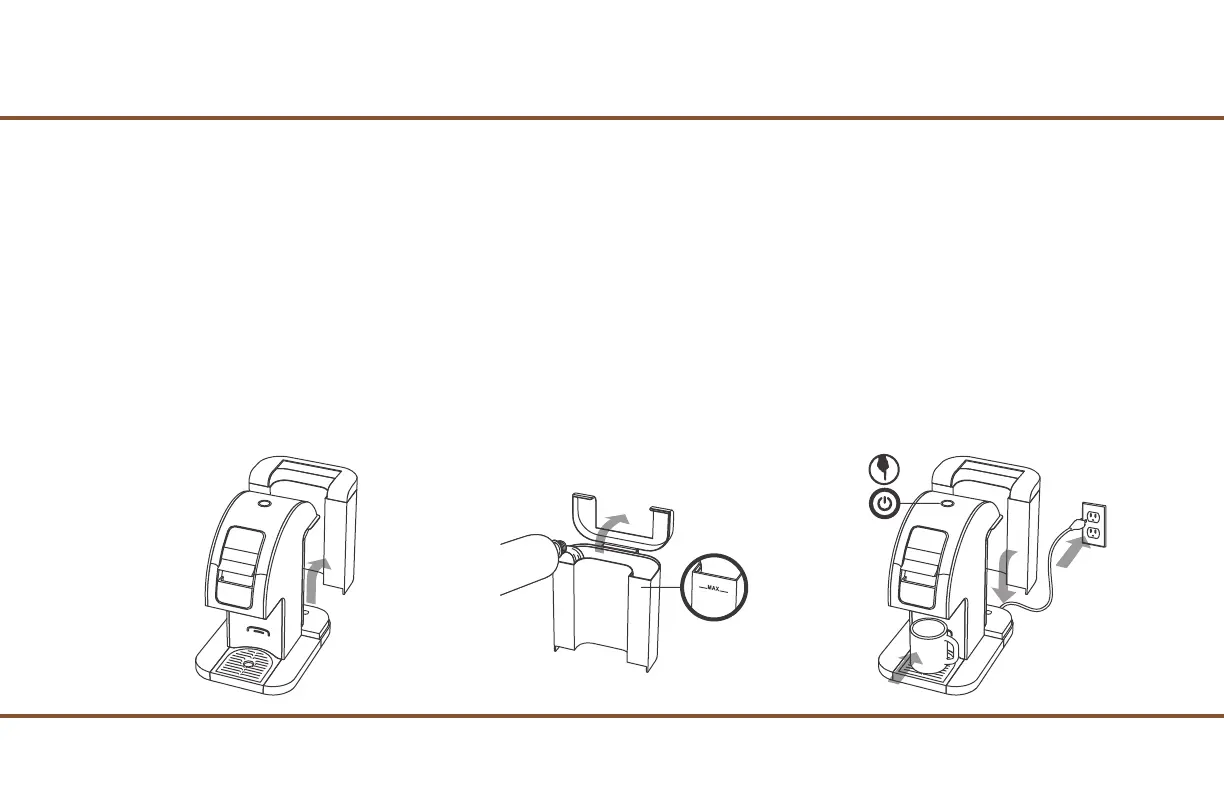
2. Remove the Water Tank from the brewer (Fig. 1) by Tilting and Lifting away from the brewer. (it may be tight)
3. Rinse the Water Tank with fresh water. Fill the Water Tank with bottled or filtered water but NOT beyond the MAX Fill Line. (Fig. 2)
4. Return the Water Tank back into the rear side of the brewer and be sure the Water Tank sits properly on the rear base of the brewer.
5. Place a large mug or cup (12 oz minimum) on the Drip Tray. (Fig. 3)
6. Plug the brewer into a 3 prong-grounded outlet. (Fig. 3)
7. Press the Power Button on top of the brewer. The blue Power Light will illuminate. (Fig. 3)
NOTE: DO NOT insert a Pod into the Red Cup Holder at this time.
Fig. 1 Fig. 2 Fig. 3