8
4. Close the air fryer door.
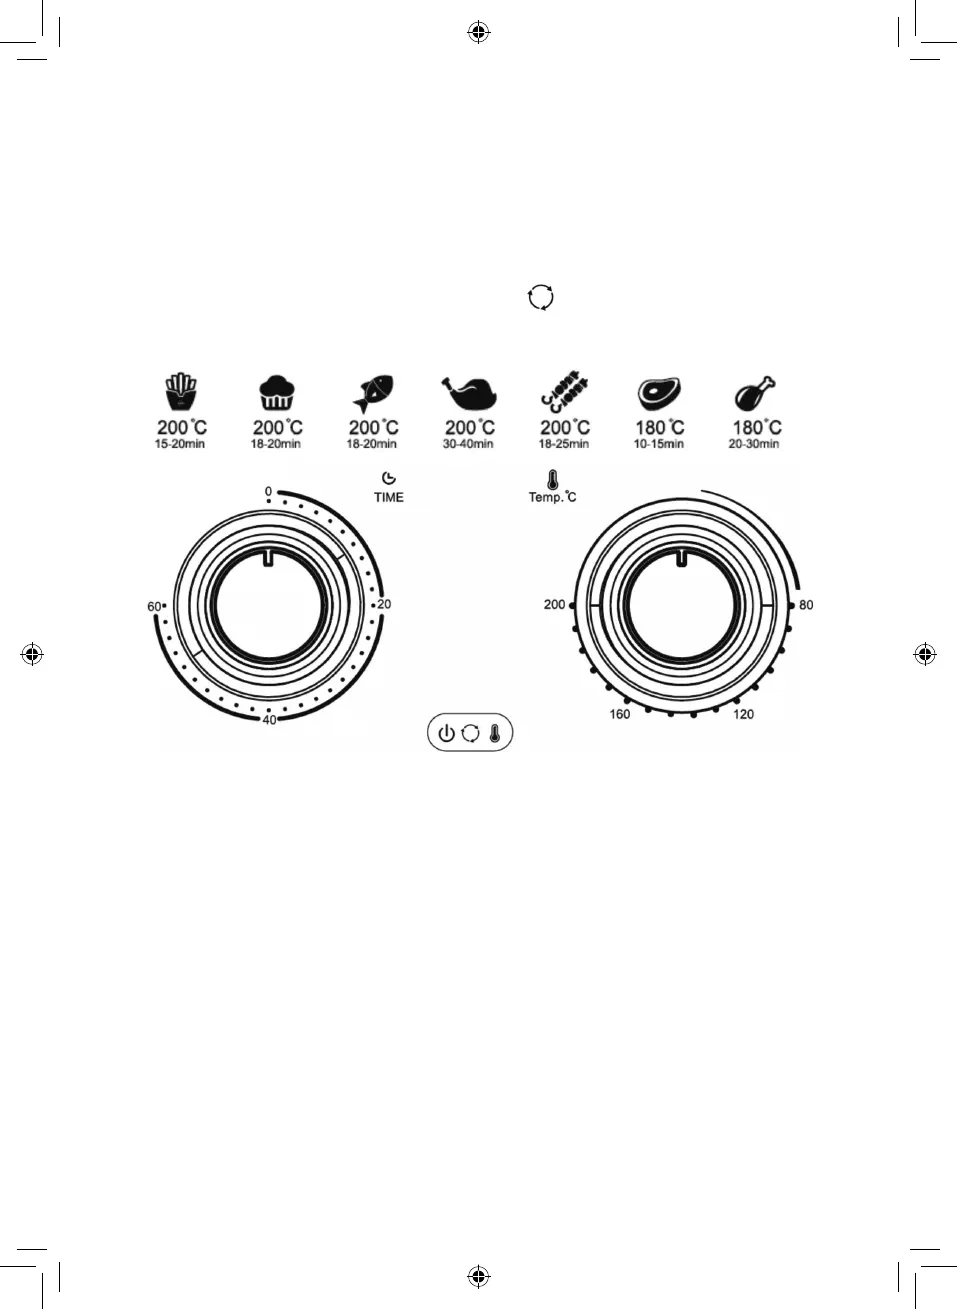
5. Determine the required preparation time for your desired ingredients (refer to the ‘Settings’
section below).
6. To switch on the appliance, turn the timer dial to the required preparation time.
7. Turn the temperature control dial to the required temperature. Refer to the ‘Settings’ section
in this chapter to learn how to determine the right temperature. Add 2 minutes to the
preparation time when the appliance is cold.
8. When using the rotisserie or grilling rack, touch the switch The fryer’s internal light will
illuminate and the rotisserie will begin to rotate. Rotation will stop automatically and the
internal light will go off whenever the cooking process is finished.
a. The timer starts counting down the set preparation time.
b. During the air frying process, the working light will turn on and off from time to time.
This indicates that the heating element is being switched on and off to maintain the set
temperature.
c. Excess oil from the ingredients is collected on the bottom of the drip tray.
Note: During the frying process, food will get very hot and steam may escape from the air fryer.
10. When you hear the timer bell, the set preparation time has elapsed.
Note: You can also switch the appliance off manually at any time by turning the temperature control
dial to zero.
11. Check if the ingredients are ready. If the ingredients are not ready yet, simply place your food
back into the fryer, close the door, then set the timer to a few extra minutes.
12. To remove ingredients (e.g. fries), open the air fryer door and pull out the food using the
insulated kitchen gloves or other suitable safety accessory such as tongs.
13. When a batch of ingredients is ready, the air fryer is instantly ready for preparing another
batch. Timer: