TABLE OF CONTENTS
DIE PATTERNS ...............................................................4&5
ITEMS REQUIRED FOR COMPLETION..............................6
GET READY TO BUILD.......................................................8
BUILD THE TAIL SURFACES .............................................10
BUILD THE FUSELAGE .....................................................13
BUILD THE WING............................................................20
FINAL ASSEMBLY..............................................................32
FINISHING.......................................................................40
FINAL CONTROL HOOKUPS...........................................46
PREFLIGHT.......................................................................52
FLYING.............................................................................54
FOLLOW THIS IMPORTANT SAFETY PRECAUTION TO
PROTECT YOUR MODEL, YOURSELF & OTHERS.
Your Trainer 40 is not a toy, but rather a sophisticated, working
model that functions very much like an actual airplane. Because
of its realistic performance, the Trainer 40, if not assembled and
operated correctly, could possibly cause injury to yourself or
spectators and damage property.
To make your R/C modeling experience totally enjoyable, we
recommend that you get experienced, knowledgeable help with
assembly and during your first flights. You’ll learn faster and
avoid risking your model before you’re truly ready to solo. Your
local hobby shop has information about flying clubs in your area
whose membership includes qualified instructors.
WARRANTY
Tower Hobbies guarantees this kit to be free from defects in
both materials and workmanship at the date of purchase. This
warranty does not cover any component parts damaged by use
or modification. In no case shall Tower’s liability exceed the
original cost of the purchased kit. Further, Tower reserves the
right to change or modify this warranty without notice.
In that Tower has no control over the final assembly or material
used for final assembly, no liability shall be assumed nor
accepted for any damage resulting from the use by the user of
the final user-assembled product. By the act of using the user-
assembled product, the user accepts all resulting liability.
If the buyers are not prepared to accept the liability
associated with the use of this product, they are advised to
return this kit immediately in new and unused condition to
Tower Hobbies.
READ THROUGH THIS INSTRUCTION BOOK BEFORE BEGINNING
CONSTRUCTION. THIS BOOKLET CONTAINS WARNINGS AND
PRECAUTIONS REGARDING THE USE OF THIS PRODUCT.
2
® ®
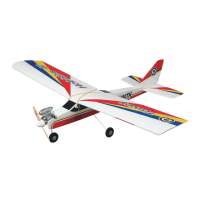
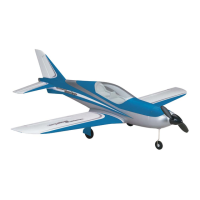
TTOOWWEERR TTRRAAIINNEERR 4400
RADIO CONTROLLED MODEL AIRPLANE KIT
INSTRUCTION MANUAL
OUR ALL-TIME FAVORITE TRAINER...
N
OW IN KIT FORM
TTR4P03 V 1.0
Wing Span: 55 in.
Wing Area: 618 sq. in. Weight: 5 to 5.5 lb.
Length: 44.5 in. Wing Loading: 18 to 21 oz./sq. ft.
Engine: .40 2-stroke
Entire Contents © Copyright 1998
™