Do you have a question about the Toyota Expert EPS9000 and is the answer not in the manual?
Explains the meaning of DANGER, WARNING, CAUTION symbols and pictographs.
Warnings about electric shock, carrying, cable damage, and power cord insertion.
Precautions against electric shock, magnetic fields, and moving parts.
Details the location and meaning of various warning labels on the machine.
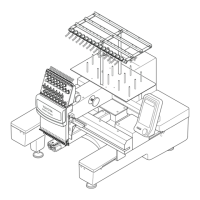
Instructions for safely carrying and installing/leveling the embroidery machine.
Detailed procedure for threading the upper thread through guides.
Continues upper thread threading, including needle and presser foot.
Instructions for setting the bobbin and threading the under thread.
Guide to properly placing and securing fabric onto the embroidery hoop.
Steps to attach the hoop assembly to the embroidery machine.
Procedure for winding the under thread onto a bobbin.
Checklist for essential checks before starting machine operation.
How to turn the machine on/off, use start/stop, and emergency stop.
Step-by-step guide for starting an embroidery job using FDD.
Final steps for starting embroidery, including hoop and thread setup.
Adjusting the sensitivity level for thread break detection.
Setting the stitch count to stop the machine when the bobbin is low.
Clearing the counted number of stitches for the bobbin counter.
Adjusting the width of satin stitches for better appearance.
Inserts thread trimming between consecutive jumps.
Sets the condition for converting stitches into jumps.
Sets the length of thread to be trimmed.
Adjusts the timing for starting thread trimming.
Sets the embroidery hoop type (flat, cap, or sleeve).
Actions for emergency stop and sewing motor lock errors.
Actions for X/Y motor lock, needle case, thread break, and communication errors.
Actions for limit, bad number, disk insert, read, and file not found errors.
Causes and corrective actions for common machine stops like startup, position, and design issues.
| Type of sewing | Lock stitch machine (specially designed for automatic embroidery) |
|---|---|
| Needle bar stroke | 50 ± 0.2 mm |
| Number of needle bars | 15 |
| Number of revolutions | Max. 1200 rpm (normal speed: 800 rpm) |
| Embroidery range | Max.: 500 mm (X direction) × 360 mm (Y direction) |
| Width of stitching | 0.1 to 12.7 mm |
| Upper/under thread breakage detection | Rotary detection type (photo-sensor) |
| Hoop driving range | Max.: 500 mm (X direction) × 360 mm (Y direction) |
| Rotary hook | Vertical rotating shuttle |
| Take-up lever | Cam driven type take-up lever |
| Needle to be used | ORGAN DB × K5Z #11 |
| Presser foot | Operated with upper shaft |
| Thread trimming device | Horizontal reciprocating type (motor driven) |
| Thread ejector | Sliding type (with thread holding function, motor driven) |
| Picker device | At the start/end of stitching and at thread trimming |
| Upper shaft drive motor | AC servomotor |
| X/Y control motor | AC servomotor |
| Embroidery operation and display | Operation using touch switches, LED and LCD display |
| Power source | 100 to 240V AC, 50/60 Hz (automatic selection type) |
| Power consumption | 220 W |
| Lubrication | Hand lubrication |
| Weight | 82 kg |
|---|---|
| Size | 745 × 720 × 820 mm (width × depth × height) |