EasyManua.ls Logo

Toyota OEKAKI 50 - User Manual

Toyota OEKAKI 50
106 pages
Print Icon
To Next Page IconTo Next Page
Loading...
HOME-USE SEWING MACHINE
with OEKAKI FUNCTION
OEKAKI 50
OEKAKI SERIES
Read this manual carefully before use and always follow the instructions.
Keep this manual in a convenient place for easy reference.
If you give the sewing machine to someone else, also give them this Instruction Manual.
Utility stitching page 44
OEKAKI (free-motion embroidering) page 72
For video tutorial, visit http://www.toyotaoekakisewing.com

Table of Contents

Questions and Answers

  • S
    Sarah KimAug 20, 2025
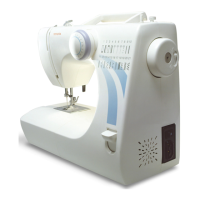
    Why does the upper thread keep breaking on my Toyota OEKAKI 50 Sewing Machine?
    • R
      Ryan Mcbride DVMAug 20, 2025
      If the upper thread of your Toyota Sewing Machine breaks, consider the following: * Ensure both the upper and lower threads are correctly threaded. * Check for thread tangled in the bobbin case or race; remove any lint. * Verify the thread is suitable for the needle's thickness; use an appropriate thread. * Adjust the upper thread tension if it's too tight or loose. * Inspect the needle for bending; replace if necessary. * Ensure the needle is correctly installed. * If the thread is old, use new thread.
  • J
    jsinghAug 22, 2025
    Why is my Toyota OEKAKI 50 not working?
    • R
      rojastoddAug 22, 2025
      If your Toyota Sewing Machine is not operating, check the following: * Ensure the power plug is correctly inserted. * Verify the sewing machine is turned on with the main power switch. * Check for tangled thread in the race; clean it if necessary. * Make sure the thread winding spindle is slid to the left. * Ensure the presser foot lever is lowered. * If using a foot controller, disconnect it or use it to start the machine if the start/stop button is pressed.
  • J
    Jennifer RodgersAug 25, 2025
    What to do if my Toyota OEKAKI 50 Sewing Machine is not feeding fabric?
    • R
      ricky00Aug 25, 2025
      If your Toyota Sewing Machine is not feeding fabric, check these potential causes: * The feed dog might be lowered; raise it using the drop feed lever. * There could be lint in the feed dog; remove it. * The stitch length might be set to “0”; adjust it to an appropriate setting. * If sewing synthetic leather or vinyl, use the non stick foot.
  • J
    jfrostAug 26, 2025
    Why are stitches not formed on my Toyota OEKAKI 50 Sewing Machine?
    • R
      Robert GibbsAug 27, 2025
      If your Toyota Sewing Machine isn't forming stitches, or you only see needle holes, it could be because: * The upper thread may be passing from behind the needle to the front; pass it from the front to the back, or use the needle threader. * You might be using thread with a strong twist; change the thread or adjust the upper thread tension to between -3 and -2. * The thread may be too thin for the needle; use a suitable thread.
  • D
    Daniel PetersonAug 28, 2025
    Why is my Toyota OEKAKI 50 Sewing Machine skipping stitches?
    • K
      Kathleen BrandtAug 28, 2025
      If your Toyota Sewing Machine is skipping stitches, consider the following: * Ensure the needle is correctly installed. * Check if the needle is bent and replace it if necessary. * Verify that the needle and thread are suitable for the fabric you are using. * Make sure the upper thread is correctly threaded. * If you are working in OEKAKI mode, attach stabilizer.
  • B
    byoungAug 29, 2025
    Why is the lower thread not being taken up by my Toyota Sewing Machine?
    • S
      Sarah RichardsAug 30, 2025
      If the lower thread is not being taken up by your Toyota Sewing Machine, it could be due to: * The needle being bent; replace the needle. * The needle being incorrectly installed; correctly install the needle.
  • C
    Caleb JacksonAug 31, 2025
    What to do if thread is entangled under the fabric with my Toyota OEKAKI 50?
    • M
      Mrs. Christine SimmonsSep 1, 2025
      If you find thread entangled under the fabric while using your Toyota Sewing Machine: * Ensure the thread hasn't come out of the take-up lever. Raise the presser foot and correctly thread the sewing machine. * Check if the lower thread has come out of the groove in the bobbin case. Correctly thread the lower thread.
  • B
    brennanamySep 2, 2025
    Why can't I adjust the stitch width in OEKAKI mode on my Toyota OEKAKI 50?
    • B
      Bradley GriffinSep 2, 2025
      In OEKAKI mode on your Toyota Sewing Machine, if you're unable to adjust the stitch width, check the following: * Ensure the foot controller is connected. * Verify the OEKAKI (free-motion embroidering) button is lit. * Confirm that stitch number A1 or A2 is selected (A3 is the tacking stitch). * Check the operation panel to ensure the stitch width is not set to “0” or a low setting; increase it to an appropriate setting.
  • M
    Michael CordovaSep 4, 2025
    Why does my Toyota OEKAKI 50 Sewing Machine needle keep breaking?
    • R
      rbautistaSep 4, 2025
      If your Toyota Sewing Machine needle breaks, it might be due to several reasons: * The needle might be incorrectly installed; ensure it's correctly installed. * The needle clamp screw could be loose; firmly tighten it. * The needle may be too fine for the fabric; use a needle suitable for the fabric. * The upper thread tension might be too tight or loose; adjust it accordingly. * The bobbin case might be incorrectly positioned; correctly position it. * The selected presser foot might not be suitable for the stitch; select a suitable presser foot.
  • L
    Lori WhiteheadSep 6, 2025
    Why is my Toyota OEKAKI 50 Sewing Machine causing fabric to wrinkle or pucker?
    • T
      Thomas SuttonSep 6, 2025
      If you're experiencing fabric wrinkles or puckering while using your Toyota Sewing Machine, consider these factors: * The upper thread tension might be too tight; adjust it. * The upper and lower threads may be incorrectly threaded; correctly thread them. * The needle might be too thick for the fabric; use a suitable needle. * The needle could be burred or bent; replace it. * If you're sewing stretch fabric, use the ball point needle. * If you are working in OEKAKI mode, attach stabilizer, especially with thin or stretch fabrics, fabrics with a coarse weave, or fabrics that often cause pattern shrinkage.

Summary

Checking accessories

Accessories

Lists items included in the sewing machine package.

Separately sold accessories

Details additional accessories available for purchase to enhance machine capabilities.

Important safety instructions

Be sure to read this section before use

Crucial safety guidelines and warnings to ensure safe operation and prevent hazards.

Functions of the machine

Part names

Identifies and labels all main physical components of the sewing machine for user familiarity.

Operation panel part names

Explains the layout and function of each control on the sewing machine's operation panel.

Functions of various parts

Describes the purpose and operation of key machine parts like levers and dials.

Operating the foot controller

Instructions for connecting and using the foot controller to operate the sewing machine.

Using the quick adviser

Guidance on installing and using the quick adviser for operational support.

Sewing preparations

Connecting the power

Step-by-step guide to correctly connect the sewing machine to the electrical power supply.

Correct needle selection

Advice on choosing the appropriate needle type based on fabric and thread for optimal results.

Changing the needle

Detailed procedure for safely removing and inserting a sewing machine needle.

Changing the presser foot

Instructions for removing and attaching different presser feet to the machine.

Changing the presser foot holder

Procedure for replacing the presser foot holder assembly.

Threading the sewing machine

Winding the bobbin

Instructions for winding thread onto the bobbin for sewing.

Threading the lower thread

Steps for inserting the bobbin and threading the lower thread path.

Threading the upper thread

Comprehensive guide to threading the upper thread through the machine's guides and tension discs.

Using the needle threader

How to operate the automatic needle threader for effortless threading.

Pulling up the lower thread

Method to bring the bobbin thread up to the needle area for starting sewing.

Utility stitching

Selecting the stitch

Guide on choosing different stitch patterns from the machine's selection.

Selecting the stitch width

Adjusting the width of stitches, particularly for zigzag patterns.

Selecting the stitch length

Adjusting the length of stitches for different sewing applications.

Selecting the sewing speed

Method to control the sewing machine's speed via the operation panel or foot controller.

Stitch patterns

A comprehensive reference table of available stitch patterns, their applications, and settings.

Relationship between needle, thread, fabric, and thread tension

Recommendations for matching components and adjusting tension for optimal sewing quality.

Sewing (utility stitching)

Basic operations

General steps for performing fundamental sewing tasks.

Straight stitch

Detailed instructions for performing a basic straight stitch.

Ending stitching

Procedures for concluding a sewing operation and securing the fabric.

Thread cutting

Instructions on using the machine's built-in thread cutter.

Reverse sewing

How to perform reverse stitches for reinforcing seams.

One stitch sewing

Method for sewing one stitch at a time for precise control.

Basics of OEKAKI (free-motion embroidering)

Features of OEKAKI (free-motion embroidering)

An overview of the OEKAKI function, its purpose, and unique capabilities.

Relationship between needle, thread, fabric in OEKAKI mode, and adjusting thread tension

Specific guidance for materials and tension settings when using the OEKAKI mode.

Sewing (free-motion embroidering)

OEKAKI (free-motion embroidering) preparations

Steps to prepare the sewing machine for free-motion embroidery operations.

Practicing free-motion embroidering

Exercises and techniques to practice and develop free-motion embroidery skills.

Tacking

Method for sewing temporary stitches to hold fabric layers before final stitching.

Special sewing tips

Sewing thick or thin fabrics

Tips and techniques for sewing fabrics of varying thicknesses, including thin and thick materials.

Sewing tube-shaped fabrics

How to sew tubular items like sleeves or pant legs using the free arm.

Sewing leather and vinyl

Using specialized presser feet for sewing challenging materials like leather and vinyl.

Sewing equally spaced lines of stitching

Utilizing the quilting guide for consistent, parallel stitching patterns.

Adjusting the thread tension

Instructions on how to adjust the upper thread tension for optimal stitch quality.

When the fabric cannot be removed from the sewing machine

Troubleshooting

When the sewing machine is operating incorrectly

A comprehensive guide to diagnosing and resolving common machine malfunctions.

Unable to adjust stitch width in OEKAKI mode

Specific solutions for issues related to stitch width adjustment in OEKAKI mode.

When an error code appears

Explains error codes displayed on the machine and provides corresponding corrective actions.

Maintenance and storage

Feed dog and hook maintenance

Procedures for cleaning and maintaining the feed dog and hook assembly for smooth operation.

Storage precautions

Important guidelines for properly storing the sewing machine to prevent damage.

Others

Recycling

Information on the environmental impact and responsible disposal of the product.

Specifications

Detailed technical specifications, dimensions, and electrical requirements of the sewing machine.

Toyota OEKAKI 50 Specifications

General IconGeneral
BrandToyota
ModelOEKAKI 50
CategorySewing Machine
LanguageEnglish

Related product manuals