Do you have a question about the TP-Link Archer AX55 Pro and is the answer not in the manual?
Connect the modem to the router's 2.5 Gbps WAN/LAN port using an Ethernet cable.
Power on the modem and wait approximately 2 minutes for it to restart.
Connect the power adapter to the router and then turn on the router.
Check the router's LEDs to confirm the hardware connection is correct.
Follow steps to download the Tether app, log in, and set up the router.
Connect to the router, launch a browser, and follow setup instructions.
Detect cyber threats to keep your privacy and connected devices well protected.
Prioritize your bandwidth needs for a better networking experience.
Manage online time and block inappropriate content for family safety.
Gain full statistics and insights to understand your home network.
Share files from a USB drive with devices on your home network.
Play media from a USB drive on your computer and smart devices.
Access the USB drive when you are away from home.
Explains how to use the WPS and Wi-Fi functions of the button.
Press and hold to reset the router to factory default settings.
Instructions for using the 1 Gbps WAN/LAN port for internet service.
Steps to take if you cannot access the router's web management page.
Troubleshooting steps for when the router cannot connect to the internet.
How to retrieve or reset your wireless password if forgotten.
Tips on positioning the router for optimal Wi-Fi signal strength.
This document serves as a comprehensive guide for setting up and utilizing a TP-Link Wi-Fi 6 Router, emphasizing ease of installation and a suite of advanced features for network management and security. The guide is structured to assist users through both initial hardware connection and subsequent software configuration, offering multiple methods to suit different user preferences and technical proficiencies.
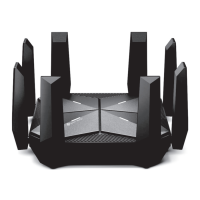
The TP-Link Wi-Fi 6 Router is designed to provide robust and high-performance wireless internet connectivity for homes and small offices. It leverages Wi-Fi 6 technology to deliver faster speeds, increased capacity, and improved efficiency compared to previous Wi-Fi standards, making it ideal for environments with numerous connected devices and demanding applications like 4K streaming and online gaming.
At its core, the router acts as a central hub for your network, receiving internet access from a modem and distributing it wirelessly or via Ethernet cables to all your devices. It supports both 2.4 GHz and 5 GHz wireless bands, allowing for flexible network configuration to optimize performance for various devices. The inclusion of a 2.5 Gbps WAN/LAN port signifies its capability to handle high-speed internet connections, ensuring that the router doesn't become a bottleneck for modern broadband services.
Beyond basic internet distribution, the router integrates TP-Link HomeShield, a premium security service that enhances network protection, parental controls, and quality of service (QoS). HomeShield is accessible through the TP-Link Tether app and offers a range of features to secure your network from cyber threats, manage online content for family members, prioritize bandwidth for critical applications, and provide comprehensive reports on network usage.
The router also features a USB port, expanding its functionality beyond just internet sharing. This port enables various USB applications, including local storage sharing, media server capabilities, and remote access. Users can connect a USB drive to the router to share files and media across their home network, stream content to smart devices, or even access their stored data remotely, transforming the router into a versatile network-attached storage (NAS) solution.
Setting up the TP-Link Wi-Fi 6 Router is designed to be straightforward, with two primary methods offered: via the TP-Link Tether app or through a web browser.
For hardware connection, the process begins by ensuring the modem is powered off and any backup battery is removed. The powered-off modem is then connected to the router's 2.5 Gbps WAN/LAN port using an Ethernet cable. If the internet source is an Ethernet outlet directly, it connects to the same 2.5 Gbps WAN/LAN port. After connecting the modem, it should be powered on and allowed to restart for approximately two minutes. Subsequently, the router's power adapter is connected, and the router is turned on. The hardware connection can be verified by checking the LED indicators for Power, 2.4GHz, 5GHz, and Internet, which should all be solid green (or the indicated color for "On"). If the wireless LEDs are off, pressing and holding the WPS/Wi-Fi button for more than two seconds will activate them.
The Tether app method involves downloading the app, logging in with a TP-Link ID (or creating one), and then tapping the '+' button to select "Wireless Router" > "Standard Routers." The app guides the user through the remaining steps to complete the setup and connect to the internet. This method is particularly user-friendly, offering an intuitive interface for configuration.
Alternatively, the web browser method requires connecting a device (wirelessly using the default SSID and password found on the router's label, or via an Ethernet cable) to the router. Users then open a web browser and navigate to http://tplinkwifi.net or http://192.168.0.1. A password needs to be created to log in, after which step-by-step instructions guide the user through setting up the internet connection and registering for the TP-Link Cloud service.
Once the router is set up, its features can be managed through the Tether app or the web management page. HomeShield features, such as network protection, parental controls, and QoS, are primarily managed via the Tether app. The USB applications, including local storage sharing and media server functions, are also configured through these interfaces, allowing users to easily share files and stream media.
The router includes physical buttons for WPS/Wi-Fi and Reset. The WPS/Wi-Fi button allows for quick, secure connection of WPS-compatible devices by pressing it for one second, or it can toggle the wireless function on/off by pressing and holding for more than two seconds. The Reset button, when pressed and held for about six seconds until the Power LED blinks, restores the router to its factory default settings, which is useful for troubleshooting or reconfiguring the device.
For optimal Wi-Fi performance, the guide provides recommendations on router placement. It advises against placing the router in corners, closets, or near obstacles and high-powered appliances. Instead, it suggests a central location at a certain height, with antennas kept vertical when placed on a desktop or upright when mounted on a wall.
The TP-Link Wi-Fi 6 Router is designed for reliable operation with minimal ongoing maintenance. However, certain practices and troubleshooting steps are outlined to ensure continuous optimal performance.
For general care, users are advised to keep the device away from water, fire, humidity, and hot environments. It is crucial not to attempt to disassemble, repair, or modify the device; any service needs should be directed to TP-Link support. Only the recommended chargers should be used, and damaged chargers or USB cables should be avoided. The device should not be used where wireless devices are prohibited. The adapter should be installed near the equipment and remain easily accessible.
In case of issues, the "Need Help?" section provides solutions to common problems. If the web management page is inaccessible, troubleshooting steps include rebooting the router, checking static IP settings on the computer, verifying the URL (http://tplinkwifi.net or http://192.168.0.1/http://192.168.1.1), trying a different web browser, and disabling/enabling the network adapter.
If internet access is lost, the guide suggests powering off the modem for about five minutes before restarting it, ensuring only one Ethernet port on the modem is connected to the router. Users should also verify if the internet works by connecting a computer directly to the modem. If the issue persists, logging into the web management page to check the internet IP address validity and adjusting DNS settings (e.g., to 8.8.8.8 and 8.8.4.4) are recommended. For cable modem users, cloning the current device's MAC address and rebooting both the modem and router can resolve connectivity issues.
For forgotten wireless passwords, the default password can be found on the router's label. Alternatively, connecting a computer directly to the router via Ethernet and accessing the web management page allows users to retrieve or reset the wireless password.
The reset button serves as a critical maintenance feature, allowing users to revert the router to its factory default settings. This can be invaluable for resolving complex configuration issues or preparing the router for a new setup.
TP-Link also provides comprehensive support resources, including technical support, replacement services, user guides, and other information, all accessible through their support website. This ensures that users have access to assistance whenever needed, contributing to the long-term usability and reliability of the device.
| DSL WAN | No |
|---|---|
| Ethernet WAN | Yes |
| WAN connection type | RJ-45 |
| Wi-Fi band | Dual-band (2.4 GHz / 5 GHz) |
| Top Wi-Fi standard | Wi-Fi 6 (802.11ax) |
| WLAN data transfer rate (max) | 2402 Mbit/s |
| WLAN data transfer rate (second band) | 574 Mbit/s |
| VPN server | OpenVPN, PPTP, L2TP |
| Networking standards | IEEE 802.11a, IEEE 802.11ac, IEEE 802.11ax, IEEE 802.11b, IEEE 802.11g, IEEE 802.11n |
| Ethernet LAN interface type | Gigabit Ethernet |
| Number of guest networks (2.4 GHz) | 1 |
| Ethernet LAN (RJ-45) ports | 5 |
| Firewall security | SPI Firewall |
| NAT functionality | • Port Forwarding • Port Triggering • DMZ • UPnP |
| Security algorithms | WPA, WPA2, WPA3 |
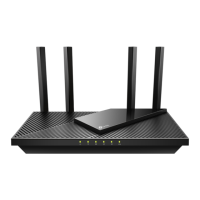
| Product type | Desktop/pole router |
| Product color | Black |
| Cables included | LAN (RJ-45) |
| Antenna type | 2x2 |
| Antennas quantity | 4 |
| Power source type | DC |
| Storage temperature (T-T) | -40 - 70 °C |
| Operating temperature (T-T) | 0 - 40 °C |
| Storage relative humidity (H-H) | 5 - 90 % |
| Operating relative humidity (H-H) | 10 - 90 % |
| Number of products included | 1 pc(s) |
| Certification | FCC, CE, RoHS |
| Depth | 134.5 mm |
|---|---|
| Width | 261.1 mm |
| Height | 41 mm |