34
Chapter 8
USB Application
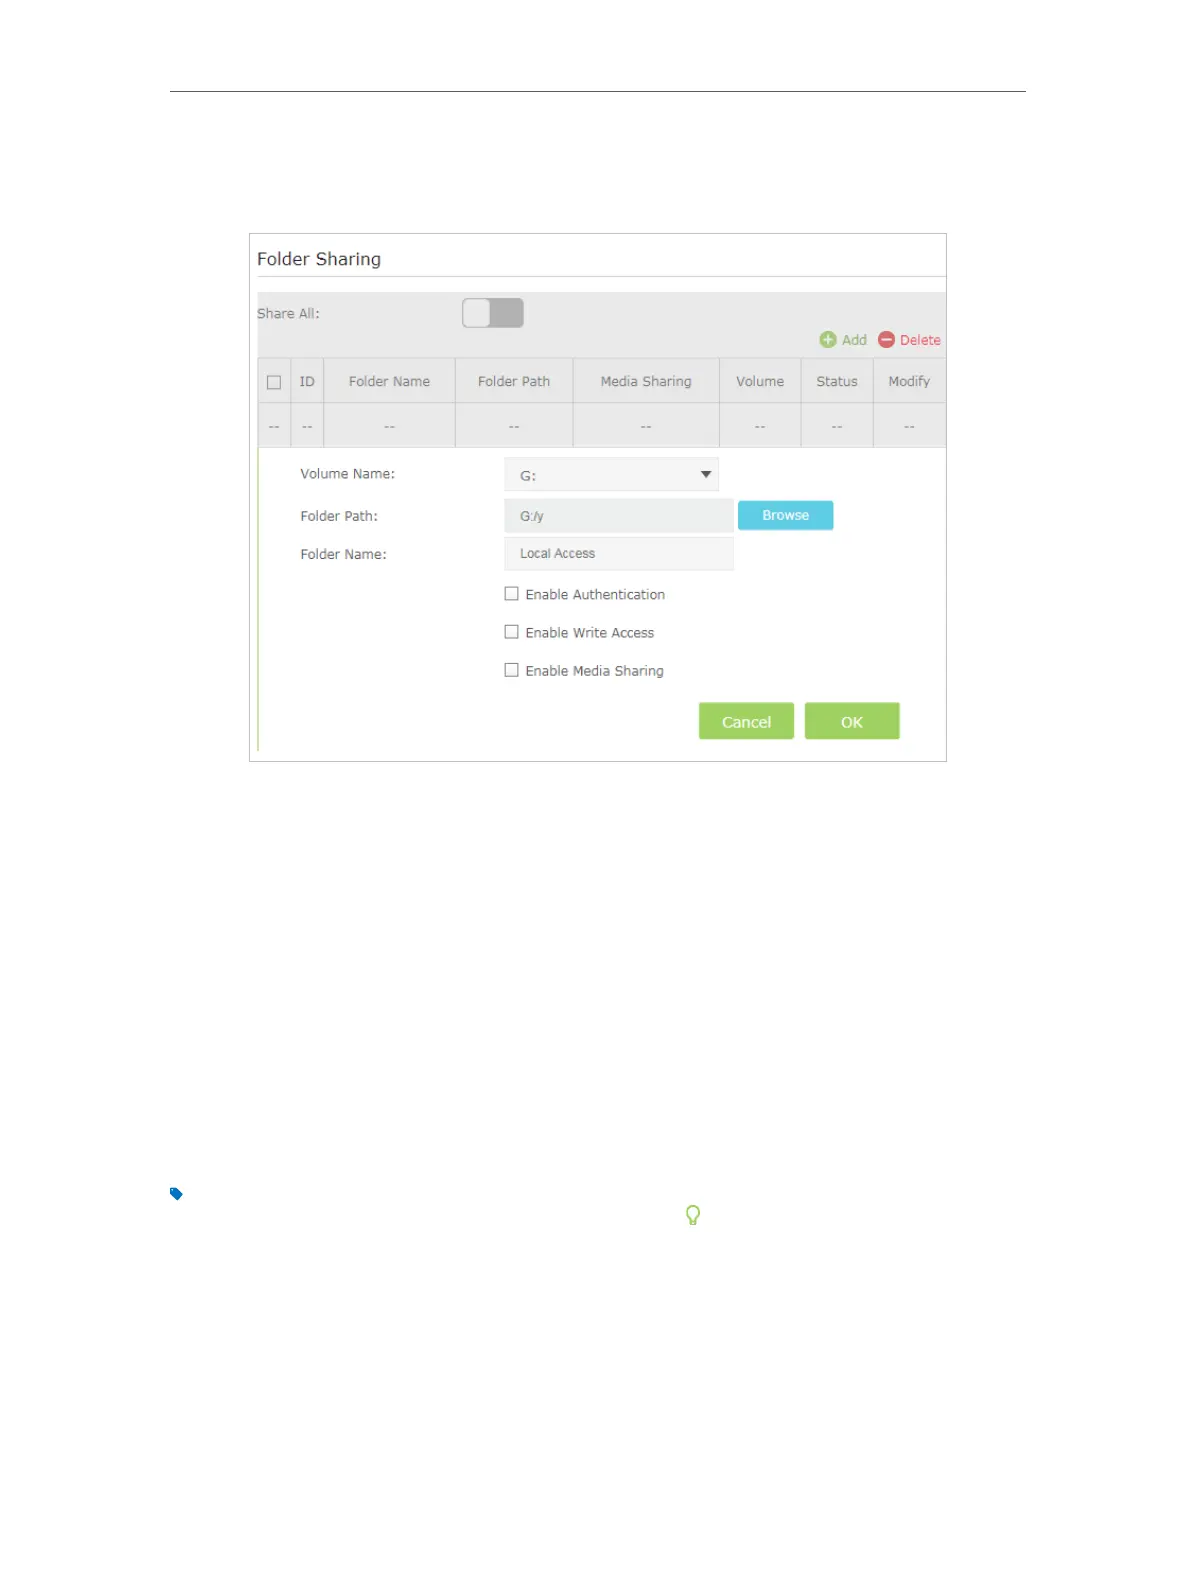
2. Select Basic > USB Settings > Folder Sharing. Focus on the Folder Sharing section.
Click the button to disable Share All, then click Add to add a new sharing folder.
3. Select the Volume Name and Folder Path, then enter a Folder Name as you like.
4. Decide the way you share the folder:
• Enable Authentication: Tick to enable authentication for this folder sharing,
and you will be required to use a username and password to access the USB
disk. Refer to To Set up Authentication for Data Security to learn more.
• Enable Write Access: If you tick this check box, network clients can modify this
folder.
• Enable Media Sharing: Tick to enable media sharing for this folder, and you can
view photos, play music and watch movies stored on the USB disk directly from
DLNA-supported devices. Click Media Sharing to learn more.
5. Click OK.
Tips:
The modem router can share eight volumes at most. You can click
on the page to detach the corresponding
volume you do not need to share.
¾ To Set up Authentication for Data Security
If you enable Authentication, network clients will be required to enter the username
and password you set when accessing the USB disk.
1. Visit http://tplinkmodem.net, then log in with the password you set for the modem
router.