54Chapter 11 . Customize Your Network Settings
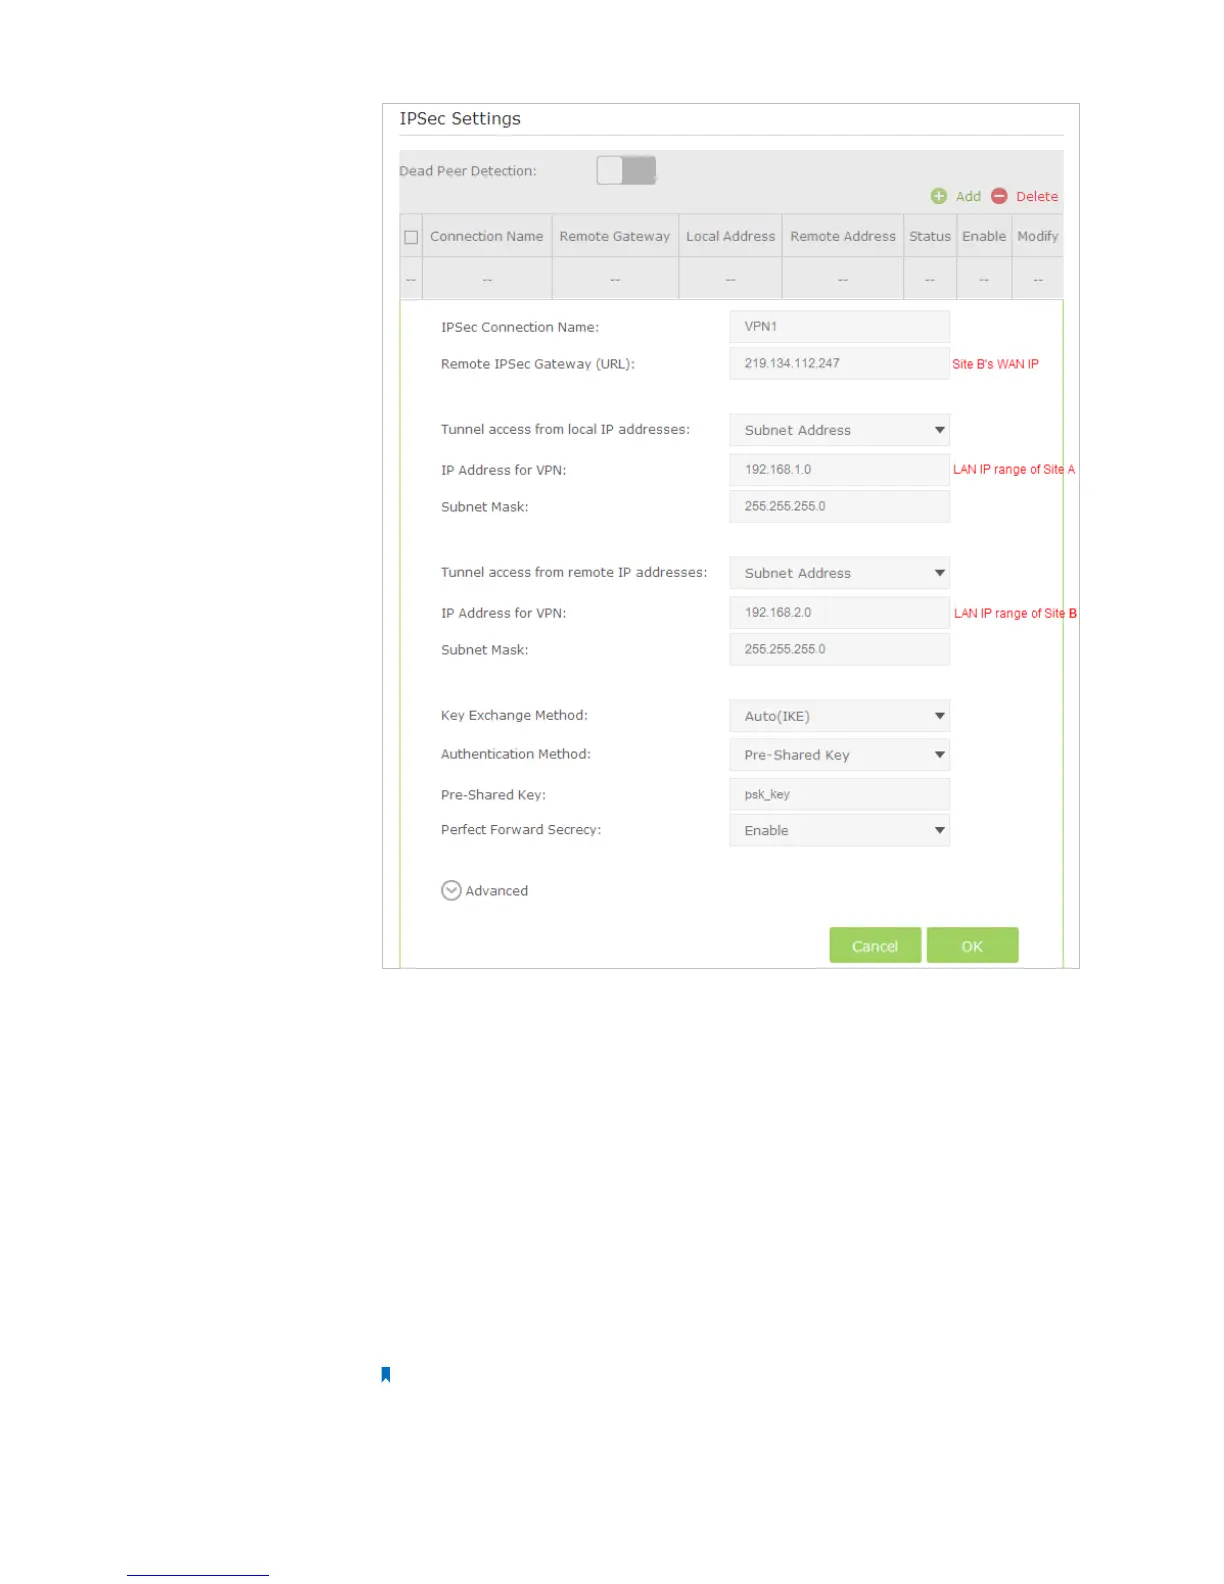
3 ) In the IPSec Connection Name column, specify a name.
4 ) In the Remote IPSec Gateway (URL) column, Enter Site B’s WAN IP address.
5 ) To configure Site A’s LAN:
In the Tunnel access from local IP addresses column, here we take Subnet Address as an
example. Then input the LAN IP range of Site A in the IP Address for VPN column, and input
Subnet Mask of Site A.
6 ) To configure Site B’s LAN:
In the Tunnel access from remote IP addresses column, here we take Subnet Address as an
example. Then input the LAN IP range of Site B in the IP Address for VPN column, and input
Subnet Mask of Site B.
7 ) Select the Key Exchange Method for the policy. We select Auto(IKE) here.
8 ) Enter the Pre-Shared Key for IKE authentication. Then keep Perfect Forward Secrecy enabled.
Note:
• The key should consist of visible characters without blank space.
• Make sure Site A and Site B use the same key.