EasyManua.ls Logo

TP-Link AX3000 User Manual

TP-Link AX3000
2 pages
To Next Page IconTo Next Page
Page #1 background imageLoading...
Page #1 background image
Connect the Hardware
Set Up the Network
Method ONE: Via TP-Link Tether App
1. Download the Tether app.
Scan for Tether
Tether
or
Choose your device type
Archer AX11000
Archer C5400X
Range Extender
Router
Archer AX6000
Method TWO: Via a Web Browser
The default wireless network names (SSIDs) and password
are printed on the label at the bottom of the router.
1. Connect your device to the router wirelessly
or with an Ethernet cable.
2. Launch a web browser, and enter
http://tplinkwifi.net or http://192.168.0.1 in
the address bar. Create a password to log in.
3. Follow the step-by-step instructions to
set up the internet connection and
register for the TP-Link Cloud service.
Note: If the login window does not appear, please refer to
Q1 of Need Help? in this guide.
2. Open the Tether app and log in with your
TP-Link ID.
3. Tap the button in the Tether app and
select Router > Wireless Router. Follow
the steps to complete the setup and
connect to the internet.
Note: If you don’t have an account, create one first.
http://tplinkwi.net
Let’s Get Started
Conrm Password
Password
Note: If the 2.4GHz LED and 5GHz LED are off, press and hold the WPS/Wi-Fi button on the back for more
than 2 seconds. Both the LEDs should turn solid on.
Power
On
Internet
On
2.4GHz
On
5GHz
On
If your internet connection is through an Ethernet cable directly from the wall instead of through a DSL /
Cable / Satellite modem, connect the Ethernet cable to the router’s WAN port, and then follow steps 3
and 4 to complete the hardware connection.
*Image may dier from actual product.
Unplug the power to turn o your modem, if any, and remove
the backup battery if it has one.
Place the router horizontally and orient the antennas vertically.
Modem
Unplug the power
Power on the modem, and then wait
about 2 minutes for it to restart.
2
Connect the power adapter to
the router and turn on the router.
3
Verify that the hardware connection is correct by checking the following LEDs.
4
Set up with videos:
Scan QR code or visit
https://www.tp-link.com/support/setup-video/#wi--routers
1
2
Model: Archer AX3000
AX3000 Gigabit Wi-Fi Router
Wireless Password/PIN:XXXXXXXX
SSID:TP-Link_XXXX
SSID:TP-Link_XXXX_5G
Internet
Connect the powered-off
modem to the router’s WAN
port with an Ethernet cable.
1

Other manuals for TP-Link AX3000

Question and Answer IconNeed help?

Do you have a question about the TP-Link AX3000 and is the answer not in the manual?

TP-Link AX3000 Specifications

General IconGeneral
Wi-Fi StandardWi-Fi 6 (802.11ax)
ProcessorDual-Core CPU
Antennas4 external antennas
MU-MIMOYes
BeamformingYes
OFDMAYes
SecurityWPA3
USB Ports1 x USB 3.0
Frequency Band2.4 GHz and 5 GHz
Ethernet Ports1 x Gigabit WAN, 4 x Gigabit LAN
Additional Security FeaturesTP-Link HomeCare
Dimensions260.2 x 135.0 x 41.6 mm (10.2 x 5.3 x 1.6 in)
Maximum Speed3000 Mbps (574 Mbps at 2.4 GHz + 2402 Mbps at 5 GHz)

Summary

Setup Videos and Resources

Connect the Hardware

Prepare the Modem

Turn off your modem, remove backup battery if available, before connecting hardware.

Position the Router

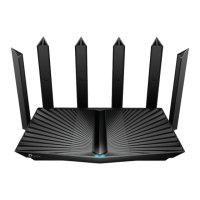
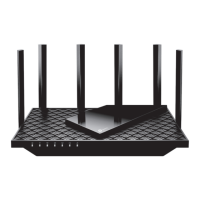
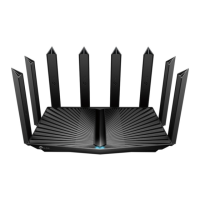
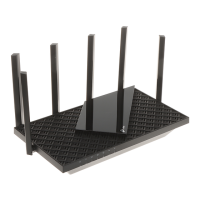
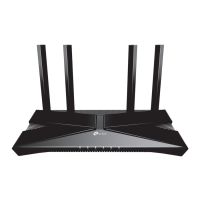
Place the router horizontally and orient its antennas vertically for optimal performance.

Alternative Ethernet Connection

Connect Ethernet cable directly from wall to router's WAN port if no modem is used.

Connect Modem to Router

Use an Ethernet cable to connect the powered-off modem to the router's WAN port.

Power On Modem and Wait

Turn on the modem and wait approximately 2 minutes for it to restart fully.

Power On Router

Connect the power adapter to the router and then turn it on.

Verify Hardware Connection with LEDs

Check the Power, 2.4GHz, 5GHz, and Internet LEDs to confirm correct hardware connection.

Troubleshoot Wi-Fi LEDs

Press and hold WPS/Wi-Fi button for 2 seconds to turn on 2.4GHz and 5GHz LEDs if they are off.

Set Up the Network

Setup via TP-Link Tether App

Use the TP-Link Tether app to download, log in, and configure your wireless router.

Setup via Web Browser

Connect device, launch browser, enter URL, create password, and follow setup instructions.

Button Explanation

WPS/Wi-Fi Button

Initiate WPS process or turn wireless function on/off by pressing or holding the button.

Reset Button

Press and hold to reset the router to its factory default settings.

LED Button

Press to turn on or off the LEDs of your router.

USB Applications

Local Storage Sharing

Share files from a USB drive with devices on your home network.

Media Server

Play media from a USB drive on your computer and smart devices.

Remote Access

Access the USB drive when you are away from home.

Community and Support

TP-Link Community

Join the community to communicate with TP-Link users and engineers.

Technical Support and Resources

Visit for technical support, replacement services, user guides, and more.

Suggestions Email

Email suggestions to techwriter@tp-link.com.cn.

Important Precautions

Environmental and Usage Guidelines

Keep device away from water, fire, humidity. Do not disassemble or use unauthorized chargers.

Adapter Accessibility

Ensure the adapter is installed near the equipment and easily accessible.

Need Help?

Cannot Access Web Management Page

Troubleshoot by rebooting, checking IP settings, browser, or network adapter.

Cannot Access Internet

Reboot devices, check modem connection, verify IP, or use MAC Clone feature.

Forgot Wireless Password

Check label, connect via Ethernet, or reset password via web management page.

Forgot Web Management Password

Reset using TP-Link ID or by pressing the reset button on the router.

Related product manuals