Tapo Solar Panel
Quick Start Guide
01 /
Position the Solar Panel
The solar panel captures free, clean solar energy and provides non-stop
power supply for your Tapo cameras. The position and tilt angle of the
solar panel greatly aects the solar eciency.
1. Choose a location where the solar panel gets the most sunlight
throughout the year.
2. Position the panel south-facing in the Northern Hemisphere or
north-facing in the Southern Hemisphere. The recommended tilt angle
between the panel and the horizontal ground is 35° ~ 45°.
3. Regularly wipe the panel to remove dust and debris.
1. Drill Holes
Stick the mounting template to a solid and
level wall surface. Drill three screw holes
according to the template.
2. Mount Bracket
Insert three wall anchors into the
holes and use the mounting screws to
ax the solar panel bracket over the
anchors.
3. Install Solar Panel
Slide the solar panel onto the
mounting bracket until it clicks
into place.
4. Install Solar Panel
Slide the solar panel onto the mounting
bracket until it clicks into place.
1. Drill Holes
Stick the mounting template to a solid and
level wall surface. Drill three screw holes
according to the template.
Scenario 2. Mount Solar Panel & Extra Camera
5. Install Screw Caps & Base Cover
Insert two screw caps into the screw holes
until ush, then install the base cover.
4. Adjust Angle
Loosen the adjustable screw, tilt
the solar panel to adjust the
angle, and then tighten the
adjustable screw.
The recommended tilt angle between
the panel and the horizontal ground is
35° ~ 45°.
5. Adjust Solar Panel Angle
Loosen the adjustable screw, tilt the solar
panel to adjust the angle, and then tighten
the adjustable screw.
The recommended tilt angle between the panel
and the horizontal ground is 35° ~ 45°.
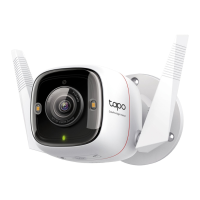
6. Install Camera & Adjust Angle
Install the camera onto the bracket and adjust
the camera angle as per the camera's guide.
Scenario 1. Mount Solar Panel Only
Φ=6 mm (15/64 in.)
40°
Φ=6 mm (15/64 in.)
40°
2. Install Camera Bracket
Secure the camera bracket to the solar
panel bracket using two screws.
The third hole below is for securing the
solar panel bracket.
02 /
Mounting
*Images may dier from actual products.
Back Side
Ensure the camera is securely
attached to the camera bracket
by tightening the bottom screw.
Camera-suggested
Angle
7106510839 REV1.0.0 ©2024 TP-Link
Wall Anchors ×3 + Self-tapping Screws ×3 Screw Caps ×2
Camera Bracket Screws ×2
Wall Anchors ×3 + Self-tapping Screws ×3
Screw Caps ×2
3. Mount Solar Panel Bracket
Insert three wall anchors into the
holes and use the mounting screws to
ax the solar panel bracket over the
anchors. Then, insert two screw caps
into the upper screw holes until ush.
Screw Cap
Orientation
Screw Cap
Orientation
Back Side


 Loading...