14
Option 2. Mount to the wall
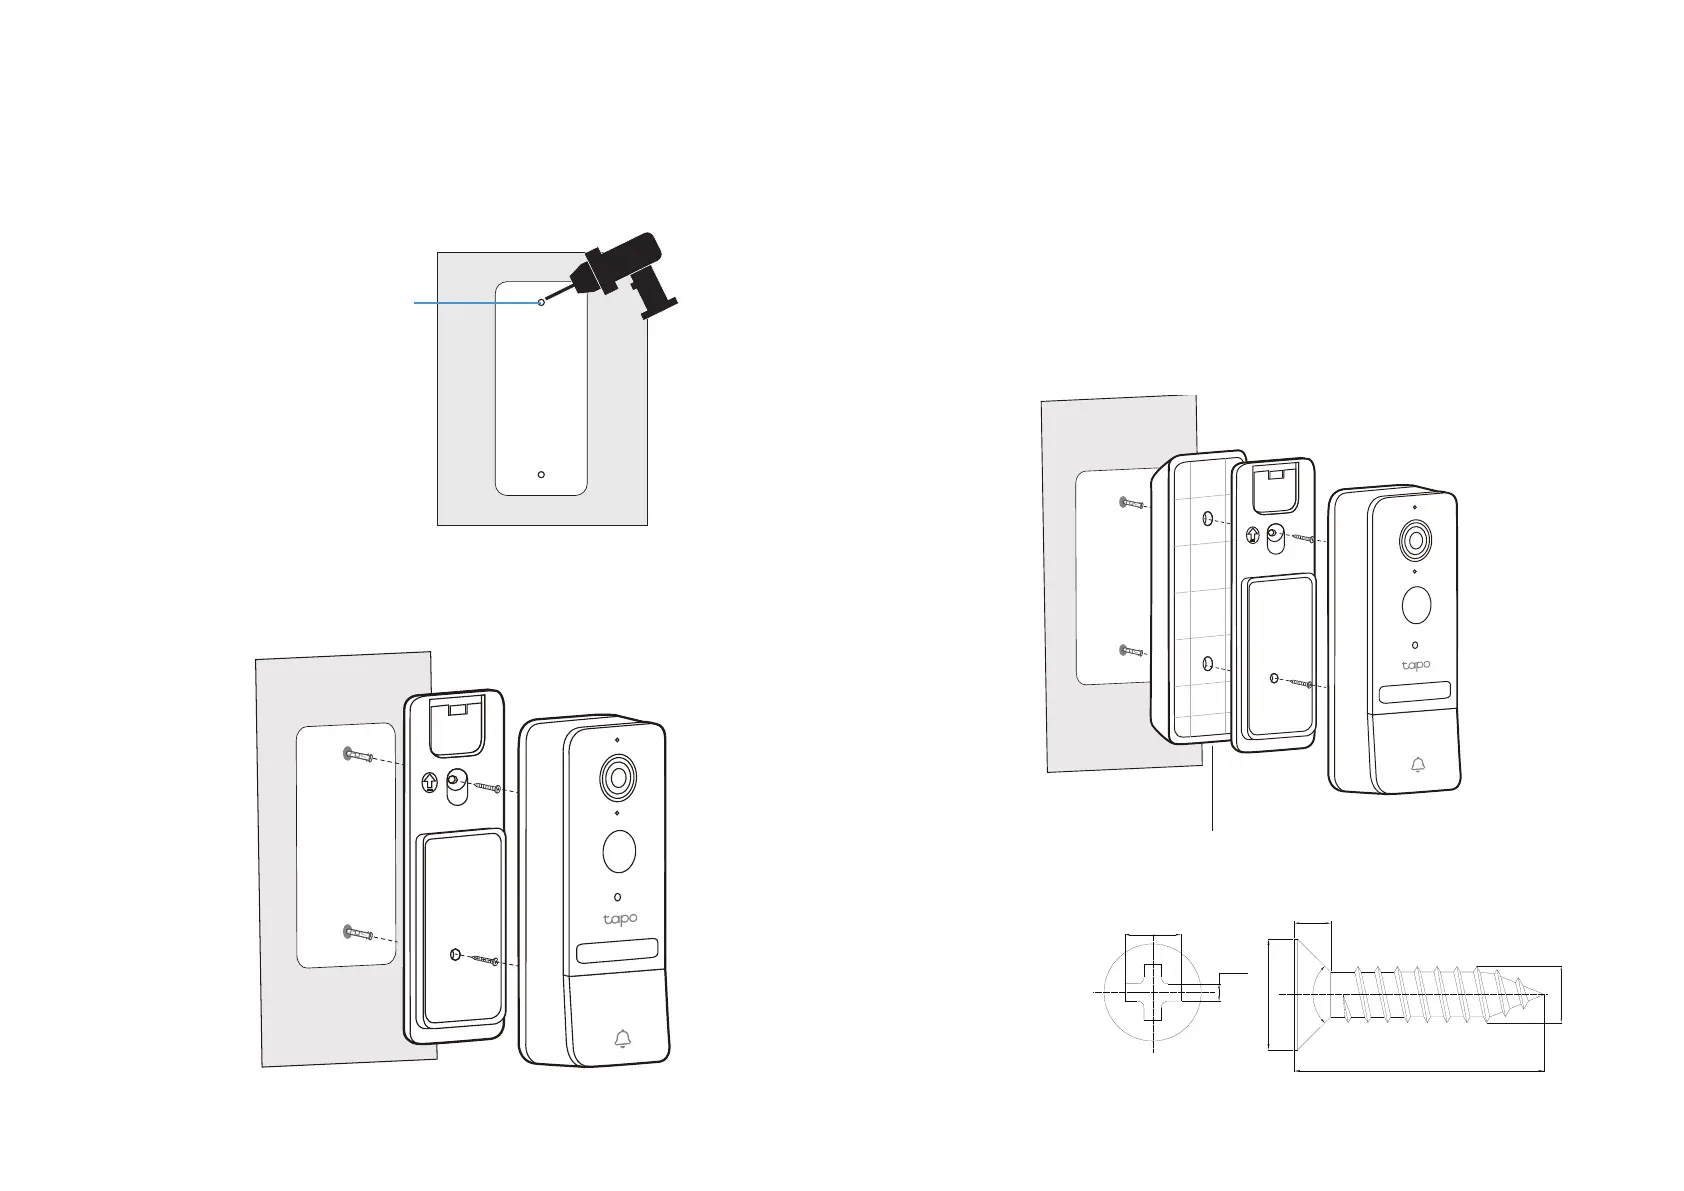
1. Stick the mounting template to the desired mounting place. Drill two
holes according to the template.
(Optional) Use 15° Mounting Wedge to Adjust Angle
To adjust the viewing angle of the doorbell, you can use the 15°
mounting wedge within the package.
1. After drilling holes, insert two anchors into the holes.
2. Place the bracket above the wedge.
3. Use the screws to ax the wedge and bracket over the anchors.
4. Attach the doorbell to the bracket.
2. Insert two anchors into the holes and use the screws to affix the
bracket over the anchors. Then attach the doorbell to the bracket.
Wedge
(You can ip 180° to nd the appropriate angle.)
Size of
mounting screws
3±0.1
30±0.5
Ø6
+0
-0.5
3.6 REF
90°
+2°
-0°
0.8
+0.15
-0
Philips depth: 0.91~1.43 mm
2Max
Φ=6 mm (15/64 in.)
 Loading...