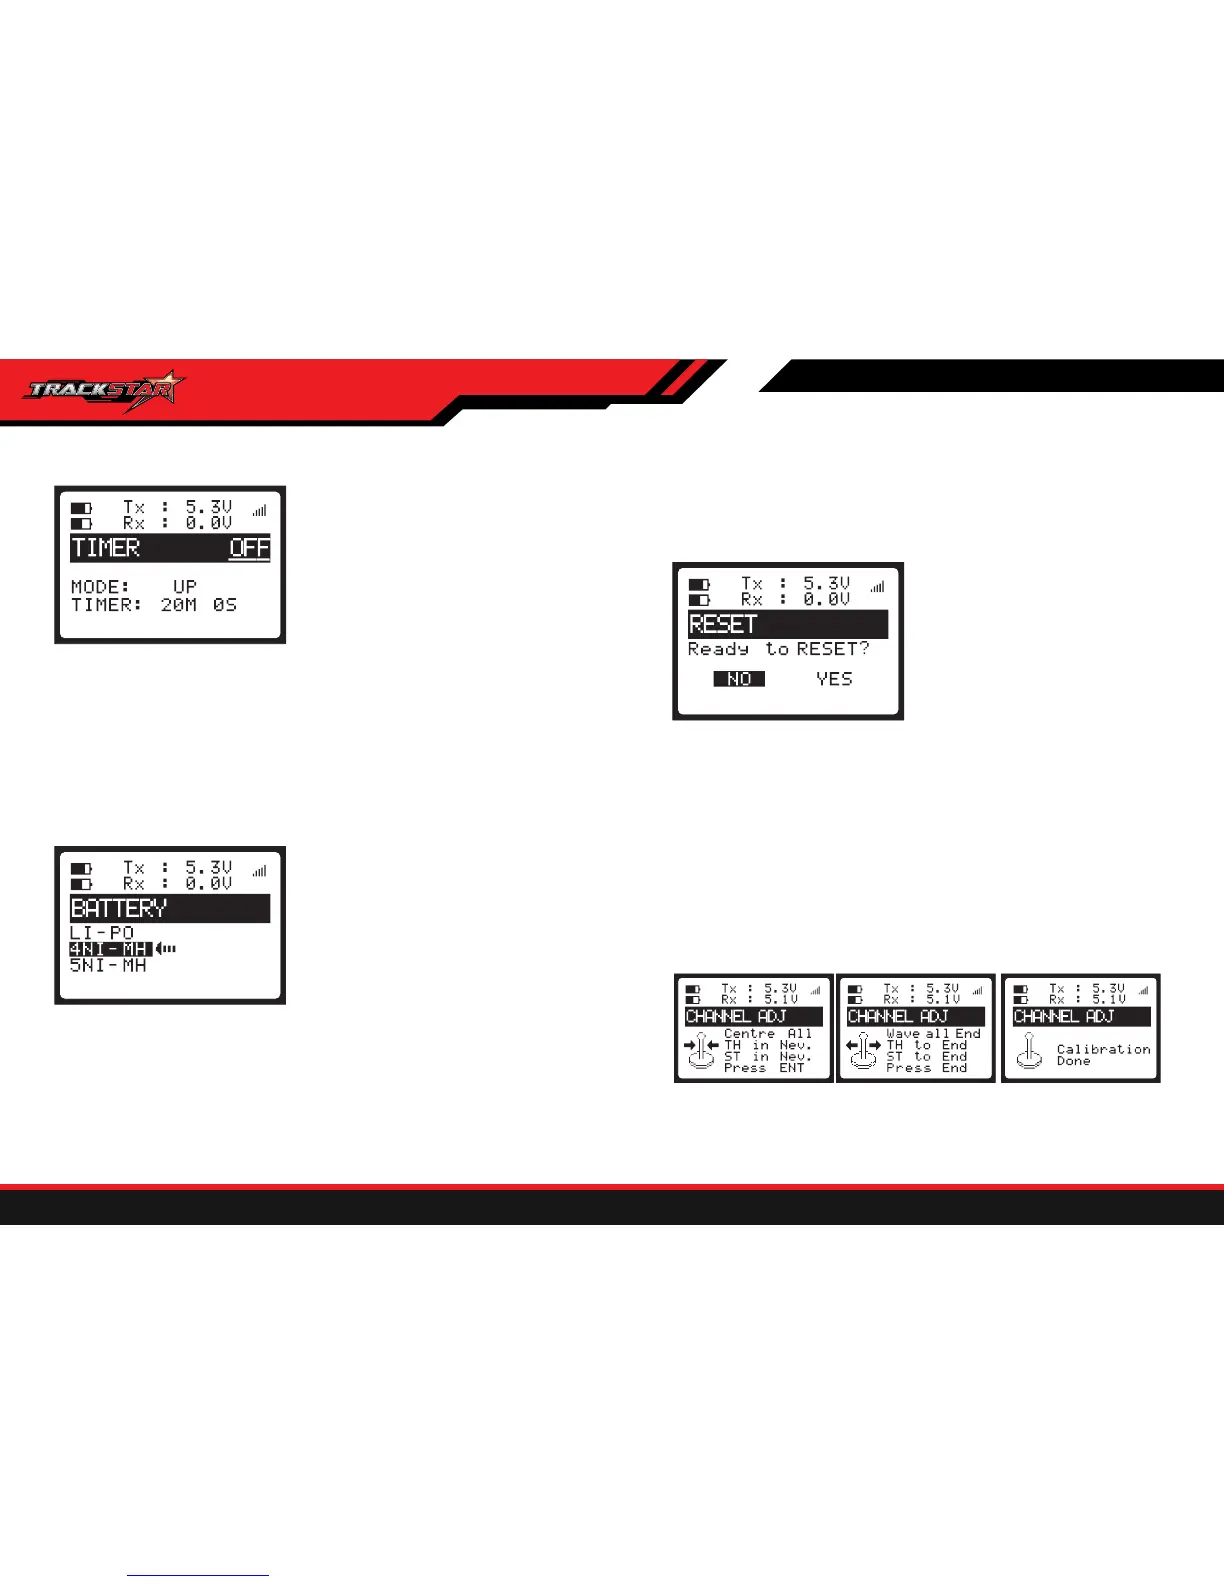
11.11 TIMER
11.13 RESET
11.14 CHANNEL ADJ
11. 12 BATTERY
By UP TIMER, DOWN TIMER, addend or
countdown timer.
How to set:
1. Press ENT to enter the FUNCTION
interface
2. Use the + / - keys to select the TIMER
function, press ENT key to enter
3. Press ENT to select ON / OFF
4. Use the + / - keys to select MODE,
choose good press ENT key, the black box
flashes by + / - keys to select the U / D.
This feature can know the vehicles
real-time voltage change,
1 Press ENT to enter the function interface
2 Use the + / - keys to select BATTERY
function, press ENT key to enter
3 Press the ENT button to select one
4 Press EXIT to save and return to
FUNCTION interface, 1.EP cars or boats,
digital system will automatically identify low
voltage alarm of 2S, 3S, 4S and 6S Li-Po
5. After this adjustment, press the ENT key to confirm. When the black box is not
flashing, through the + / - keys to select another spin.
6. Press EXIT to save and return to FUNCTION MENU;
NOTE: Timer begin with the pull of the throttle trigger. Without changing the
throttle trim, or throttle curve, the slight pull the trigger timer will begin counting. If
changes in these parameters, pull or not may cause timing function start. Time
out the buzzer will issue a "B-B-B" audible sound which stops after 10 seconds.
battery (the default is each Li-Po battery voltage lower than 3.5V, the alarm will be
start after continue some seconds), Additional setting voltage alarm is not requires.
If you are using 4 or 5 Ni-MH battery to control the gas car and gas boat, then you
need to choose, if you do not choose, there will be situations voltage disorder
alarms and not show on the main menu.
2.4 or 5 Ni-MH battery voltage display is entered directly through the receiver, no
additional connection, just inside this menu, select the corresponding cell numbers
and need to connect the concentrator BER-HCV1.Detection of Li-Po battery
should be through the battery connecting line into BER-HCV1 VOL hub as
above connection diagram shown:
( Do pay attention to the battery pole. Do not connect reverse )
All settings can be reset to the
factory settings, including different
memory modules, all previous
settings will be restored to factory
settings.
1. Press ENT to enter the FUNCTION
interface
2. Use the + / - keys to select RESET
function, press ENT key to enter
3. Press the + / - keys to select YES
and press ENT reset factory sitting.
4. Press EXIT to save and return to
FUNCTION screen,
CHANNEL ADJ is Channel adjustment.
NOTE: This feature is for the factory calibration(or professional player ).
When your R/C is under normal use, please do not enter. But when you find
servo motion is abnormal or if you change potentiometers, it will be needed.
Please enter the function 11-14 MONITOR to check each channel dynamic
value status (see at the state of the factory settings). If normal, Do not
calibrate. If abnormal please calibrate as follow:
1514