Re
check the bolt torques every 3000 miles.
With
prolonged driving, vibrations may cause the
Capa
city: The van rack is rated for a capacity of 500 lbs.,
even
ly distributed, assuming normal driving conditions and
loadi
ng. Please secure loads carefully, and exercise caution
The g
utters on some Vans are curved, which makes install-
ing t
hree level crossbars a special challenge. To compen-
sate
for this curvature, you’ll install our shims in the front
and r
ear crossbar assemblies, raising them to the height of
1. Ve
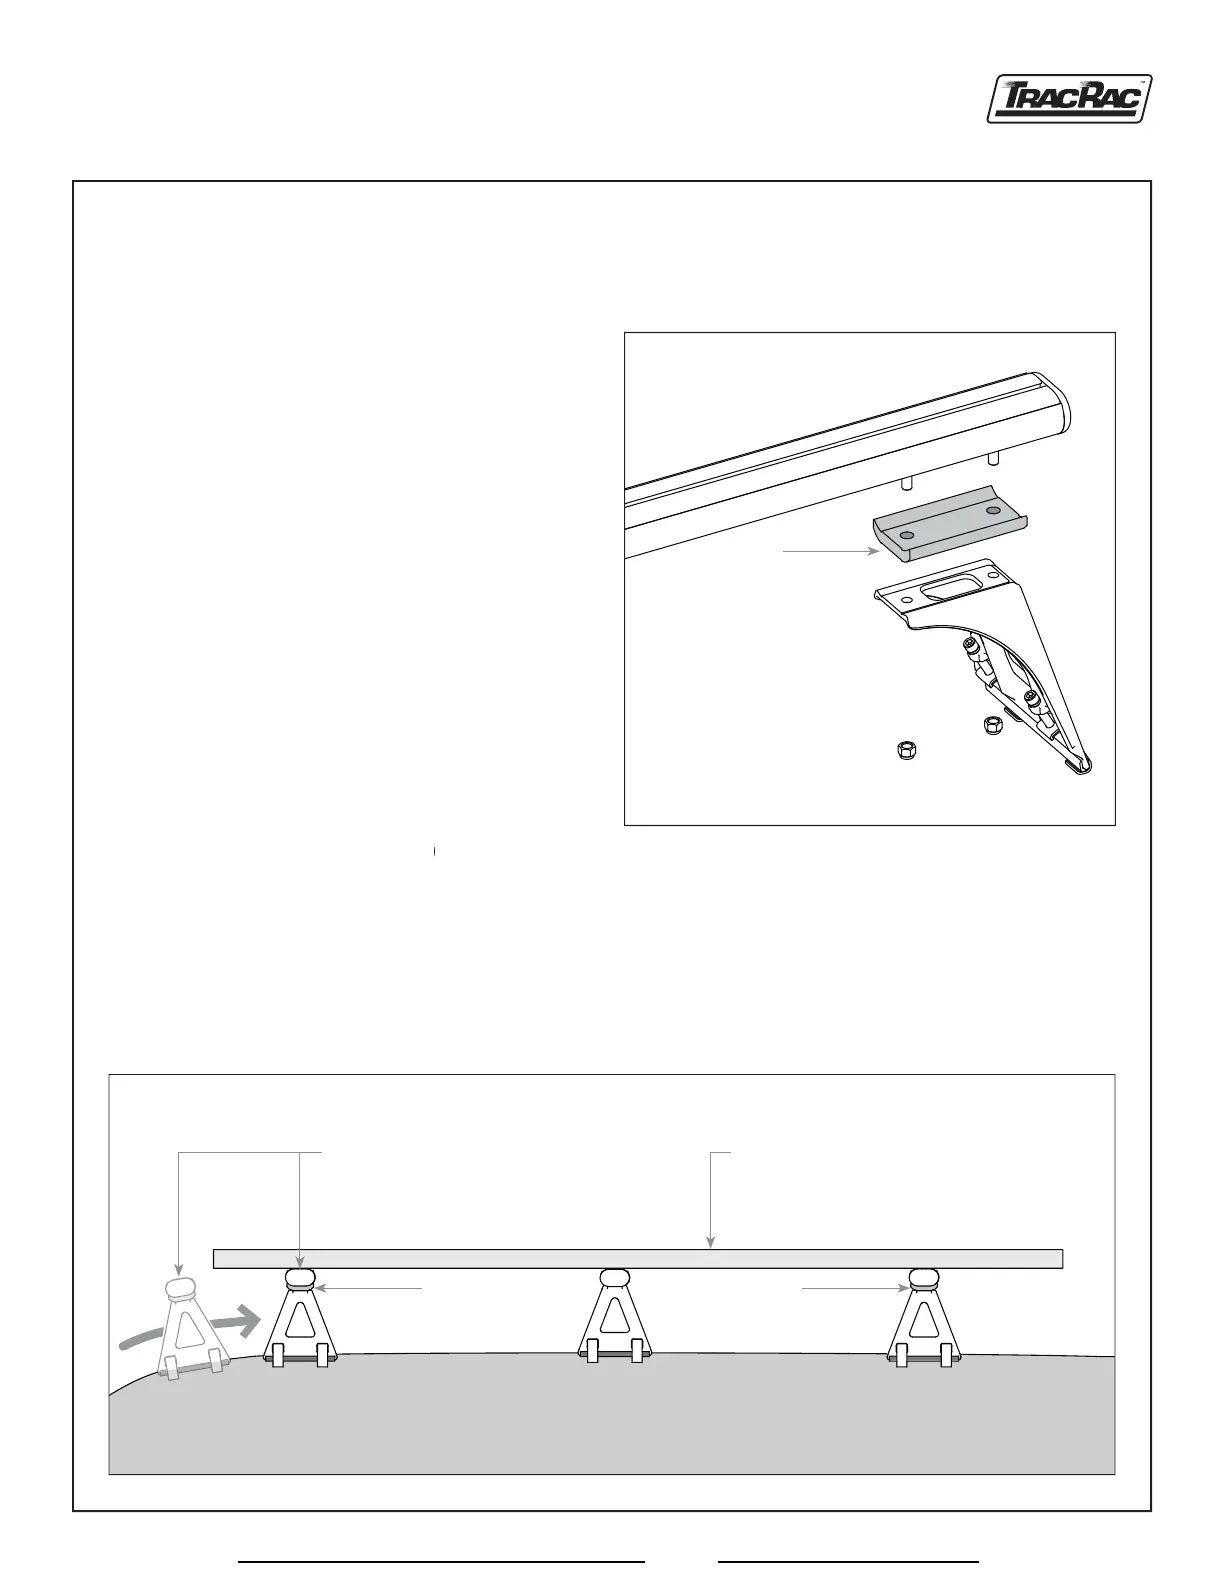
rify that you have received four Van Rack Shims.
2. I
nstall the middle (third) crossbar assembly roughly in
cent
er of van roof per Van Rack Installation Instructions.
3. L
oosely assemble the front and rear crossbar assemblies,
plac
ing the shims between the corner brackets and the
4. I
nstall the front crossbar assembly in desired location
near
front of van roof, and tighten all fasteners in accor-
dance
with Van Rack Installation Instructions.
5. P
osition the rear crossbar assembly on rear of van roof,
enga
ging lower edge of comer brackets in rain gutters.
6. P
lace a straight-edge (a ladder or straight piece of
lumb
er will do) atop crossbars
(Fi
g. 5)
to check that the to check that the to check that the (Fi
g. 5)
rack
s are all in line. As necessary, slide the rear crossbar
assem
bly to the front or rear until the straight-edge rests
flat
ly and evenly on all three crossbars. Complete instal-
lati
on to rear crossbar assembly in accordance with Van
Rack
Installation Instructions.
7.
Check all fasteners for proper torque.
SHIM INSTALLATION
Supplied as part of SKU 29056, TracVan Triple
Slid
e rear crossbar until
it co
ntacts straight edge
Rest
straight edge on front
View other commercial van equipment made by Thule on our website.
 Loading...