2
Elevation Motor/Belt Replacement
Instructions
Follow the instructions below to replace the
elevation motor and/or motor belt.
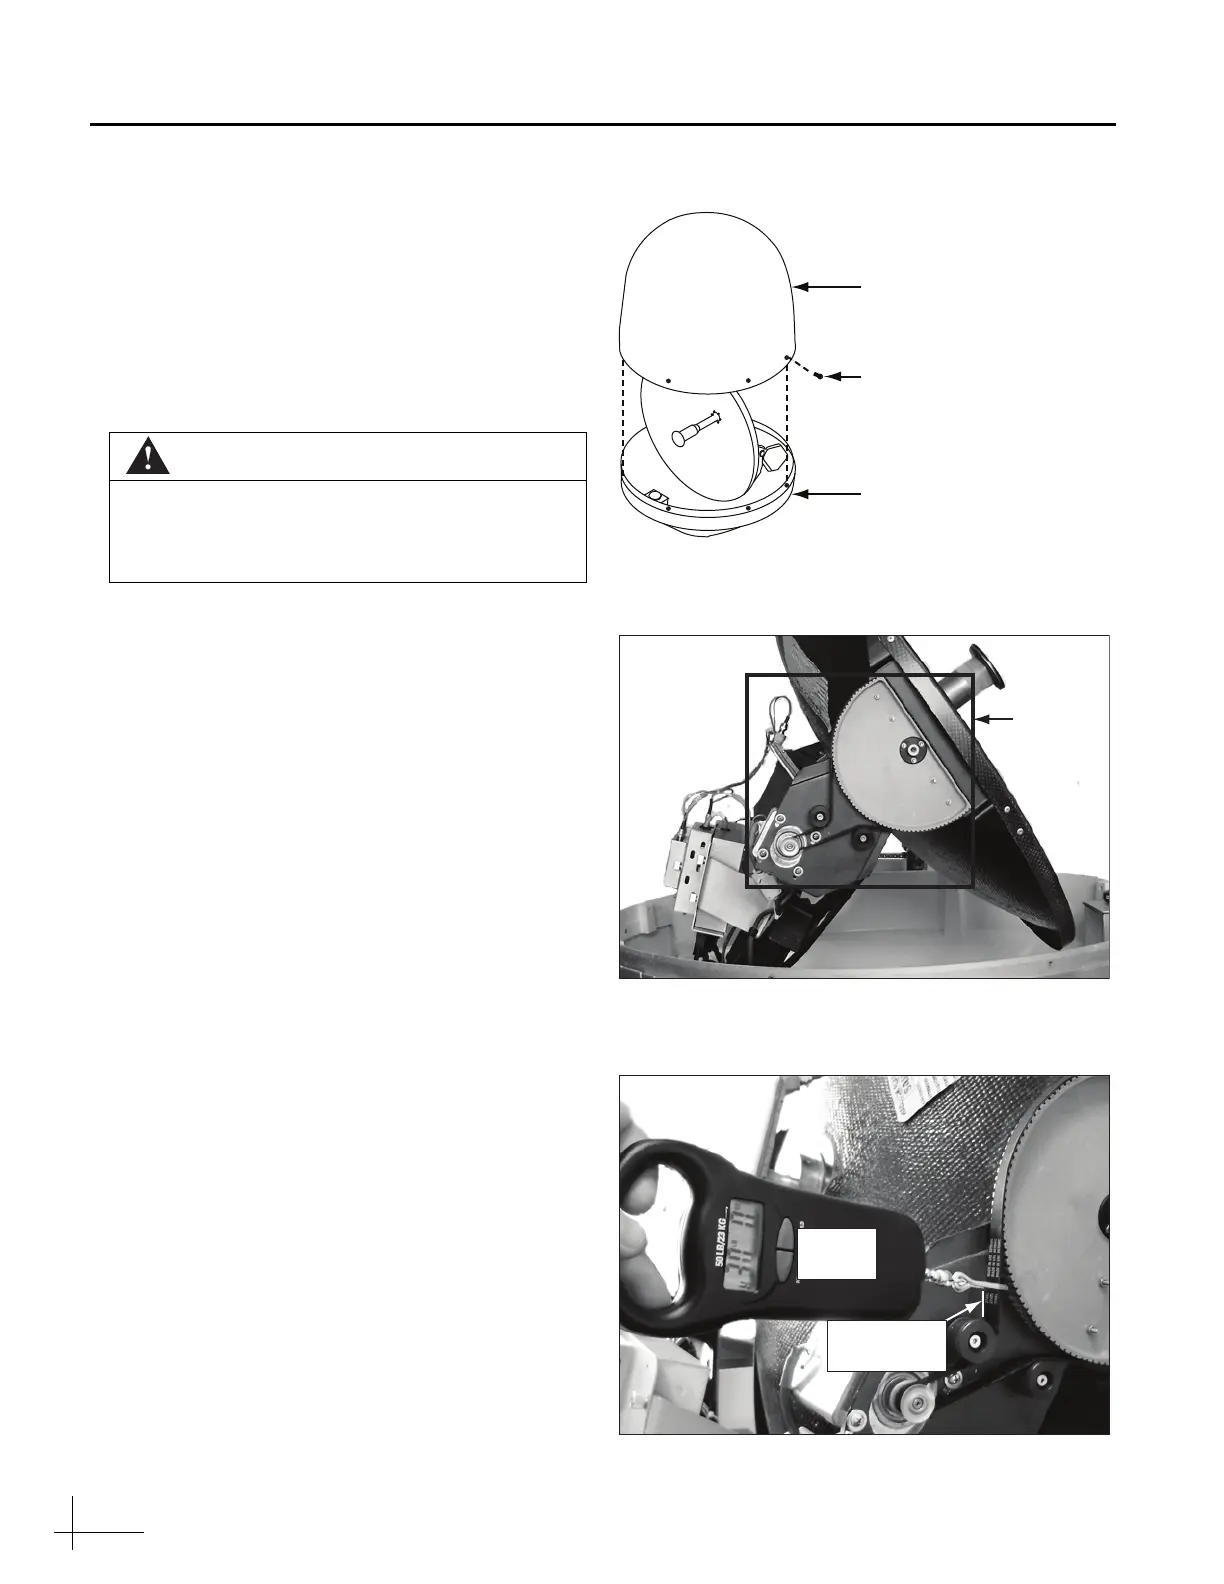
Step 1 - Remove the Radome
Follow the steps below to remove the radome.
a. Disconnect power from the TracVision
system and any connected receivers and/or
multiswitch.
b. Remove the eight Phillips screws securing the
radome (see Figure 1). Then remove the
radome and set it aside in a safe place.
Step 2 - Mark the Current Belt Tension
You need to record the current belt tension to
ensure the belt is replaced correctly. This
procedure requires a scribe (or pencil) and a
tension meter.
NOTE: Improper belt tension might impair antenna
performance.
a. Locate the elevation motor assembly (see
Figure 2).
b. Using a tension meter, apply 30 lbs of force
on the belt at the location shown in Figure 3.
c. Use a scribe to mark the belt’s deflection on
the frame while applying 30 lbs (13.06 Kg) of
force. You will use this scribe mark later
when you replace the belt (see Figure 3).
CAUTION
For your own safety, be sure to disconnect
power from all wired components before
performing this procedure.
Figure 1 Radome Screws
Figure 2 Elevation Motor Assembly Location
Figure 3 Measuring Belt Tension
#10-32 Screw (x8)
Baseplate
Radome
Tension
Meter
Tension
Scribe Mark