3
Step 3 - Remove the Belt
Follow the steps below to remove the belt.
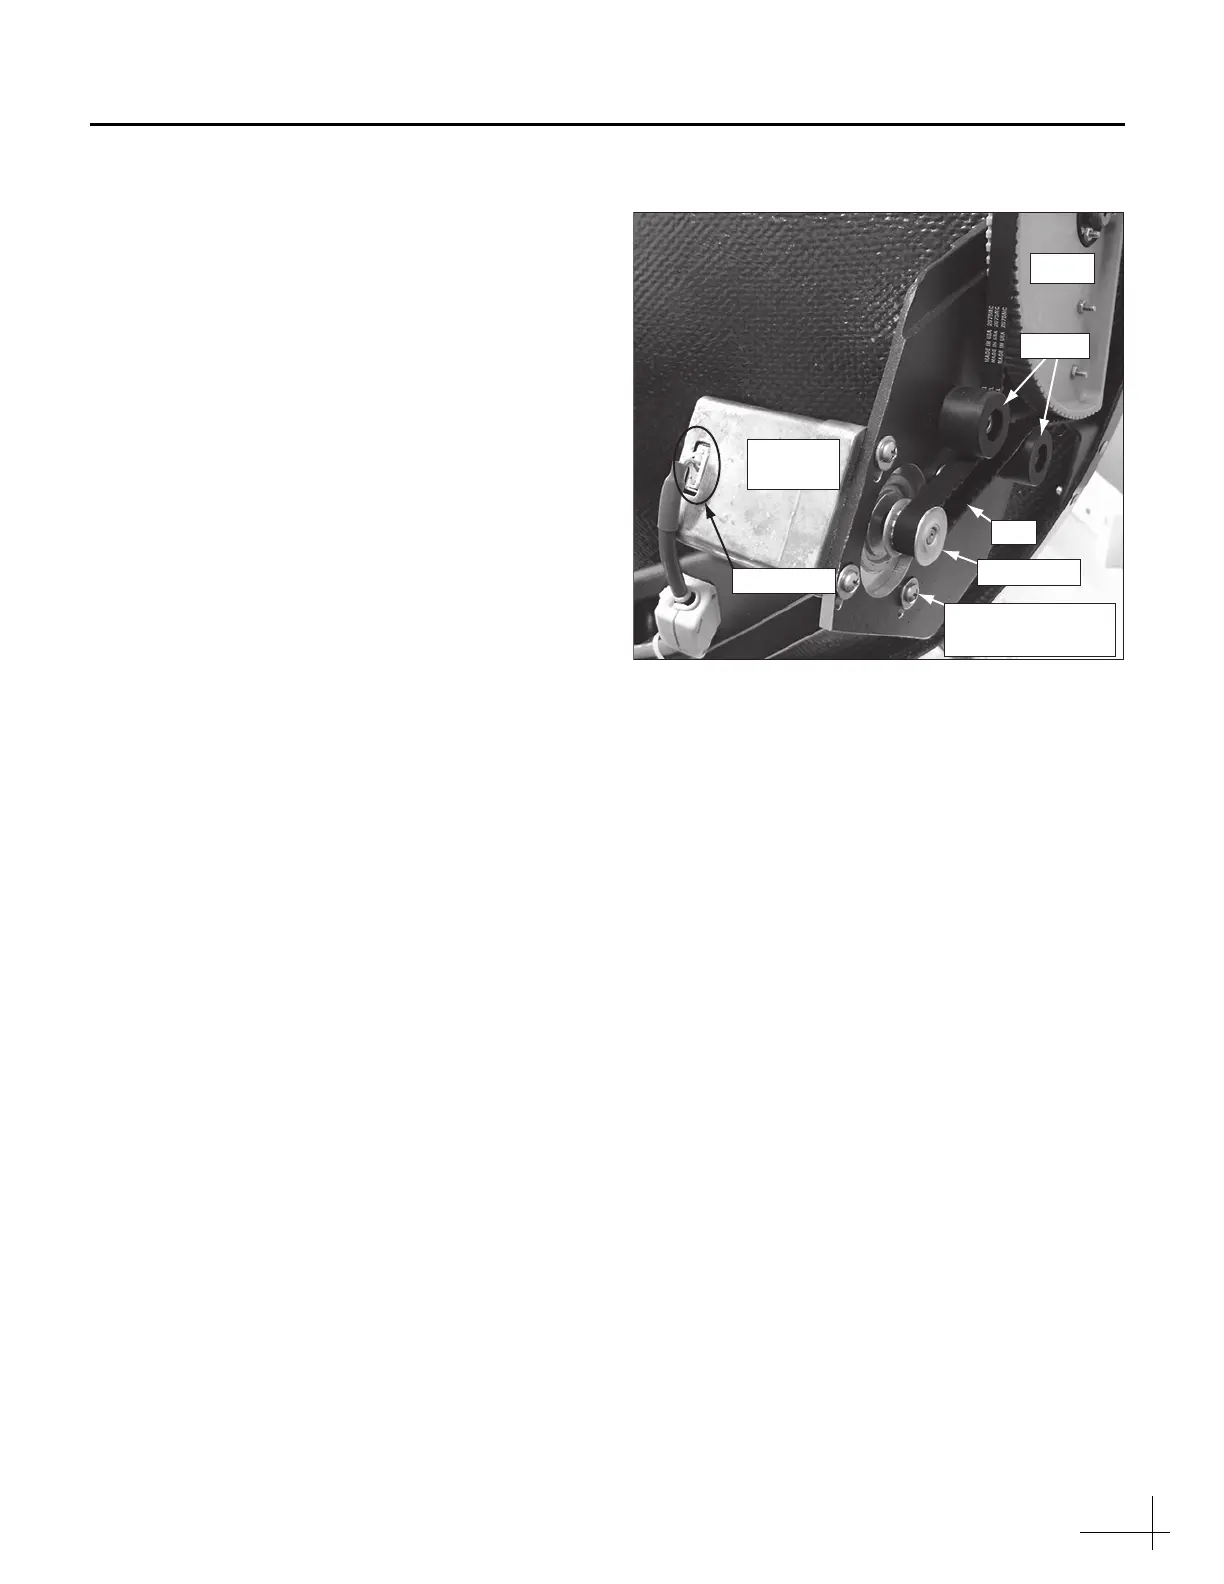
a. Loosen the four Phillips screws and washers
securing the motor to the frame until the
motor is free to move upward (see Figure 4).
b. Move the motor upward as necessary to
relieve tension, then roll the belt over the
motor hub while slowly moving the antenna
reflector through its vertical range.
c. Remove the belt.
Step 4 - Remove and Replace the Elevation Motor
(if required)
Follow the steps below to replace the elevation
motor. If you do not need to replace the motor,
skip to “Step 5 - Replace the Belt.”
a. Using needle-nose pliers, gently disconnect
the motor’s cable connector.
b. Remove the four screws and washers
securing the motor to the frame.
c. Install the new motor. Loosely secure the
motor onto the frame using the four screws
and washers you removed in the previous
step. You will tighten these screws later.
d. Reconnect the motor’s cable connector.
Step 5 - Replace the Belt
Follow the steps below to install/re-install the
elevation motor belt.
a. Carefully work the belt in between the
antenna pulley and reflector (see Figure 4).
Ensure that the belt teeth are positioned
inside the belt loop.
b. Route the belt between the rollers and onto
the motor hub.
c. Once the belt is in place, slowly move the
reflector through its vertical range to ensure
the belt is aligned and the teeth engage the
pulley and motor hub.
Figure 4 Elevation Motor Assembly
Elevation
Motor
Pulley
Connector
Belt
Rollers
Motor Hub
Motor Screws
and Washers (x4)
 Loading...