8
1035 309 94
1018,1021,1022 299 91
1026,1513 299 91
A36(SHAPES),1040 269 82
1042,1541 249 76
1044,1045 219 67
1060 199 61
1095 184 56
8615,8620,8622 239 73
4340,E4340,8630 219 67
Ni-Cr-Mo
Alloy Steel
8640 199 61
E9310 174 53
A-6 199 61
A-2 179 55
Tool Steel
A-10 159 49
D-2 90 27
H-11,H-12,H-13 189 58
Stainless
Steel
420 189 58
430 149 46
410,502 140 43
414 115 35
431 95 29
440C 80 24
304,324 120 36
304L 115 35
347 110 33
316,316L 100 30
416 189 58
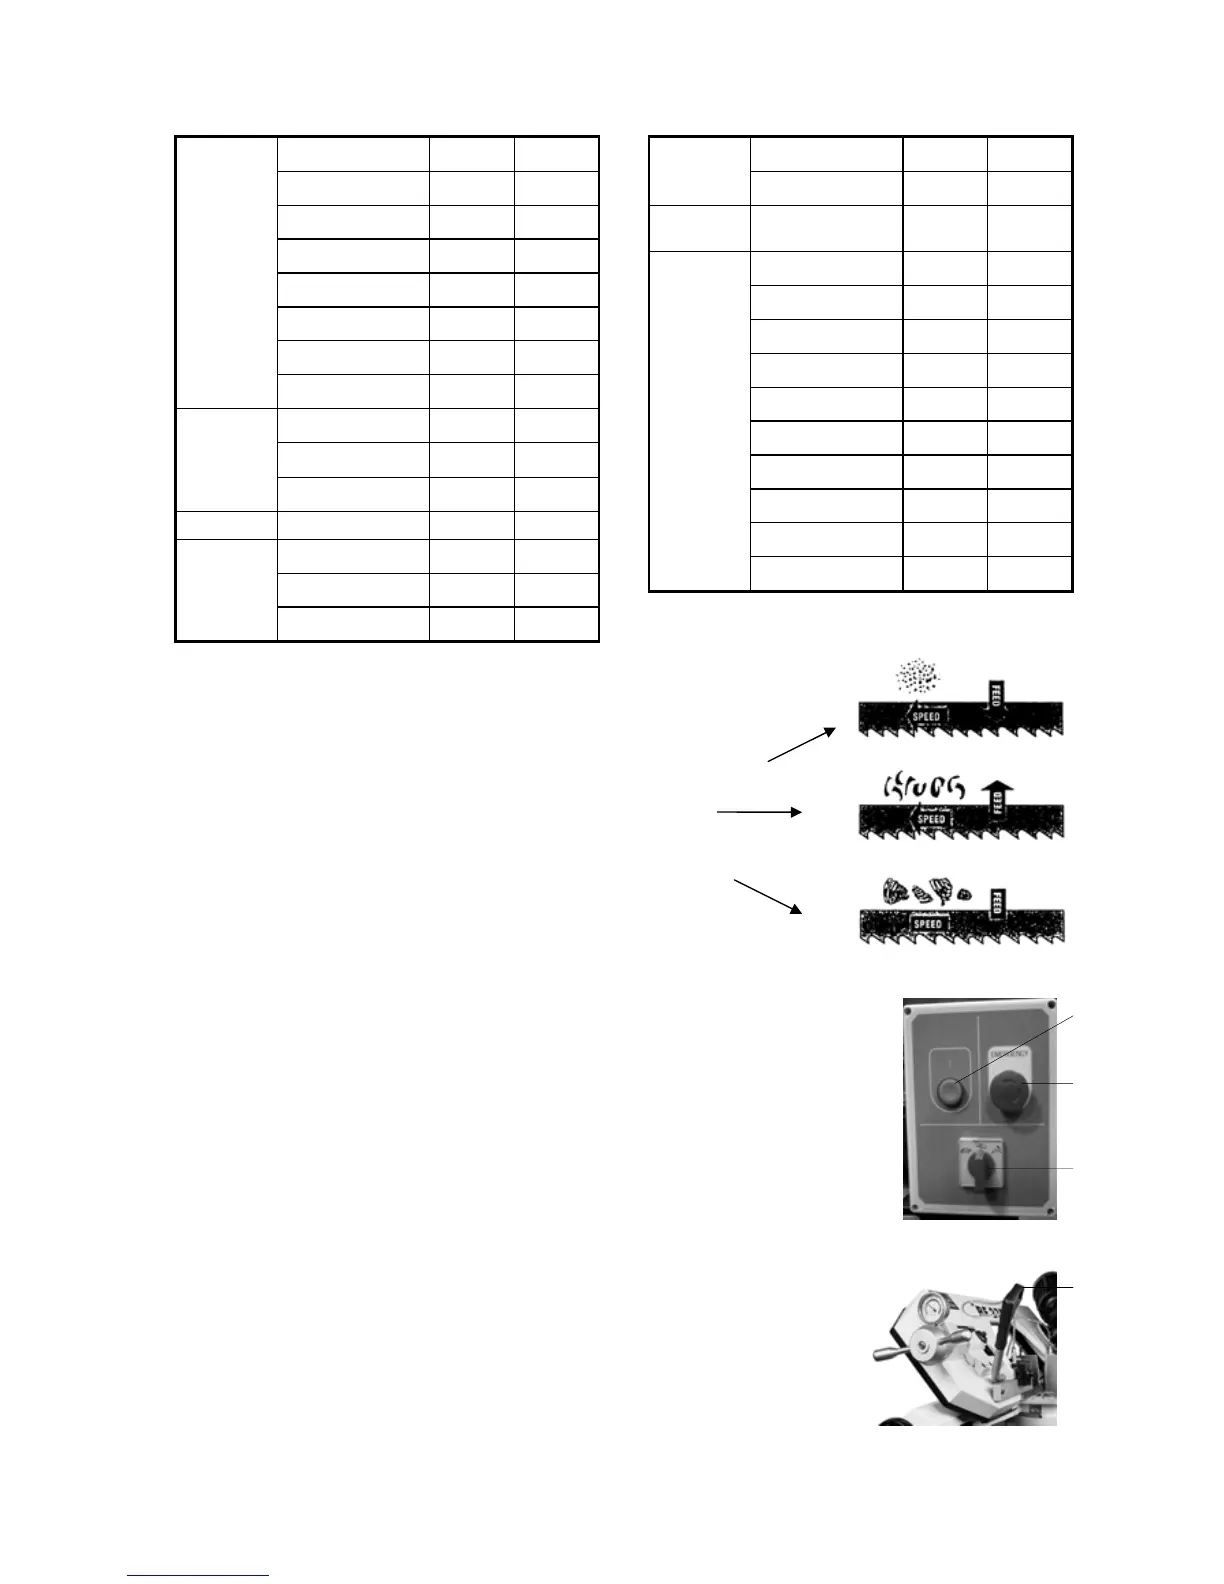
TELLTALE CHIPS
Chips are the best indicators of correct feed force. Monitor chip information and adjust
feed accordingly.
Thin or powdered chips – increase feed rate or reduce band speed.
Burned heavy chips – reduce feed rate and/or band speed.
Curly silvery and warm chips – optimum feed rate and band speed.
9.USE OF MAIN MACHINE PARTS
9-1.POWER SYSTEMS AND CONTROL PANEL
The electrical rating of your band saw is either with 230 volt-single phase, or 400 volt-3
phase, magnetic control.
Before connecting your machine to an electrical power system, be sure the motor shaft is
running in the correct direction.
We recommend that 1.5mm² fused with a 10 amp, dual element, time lag fuse, to be used to
supply power to all machines regardless of their electrical rating.
Refer to the electrical wiring diagram supplied with your machine for instructions
on how to connect saw to power source. Power must be cut off when wheel cover
is opened or during repairing.
Please check the moving direction of the blade. If the blade is moving in the wrong direction,
please re-connect the wire.
9-2.STARTING AND STOPPING MACHINE
1. Light (D) will be on when power is connected.
2. Start the motor by turning the start button (C), Push the button (E) to start blade
saw. Unhand button (E) stop The motor.
3. Turn (A) ( 0-close,1-open) to open the coolant system
4. When saw blade is closing work piece. Or when the cut is completed, turn off the
coolant system (A)
5. Press emergency button (B) to shut-off the motor when in emergent situation.
B
A
C
E