10
Installation
The safest way to install the
Trailer Valet
!
!
WARNING
WARNING
is while the trailer is securely mounted to
your vehicle or mounted on an exis ng jack.
Crank Handle
Items sold separately:
Standard Drill/Driver (minimum drive
torque
Drill A achment (available at
www.trailervalet.com)
2) Upon removing the dolly from packaging, it is
very important to thoroughly inspect all
parts of the system before using the device.
Any part that is missing or damaged must be
immediately replaced. Contact Trailer Valet
Customer Service at 1-626-400-6299.
Only use the !!
WARNINGWARNING
in the box
Step 1: CHOOSE A LOCATION ON THE
TONGUE WHERE
THE TRAILER VALET CAN FREELY ROTATE
FROM ITS VERTICAL POSITION TO ITS
HORIZONTAL STOW POSITION.
The moun ng bracket has 7 holes to fit a variety
of trailer frames. Have a tongue clearance of at
least 13 inches off the ground before installing
the bracket. Set aside 8 inches of space on the
tongue for the moun ng bracket.
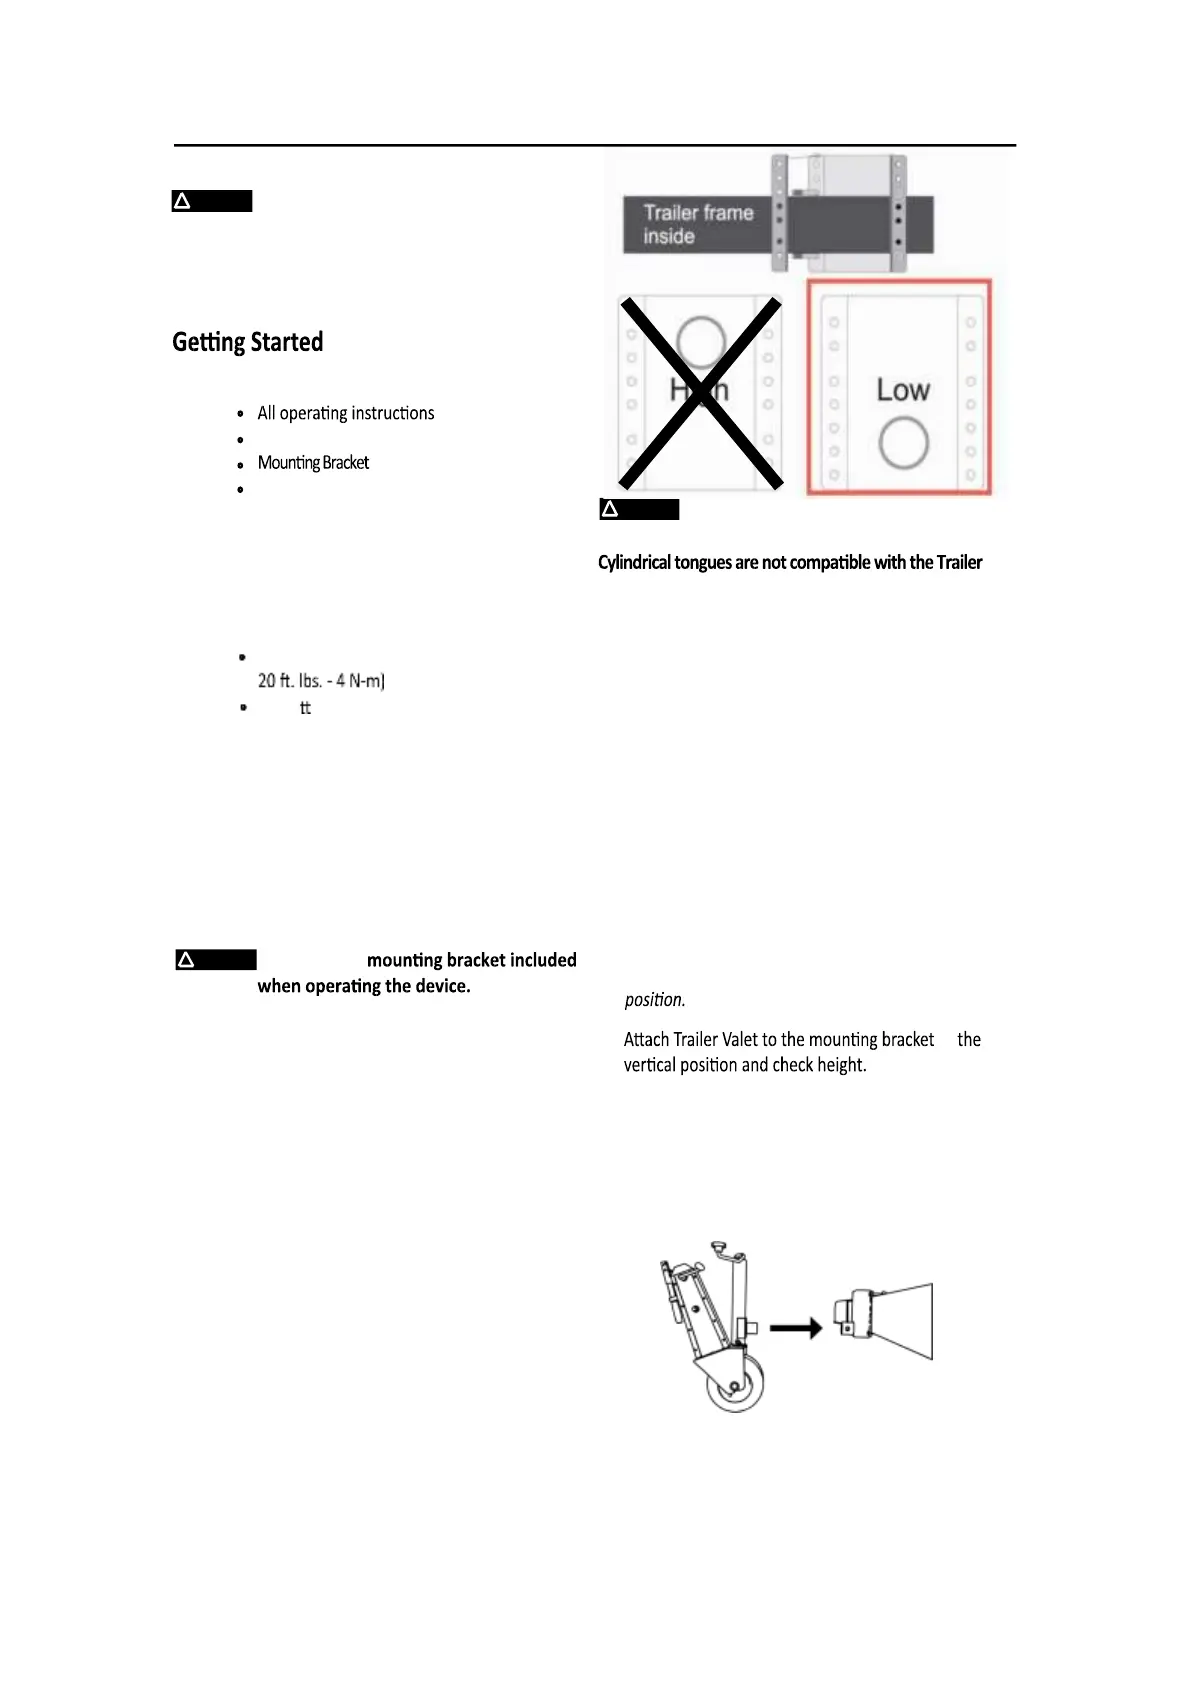
WARNING
!
! WARNING The Trailer Valet is
only to be installed on trailer tongues that
are rectangular in pro file.
Valet as it will rotate, allowing the trailer
to drop.
Step 2: INSTALL THE MOUNTING BRACKET
1) Place the moun ng bracket (Part Number 20)
and clamps (Part Number 21) onto the area
of the tongue you designated in Step 1, and
secure onto the tongue with the 4 bolts, each
bolt having one washer, one spring washer
and one nut. Do not completely ghten the
bolts yet.
NOTE: It is recommended that you make
sure the Trailer Valet will have the
necessary clearance from the ground to
operate and rotate into the stow
2)
NOTE: The trailer should be high enough
so that the Trailer Valet is at least 1 inch
off the ground at this stage of installa on.
If the Trailer Valet is not high enough,
adjust trailer height or moun ng bracket
and test again.
3)Evenly and firmly ghten the 4 bolts.
S ep 3: SECURE THE TRAILER VALETt
Set the stow pin to secure the Trailer Valet and set the
Things you will need to operate your Trailer Valet: