The Trailer Valet RVR12 is a remote-controlled, motorized trailer mover designed to assist in precisely maneuvering trailers in various settings, particularly where space is limited or manual pushing is impractical. It operates on a track-based system, providing enhanced traction and stability for moving trailers.
Function Description
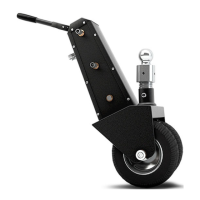
The RVR12's primary function is to move trailers with precision using a remote control. It attaches to the trailer's hitch ball, effectively becoming a motorized dolly that can push or pull the trailer. This allows for easy parking in tight spots, navigating around obstacles, or positioning a trailer without the need for a tow vehicle. The device is designed for vertical loading, meaning it primarily handles the downward force of the trailer tongue weight.
Usage Features
The RVR12 offers several features to facilitate its operation:
- Remote Control Operation: The device is controlled wirelessly via a handheld remote. This allows the operator to stand at a safe distance and have a clear view of the trailer's movement and surroundings, enhancing safety and precision.
- Multi-Speed Toggle: The remote control includes a 3-speed toggle (fast, moderate, and slow) to adjust the RVR12's movement speed. This is particularly useful for fine-tuning maneuvers, especially when turning at sharp angles or navigating challenging terrain. The manual notes that slower speeds might require switching to moderate or fast for 90-degree turns, and terrain/incline can affect maneuverability.
- Control Stick: The remote features a control stick for directional movement. The manual emphasizes that this stick is sensitive, and accidental movements can cause the valet to move. It is recommended to turn off the remote's power switch when not in use to prevent unintended operation. The remote will also beep if left on for a couple of minutes without use, serving as a reminder, not an indicator of low battery.
- Coupler Set Attachment: The RVR12 attaches to the trailer using a coupler set, which includes a custom hitch ball (2" or 2-5/16"), a coupling plate, a custom ball base, a base tower, a rotation/security pin, and a spanner wrench. The attachment process involves securing the coupling plate and hitch ball to the base, then placing the ball base into the RVR's base tower. The trailer tongue is then raised to slip the hitch ball into the coupler, and a locking nut is tightened with the spanner wrench to prevent the ball from slipping out.
- Battery and Charging: The RVR12 is powered by a lithium battery, which requires a full charge before first use (6-8 hours). The unit has a charging jack and an indicator light that turns red when charging and green when fully charged. It's recommended to keep the unit charging when not in use. The remote control also uses rechargeable AA batteries and has its own charging port and indicator LED. The remote charger should only be used with the supplied rechargeable batteries (1200mAh Ni-MH or Ni-Cd 'AA') to avoid damage.
- Safety Guidelines: The manual stresses several safety precautions, including not using the RVR on slopes beyond stated limits, avoiding submerging it in water, reading all instructions carefully, and exercising common sense. It also warns against operating the device while tired or under the influence, or allowing children to operate it. Operators and bystanders should keep body parts clear of the product and load.
- Pre-Operation Checks: Before each use, operators must check the RVR for functionality and charge, and inspect for any damaged parts. The tracks and bottom of the RVR should be free from obstruction. After lifting the RVR off the ground, it's crucial to ensure the sprockets are correctly seated on the tracks to prevent damage.
- Slope Operation: When moving a trailer up a slope, the RVR must push the trailer, potentially one wheel at a time. When moving down a slope, the RVR must lead the trailer. For downhill movement, it's important to turn the RVR 180 degrees so it moves in reverse, with the antenna facing the trailer, to prevent it from tipping over forward. The RVR is designed for use on solid surfaces and should not be used on excessively soft or muddy terrain where it cannot gain traction. If traction is an issue on a solid surface, shifting more trailer weight forward is suggested. The RVR should not be used on slopes exceeding a strict maximum of 5 degrees on paved/concrete surfaces, as this rating can be affected by various factors.
- Circuit Breaker: The RVR has a circuit breaker that will trip if the unit is overloaded. To reset it, the top cover must be opened to push the button down. If it pops back up, a 1-minute wait is recommended before trying again.
- Trailer Brakes: If the trailer has built-in brakes, they must be disengaged before operating the Trailer Valet.
Maintenance Features
The RVR12 requires specific maintenance to ensure optimal performance and longevity:
- Track Tension Adjustment: Over time, the tracks will stretch. To tighten them, a 14mm socket wrench is used to loosen a retaining bolt (only a half to quarter turn). A wedge implement, like a flathead screwdriver, is then inserted into a tensioning notch to move it away from the retaining bolt, tightening the track. The retaining bolt is then re-tightened to secure the track.
- Tread Section Replacement: If treads are damaged, individual sections can be replaced. This involves removing two adjacent rotoclips and two track pins from the front end of the tug, along with two track links. A hammer can be used to tap the track pin through the rotoclip (the rotoclip will not be reusable). New track links are overlapped, and a new track pin and rotoclip are inserted using a retainer clip tool. After replacement, the track pin and rotoclips should rotate freely, and there should be about 1/2" of play at the center of the track. Plastic track covers are then reinstalled.
- Visual Track Inspection: Regularly inspect the tracks for wear on the treads and inner plastic surfaces. Also, check for damaged or missing rotoclips, which can occur from driving over small rocks. Damaged treads should be replaced before operating the RVR.
- Remote Battery Replacement: The remote control batteries can be replaced by removing four cover screws from the back of the case. The manual describes two options: replacing a shrink-wrapped battery pack or installing a supplied battery tray with six rechargeable 'AA' Lithium Ion batteries.
- Periodic Recharging: If the RVR goes unused for more than two months, it's highly recommended to inspect and charge the battery to maintain maximum battery life and performance.
- Storage: Do not store the RVR in direct sunlight or at high temperatures, as this can drain the battery quickly and potentially damage it, voiding the warranty.
- Factory Replacement Parts: When servicing the RVR, only factory replacement parts should be used.