18-HE58D1-6 3
Installer’s Guide
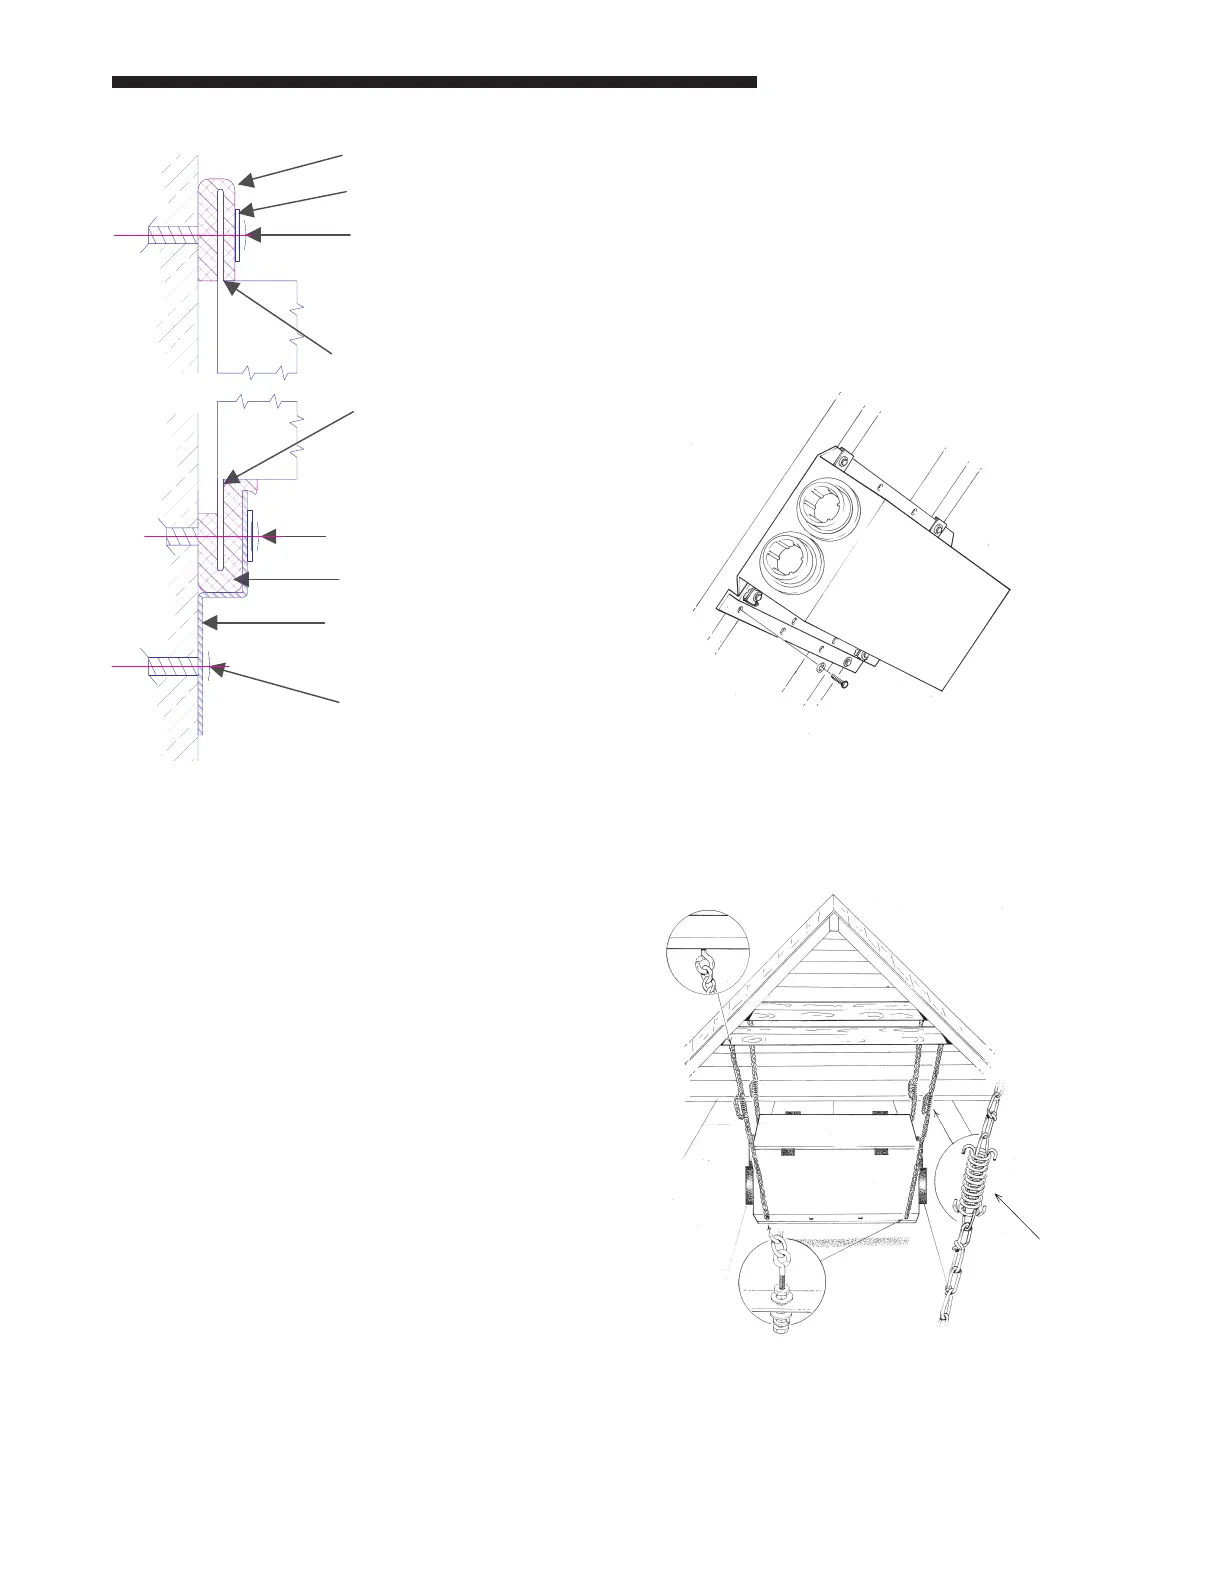
Foam Tape
Metal Washer
Lag Screw or Co
nc
rete
Anchor (supplied by installer)
Unit Flange
Lag Screw or Concrete
Anchor (supplied by installer)
Foam Tape
Hanging Bracket
Optional Washer and Screw
(supplied by installer)
Wall
Figure 2
INSTALLATION ON A STUD WALL
Mount the unit using the supplied hanging bracket kit
as described for installation on a concrete foundation.
Use appropriate fasteners for a stud wall (supplied by
installer). Be sure the fasteners are properly selected
to support the load. Note that the hole layout on the
integral mounting flanges and the hanging bracket are
spaced for 16” or 24” on center framing patterns.
INSTALLATION ON OVERHEAD FLOOR JOISTS (Ac-
cess Door Swings Open Down)
The unit may be fastened directly to floor joists using
the hanging bracket and integral flange. Mount as
described for installation on a concrete foundation wall
except use appropriate fasteners for a floor joist supplied
by installer. Be sure the fasteners are properly selected
to support the load.
ATTIC INSTALLATION
INSTALLATION ON ROOF RAFTERS
The unit may be mounted directly to the roof rafters.
(See Figure 3) Mount as described for installation on a
concrete foundation wall except use appropriate fas-
teners for a roof rafter. Be sure fasteners are properly
selected to support the load.
Figure 3
SUSPENSION OF ERV FROM ROOF RAFTERS
Suspend unit from the roof rafters. The unit may be
suspended from the roof rafters by chains and springs,
supplied by the installer. See Figures 4, 4a, and 5.
Figure 4
Spring option is
an alternative to
the spring with
safety chain
 Loading...