6 ACC-SVN231A-EN
Installation – FIADMPR102*
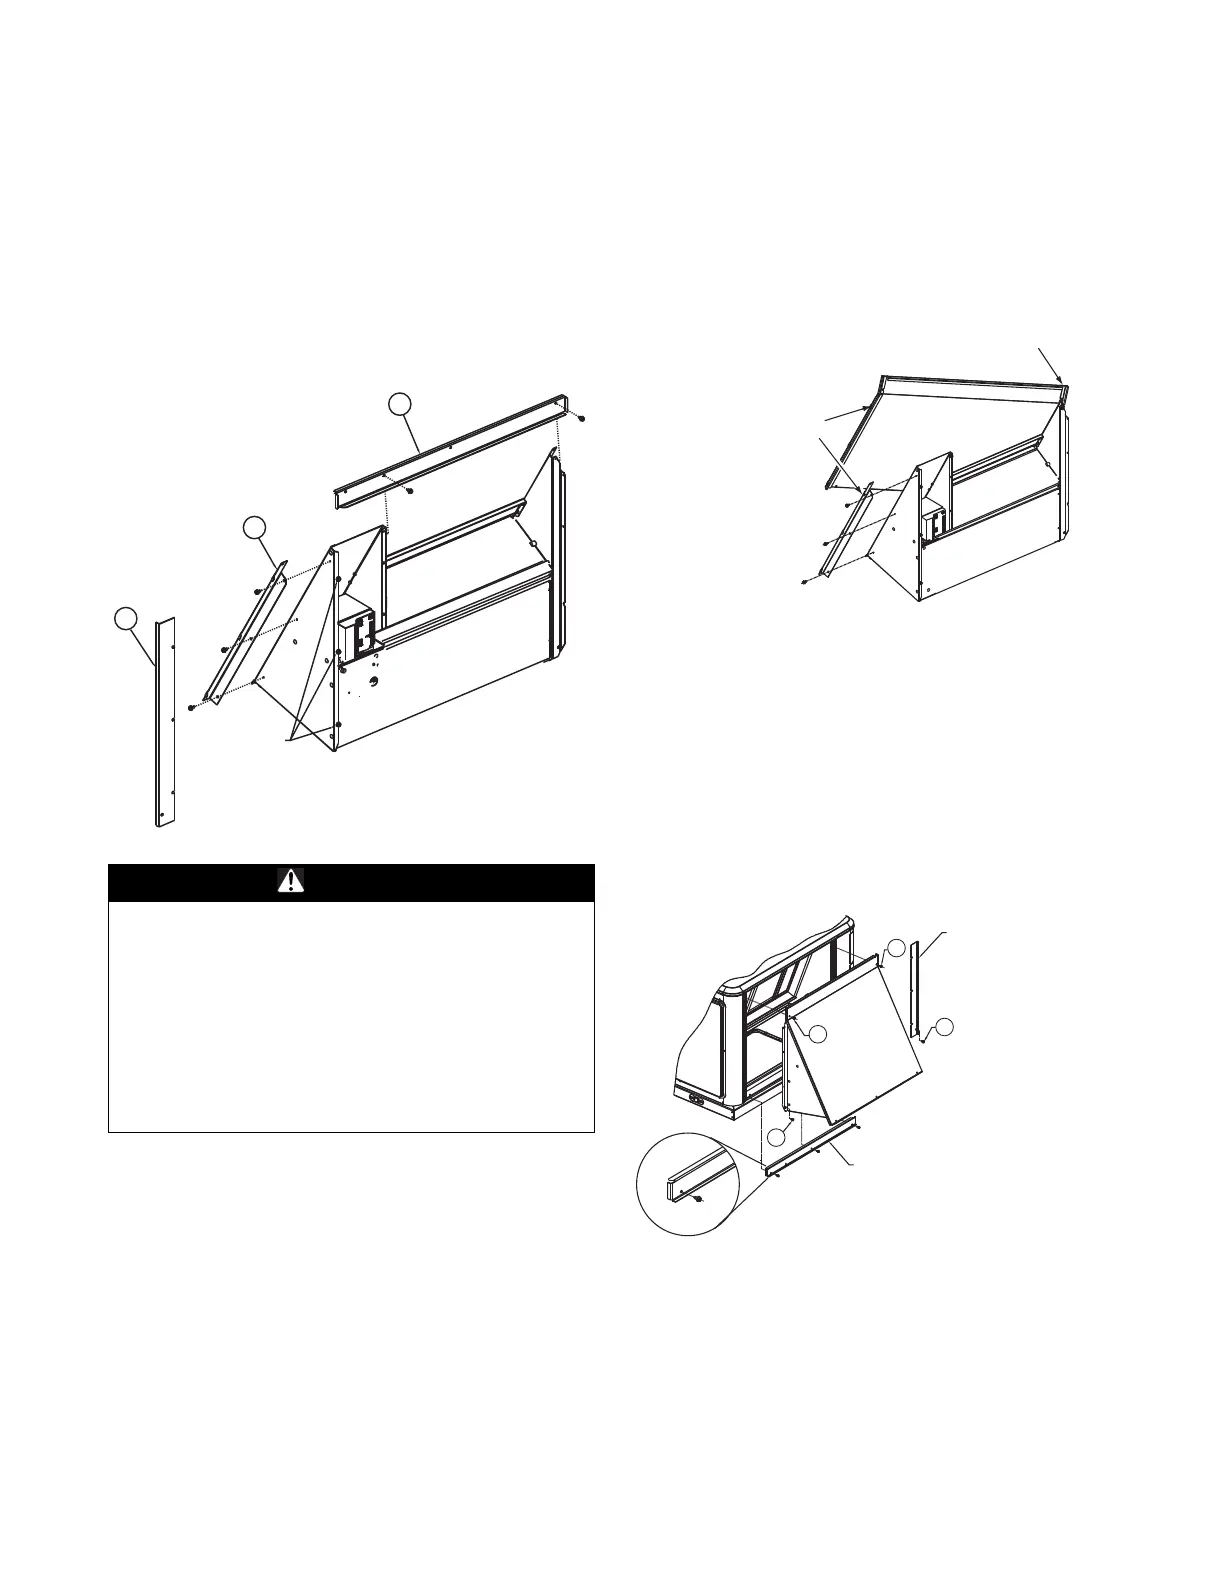
Uncrate the damper and locate all parts shown in Figure 1.
Each damper ships with items 1, 2 and 3 attache
d. Remove
screws completely from items 1 and 2. Remove item 3 by
loosening the three screws but do not remove them. See
figure below.
Figure 1. Damper
components
WARNING
Hazardous Voltage w/Capacitors!
Failure to follow instructions below could result in
death or serious injury.
Power down the outdoor unit
before making contact
with the inverter circuit board. Follow proper lockout/
tagout procedures to ensure the power cannot be
inadvertently energized.Wait for at least 15 minutes to
allow the unit to fully discharge high DC voltage.
Confirm the unit is fully discharged using a CAT III or IV
voltmeter rated per NFPA 70E.
1. Remove unit end panel, retain the screws removed
fro
m the top of panel and the screws removed from
bottom of panel for use later
2. To install the damper, lift into pos
ition by fitting the
upper left hand corner around the channel in the
cabinet post. Then pivot the damper into the opening
in the cabinet. Refer to Figure 2, p. 6.
3. Once the damper is in place, lift the damper and panel
assemb
ly to align the upper two screw holes. Secure
the top by inserting two screws, top left 1 then top right
2. Refer to Figure 2, p. 6.
4. Pull out on the bottom of the
damper and secure
bottom left 3. Refer to Figure 3, p. 6.
Figure 2. Damper panel
5. Remove the filter access panel. Position the adapter
backing plate inside the filter section. The adapter
backing plate will slip over the three screws that were
loosened in Figure 1, p. 6. Align the screw engagement
ho
le in the adapter backing plate, with the screw
clearance hole in economizer side panel and secure
lower right side of damper with screw four. Refer to
Figure 2, p. 6.
6. Install the bottom blockoff and secure
with three
screws. Refer to Figure 3, p. 6.
Figure 3. Bottom blockoff
1
2
3
Do not
remove screws
Align (3) tabs on bracket
with (3) slots in panel.
Pivot into place and
secure with three screws
engaged into damper
side panel.
Align (3) slots in panel
with (3) tabs on damper
side panel. Pivot panel
into place.
Adapter
Backing Plate Panel
Bottom Blockoff
1
2
3
4
 Loading...