9
4. INSTALLING THE TREX RAINESCAPE
TROUGHS
NOTE: If installing when temperatures fluctuate
drastically, be sure to acclimate trough material before
installing. Especially if you are using black. Here are
two ways.
»
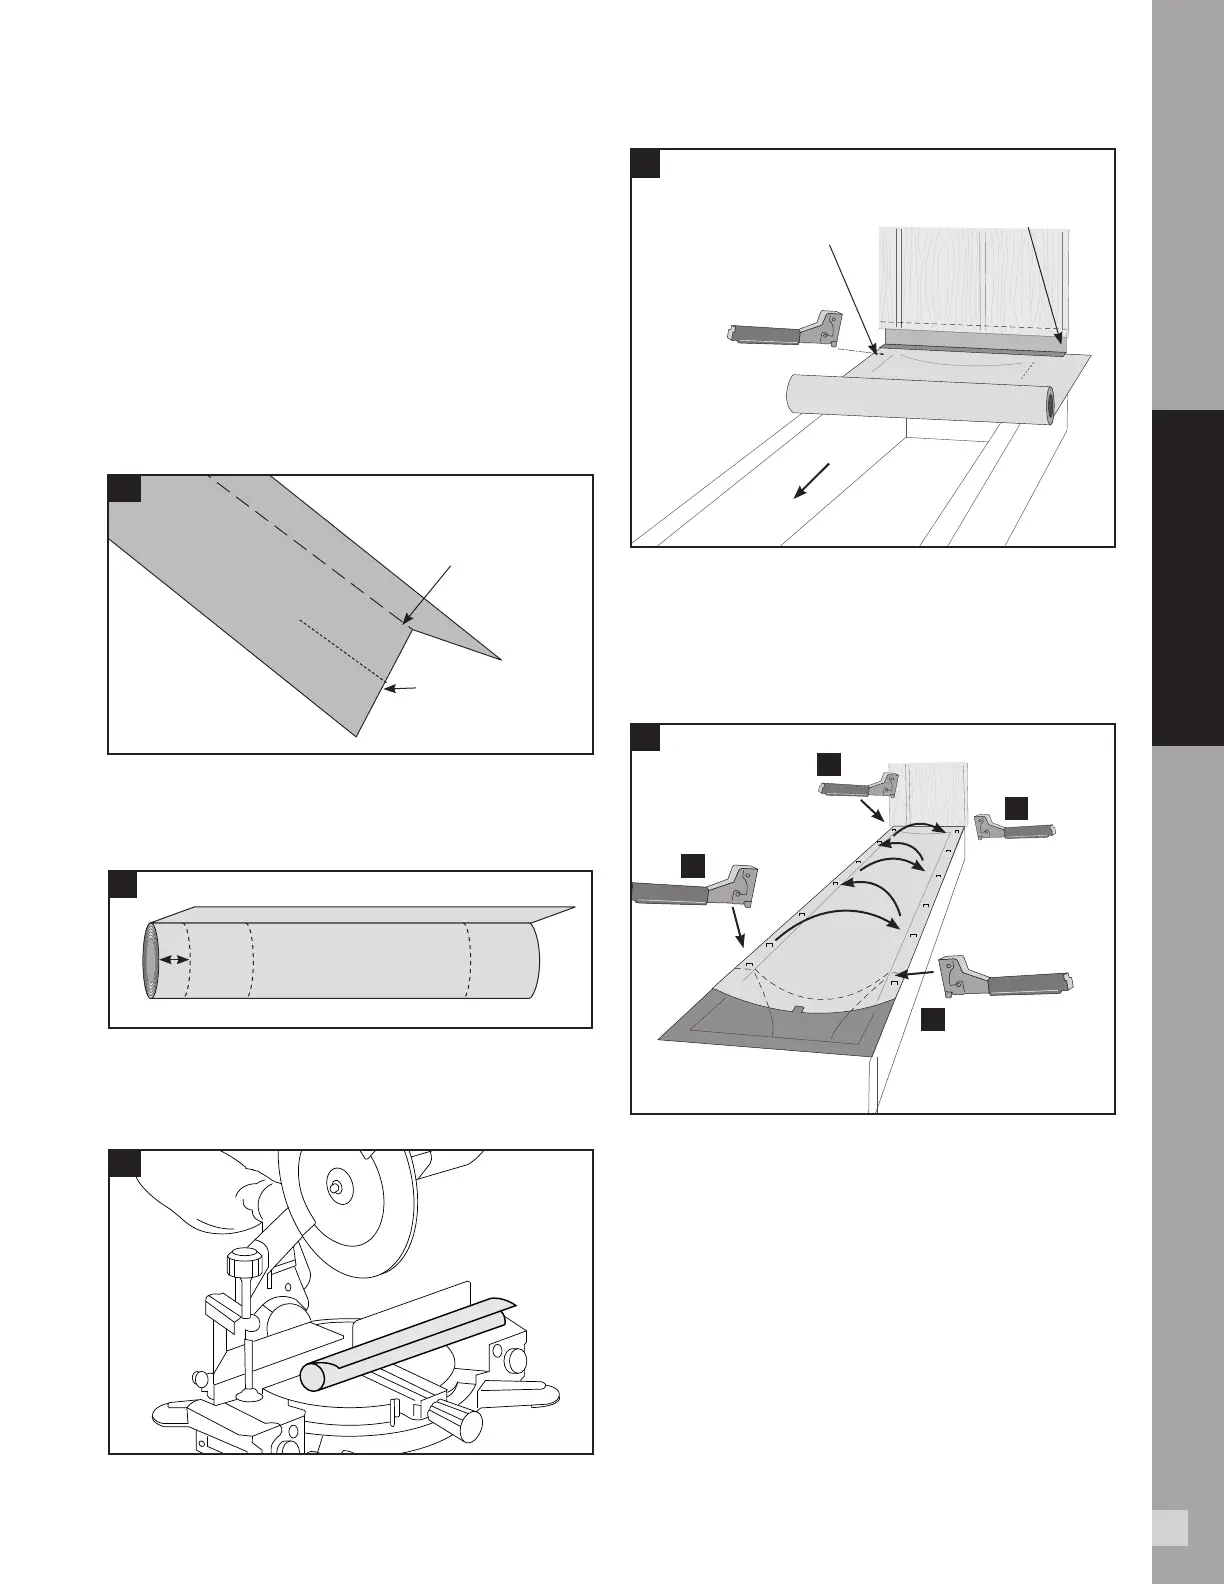
Fold a soft crease down the center of the trough.
Be sure to account for the oset if installing for
a 12" joist bay. (4A)
»
Unroll trough material, giving plastic time to relax
and acclimate to outdoor temperatures.
TO EASE INSTALLATION, FOLD A
SOFT CREASE DOWN THE CENTER OF
THE TROUGH BEFORE INSTALLING.
IF INSTALLING IN A 12" JOIST
BAY THE FOLD NEEDS TO BE
OFFSET TO ACCOMMODATE
THE JOIST BAY
1-1/2" 4" CUT LINE
4C
4A
4B
UNROLL USING
1
1
/2" SCORE MARK
ON INSIDE OF
JOIST AS A GUIDE
SLIDE TROUGH UNDER FLASHING
PLACE FIRST STAPLE
ROLL
UNROLL TO THE DOWNSPOUT
SMOOTH/SHINY SIDE FACES UP
4D
»
When working with the Trex RainEscape trough
material, ensure that the smooth/shiny side
always faces up.
»
If installing the system on 12" o.c. joist, cut the 1 - 1/2"
score mark side back 4". Then align the left edge of
the trough with the outside of the joist. (4B)
» Hold roll so 1 -
1/2"
score mark is on the left. (4D)
» Line up the 1 -
1/2"
score with the second joist.
» Place first staple at ledger board on 1 -
1/2"
score
mark side. (4E)
1
2
3
4
PLACE 3RD STAPLE THROUGH
TROUGH AND DOWNSPOUT
PLACE FIRST
STAPLE
AT LEDGER
PLACE SECOND
STAPLE BEFORE
DOWNSPOUT
FINISH STAPLING EVERY
8" TO 10" GOING FROM
SIDE-TO-SIDE UNTIL YOU
REACH THE LEDGER
4E
»
Unroll trough to downspout using 1 -
1/2"
score
mark on inside joist as guide.
»
Cut trough to length to back wall of downspout.
»
To remove memory from sheet, backroll the last
few inches of the trough. (4F)
NOTE: If run is longer than 12', put down second staple
halfway down second joist.
7
»
Measure over 4" on the 1-1/2" score mark side and cut
o for 12" on center joists. (4C)
BASIC INSTALLATION



 To Next Page