Correct excavation of the pool is very important. A hole that is too small can mean hours of picking and shovel-
ing by hand. A hole that is too large will require extra import material, which if not dealt with properly, can result in set-
tling or bulging of the pool.
The excavation should be dug very close to the pool size with a minimum disturbance to the unexcavated soil
which will support the pool. The clearance is approximately 6” on the sides and 6” on the ends (Fig 2). The depth of the
excavation is determined with the use of a transit level and a measuring stick. The bottom of the excavation is over dug
approximately 4”. This size pool will require approximately 25 to 30 yards of sand for backll (more may be required if
the pool is over dug).
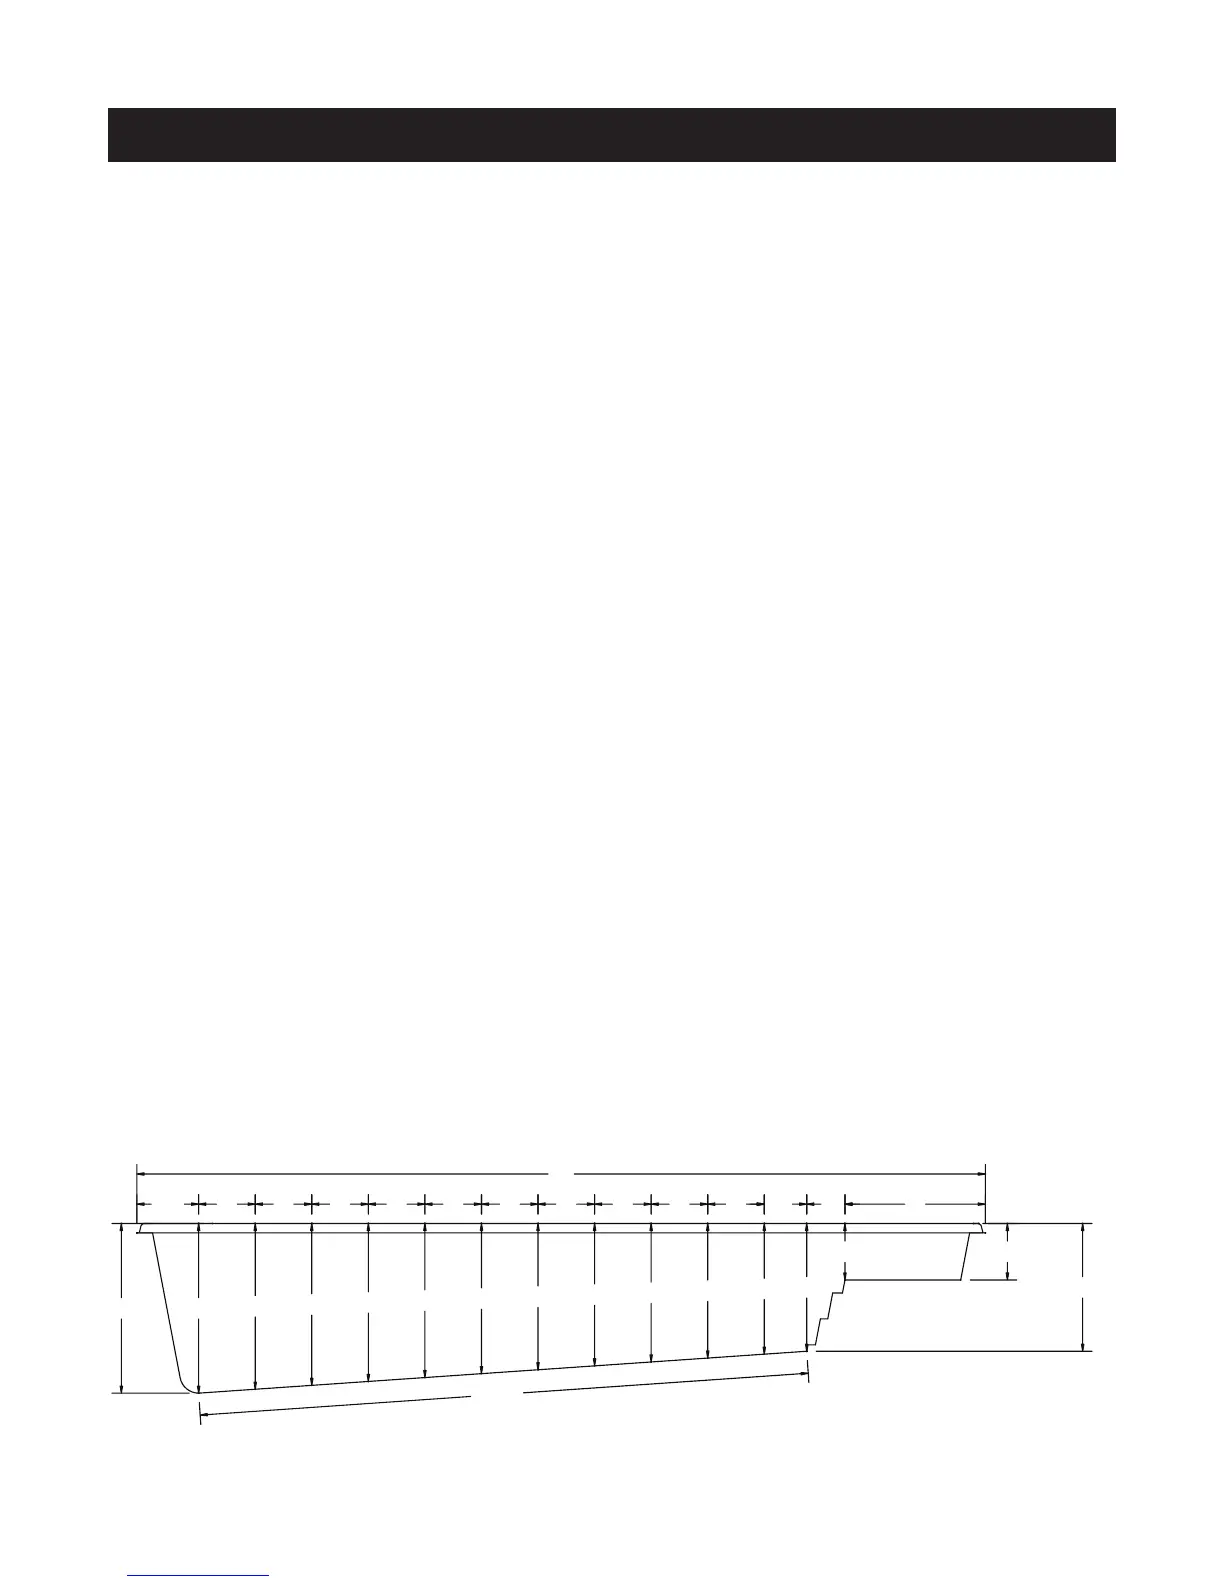
The excavation should be 14’ by 30’, with a total depth of approximately 4’ 4” (shallow end) to approximately
6’ 3” (deep end) from the desired elevation of the pool. It can be helpful to give yourself extra room the rst 6” in width
and 12” in depth of the hole, to get past the coping, and allow space for the skimmer and the main drain. Also, keep in
mind that the wall of our pools are tapered, usually 1” in for every 12” in depth. A place for the skimmer must also be
dug in the side of the excavation wall. The skimmer cutout should be 2’ by 2’ and 3’ deep. See Figure 1. for placement.
If dramatic over digging occurs in the bottom of the hole, never use excavated material to ll in the hole to the
desired depth. The material will settle. We suggest road base (a tamper may be needed) compacted thoroughly, and
topped with sand. If the sides of the hole are dramatically over dug, road base should be used beyond the six inches
of sand. Both should be compacted thoroughly during the backll process. In the case of over excavation on the sides
of the pool in seasonal high water or poor drainage areas, you may want to mix 10% Portland cement to the backll for
stabilization.
In areas that experience seasonal high water or experience considerable water seepage during excavation, a
permanent sump line (see Cross Section A-A) must be installed to alleviate the excess water and the associated hydro-
static pressure accompanying it. Trilogy suggests digging an 18” x 8’ x 18” trench across the deep end of the excava-
tion. Six inches of 1 1/2” rock should be placed in the bottom of the trench. A joint of 3” perforated PVC pipe is placed
on the rock base and connected to a vertical stand of 8” PVC pipe running to the surface of the excavation. The 8” PVC
should be trimmed with a skimmer ring and lid for aesthetics and safety. After the connection has been to the vertical
stand of 8” PVC, nish covering the 3” perforated PVC pipe with 1 1/2” to 2” rock to the bottom of the excavation (See
Cross Section A). Cover the new sump line with fabric. The bottom of the excavation is now ready for approximately 4” of
sand bedding.
Step 4.
EXCAVATION
4'-6"
6' 6'
5'-10"
5'-9"
5'-7"
5'-5"
5'-4"
5'-2"
5'
4'-11"
4'-9"
4'-7"
4'-6"
2'
2'
5'
1'-4"
1'-6"
2'2'2'2'2'2'2'2'2'2'2'-2"
30'
21'-7"
 Loading...