Your pool will arrive on a truck-trailer combination. Be sure to inspect the pool for damage that may have oc-
curred during transportation and for conformity to order specications. A crane or excavator will lower the pool into the
excavation. Please note that Trilogy recommends lifting all pool models over 12’ wide with a spreader bar and 20’ lifting
straps. Once the pool is set in the excavation, the pool should be checked for level and the bottom should be walked
over to detect any voids in the sand that might be present. The pool is then lifted and reset as many times as necessary
to achieve a “good t”. A good t is realized by raking the surface of the sand in order to see where the pool’s perimeter
is touching (footprint) after it is removed and also by walking around on the inside of the pool to detect low spots. It is
normal to feel a slight void under the center of the pool. This will disappear under the weight of the water. It is important
to make certain that the bottom perimeter and all transition points are sitting rmly against the sand bed. The pool can
be separated from the lifting equipment when the entire perimeter of the pool (including all transitions) leaves a clear
footprint and the pool is within 1/2” of level.
A properly prepared hole should not require the lling of large voids beneath the pool. Blindly washing sand
beneath a pool can cause more harm than good. It is important that any adjustments to the pool’s elevation be made
before water is added. If a pool was properly set, nothing more than a few minor adjustments should be needed.
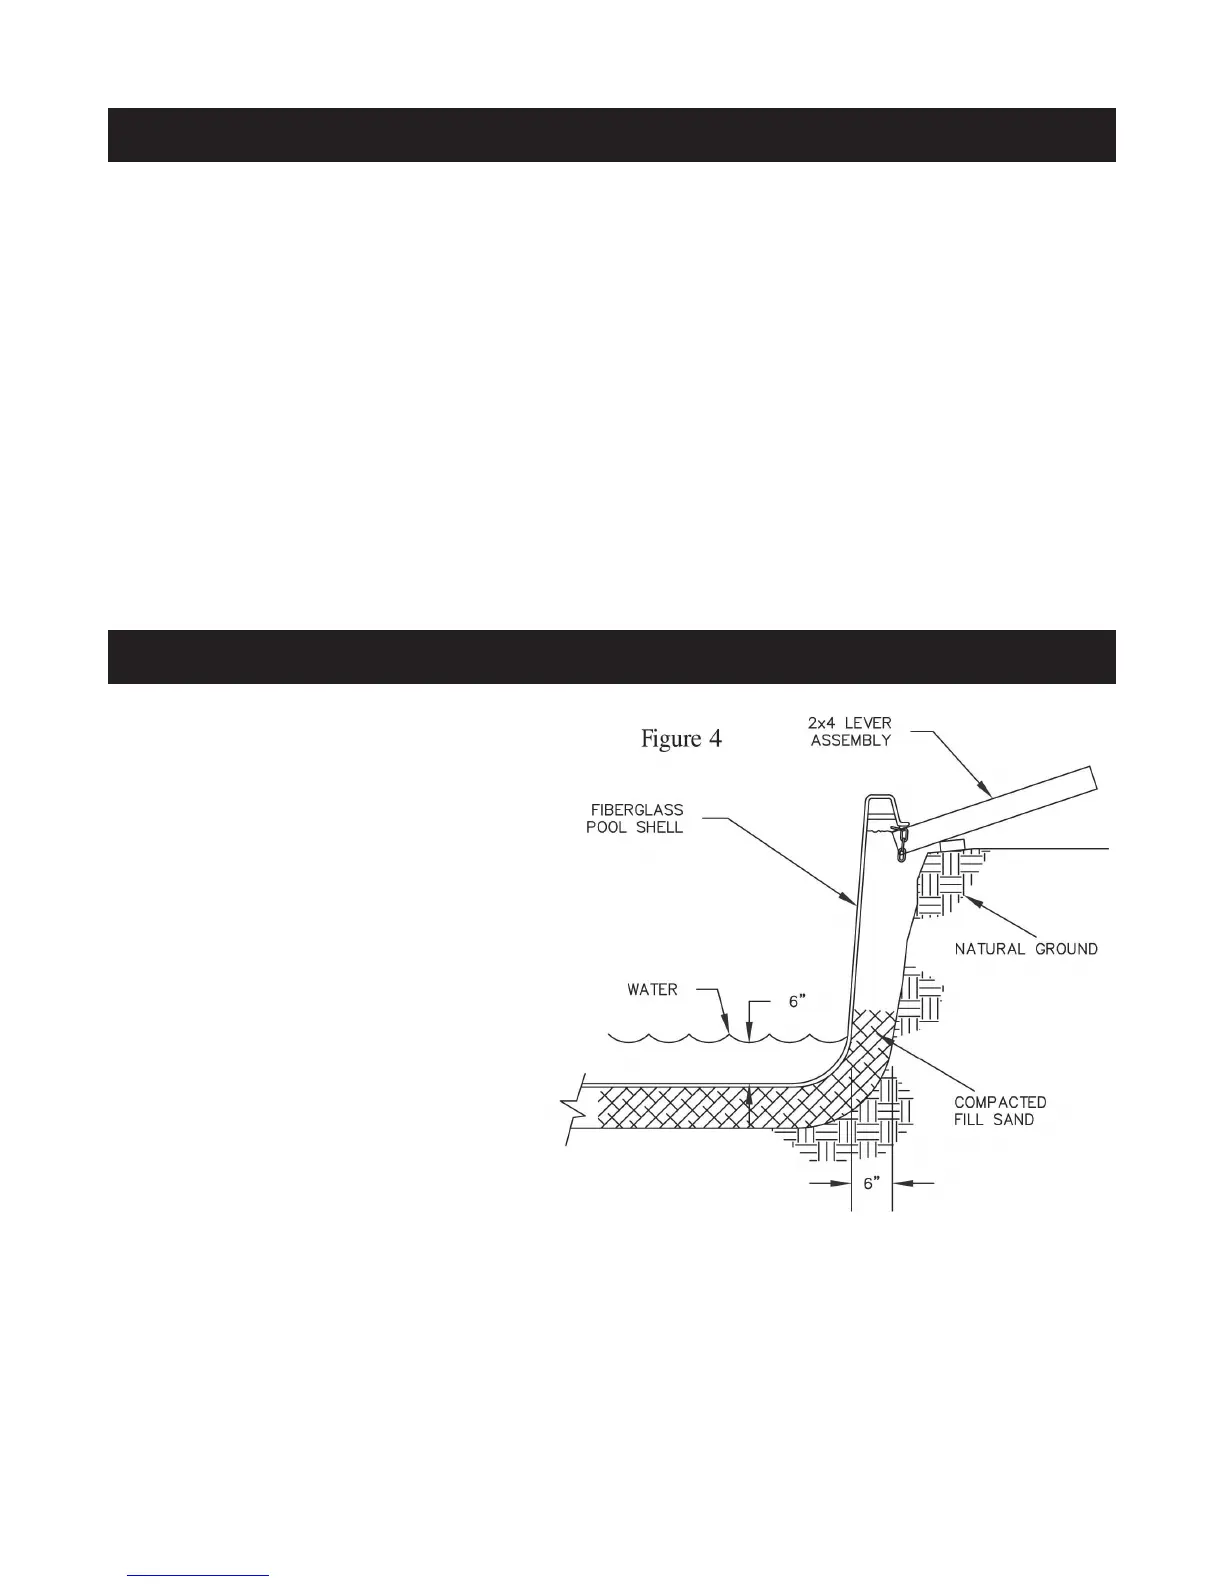
“Locking in” is the process of placing
and tamping the rst 6” of backll around the
radius of the pool to hold it rmly in place during
the installation process. After your pool is “locked
in, start the water in the pool and continue the
backll process. The level of water in the pool
and the level of sand outside the pool should be
within 6” of each other. Continue lling the pool
and backlling until 4” to 6” of water are in the
pool. Check the level of the pool. If the pool was
properly “locked in”, no adjustments should be
necessary. If any movement has occurred, small
adjustments must be made at this time by placing
a lever assembly under the coping of the pool
(Fig 4.). If adjustments are needed, (low condi-
tion) raise the pool to the proper height and place
sand under the pool. When the proper height
is achieved, continue the lling and backlling
process. If the pool is to high, remove sand as
needed. It is very important that the radiuses of the pool are packed properly. Poorly packed radiuses can result in
hairline cracks or structural cracks due to deection. Be sure to backll slowly and thoroughly. When the proper height
is achieved, continue with the lling and backlling process.
After approximately 12” of water is in the pool and backll has been placed evenly, the backll should be
allowed to precede the water by 6”. As the water approaches the shallow end, pay particular attention to all the unsup-
ported areas of the pool. Steps and swimouts tend to droop, so slight adjustments may need to be made with the lever-
ing device as mentioned before (Fig 4). Be sure you wait until a sufcient amount of water surrounds the area (usually
12”) to keep the rest of the pool in place, or you may raise more than you intend. The walls of the pool may bulge inward
Step 6.
SETTING THE POOL
Step 7.
WATER AND BACKFILL
 Loading...