2 Overview of the Trimble M3 Total Station
16 Trimble M3 Total Station User Guide
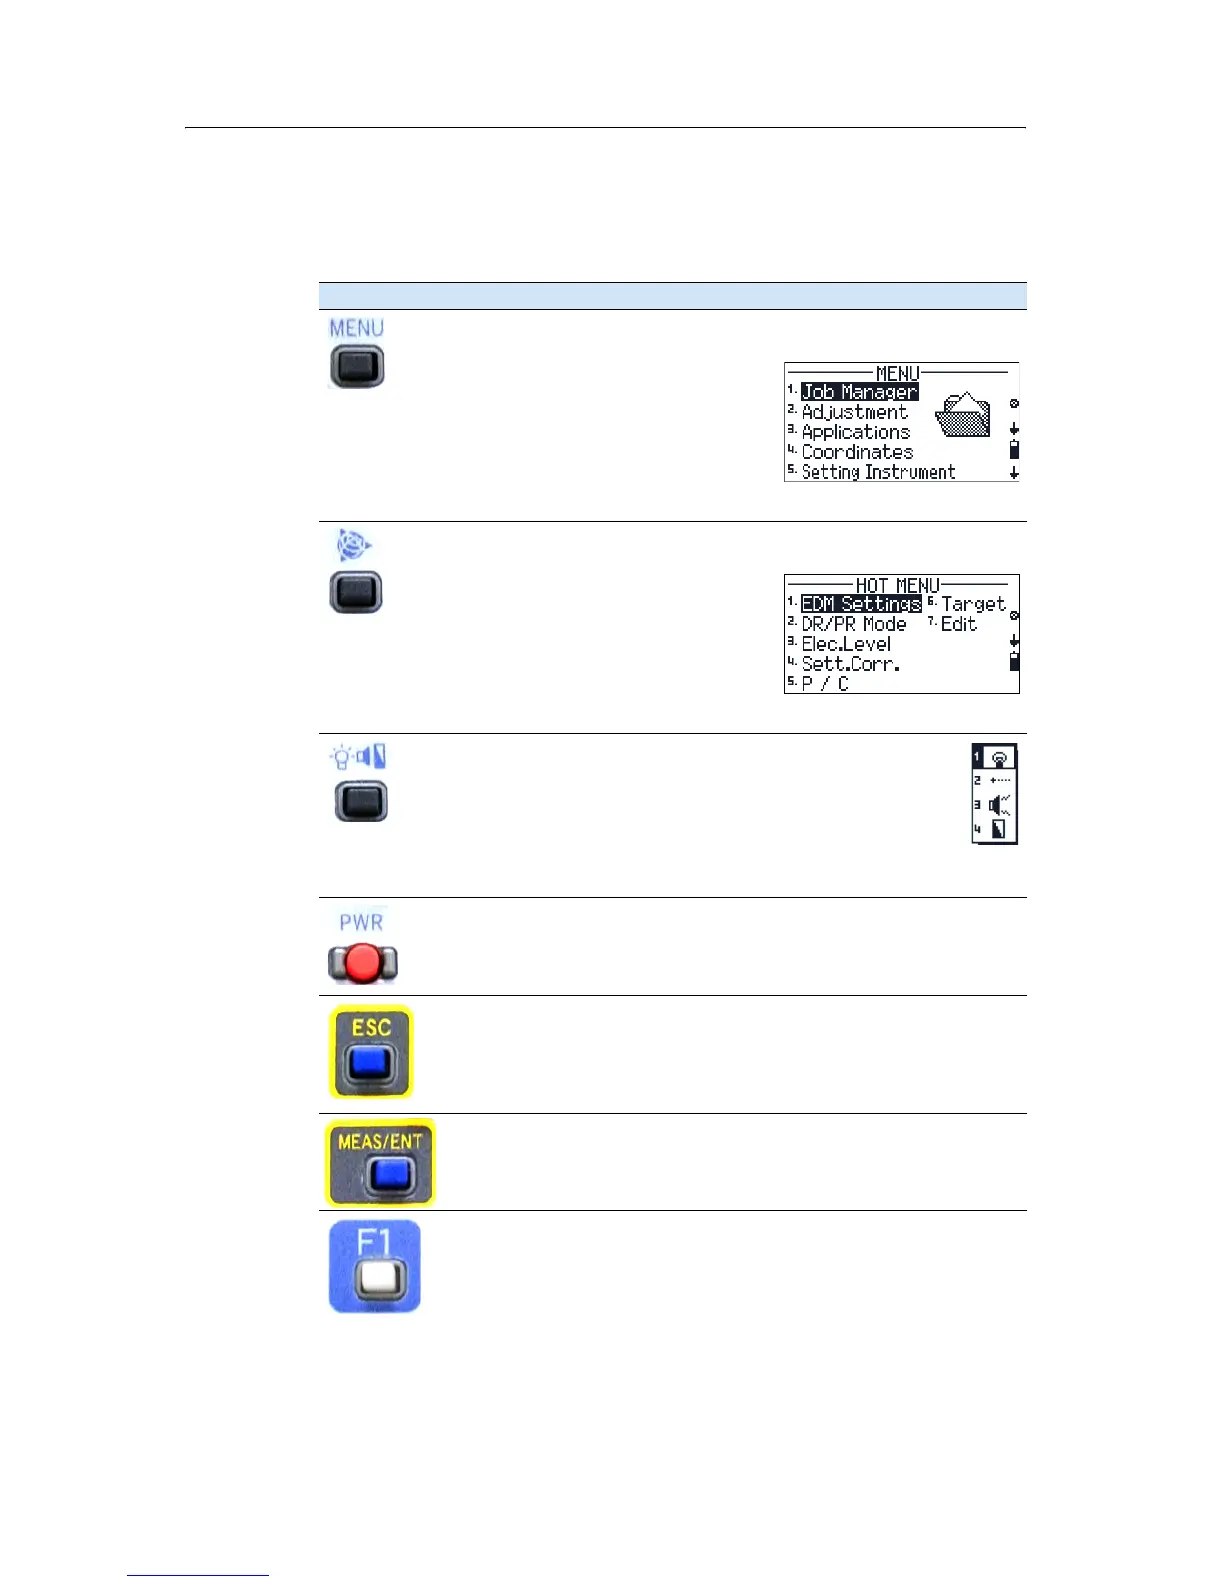
24.1 Key functions
Table 2 .1 summarizes the functions of the Trimble M3 series keys.
Table 2.1 Key functions
Key Function
[Menu] key. Press to display the MENU screen which contains the following
options:
1. Job Manager
2. Adjustment
3. Applications
4. Coordinates
5. Setting Instrument
6. Setting interface
7. Data Transfer
Trimble key. Press to display the
HOT MENU screen which contains the
following options:
1. EDM Settings
2. DR/PR Mode
3. Electronic Level
4. Setting Corrections
5. Point number / Point code
6. Target
7. Edit
Illumination key. Press to display the 4-switch window which
contains the following options:
1. Backlight on/off.
2. Laser pointer on/off
3. Sound on/off
4. Display contrast adjustment
See Adjusting lighting, laser, sound, and contrast, page 17.
[PWR] button. Press to turn the instrument on or off.
See Turning the instrument on and off, page 53.
[ESC] key. Press to return to the previous screen. If you are in numeric or
alpha-numeric mode press this key to delete your input.
[MEAS/ENT] key. Press to do any of the following:
• Proceed to the next step
• Initiate a measurement and record the point
• Confirm the input value/name/code when you are in input mode
[F1] - [F4] Function keys. When softkeys (for example Stack) are displayed at
the bottom of the screen, press the function key beneath the softkey
indication.
Note – The fields at the bottom of each screen relate to the function of the
keys situated below the display. They indicate the next possible setting, not
the current setting.
 Loading...