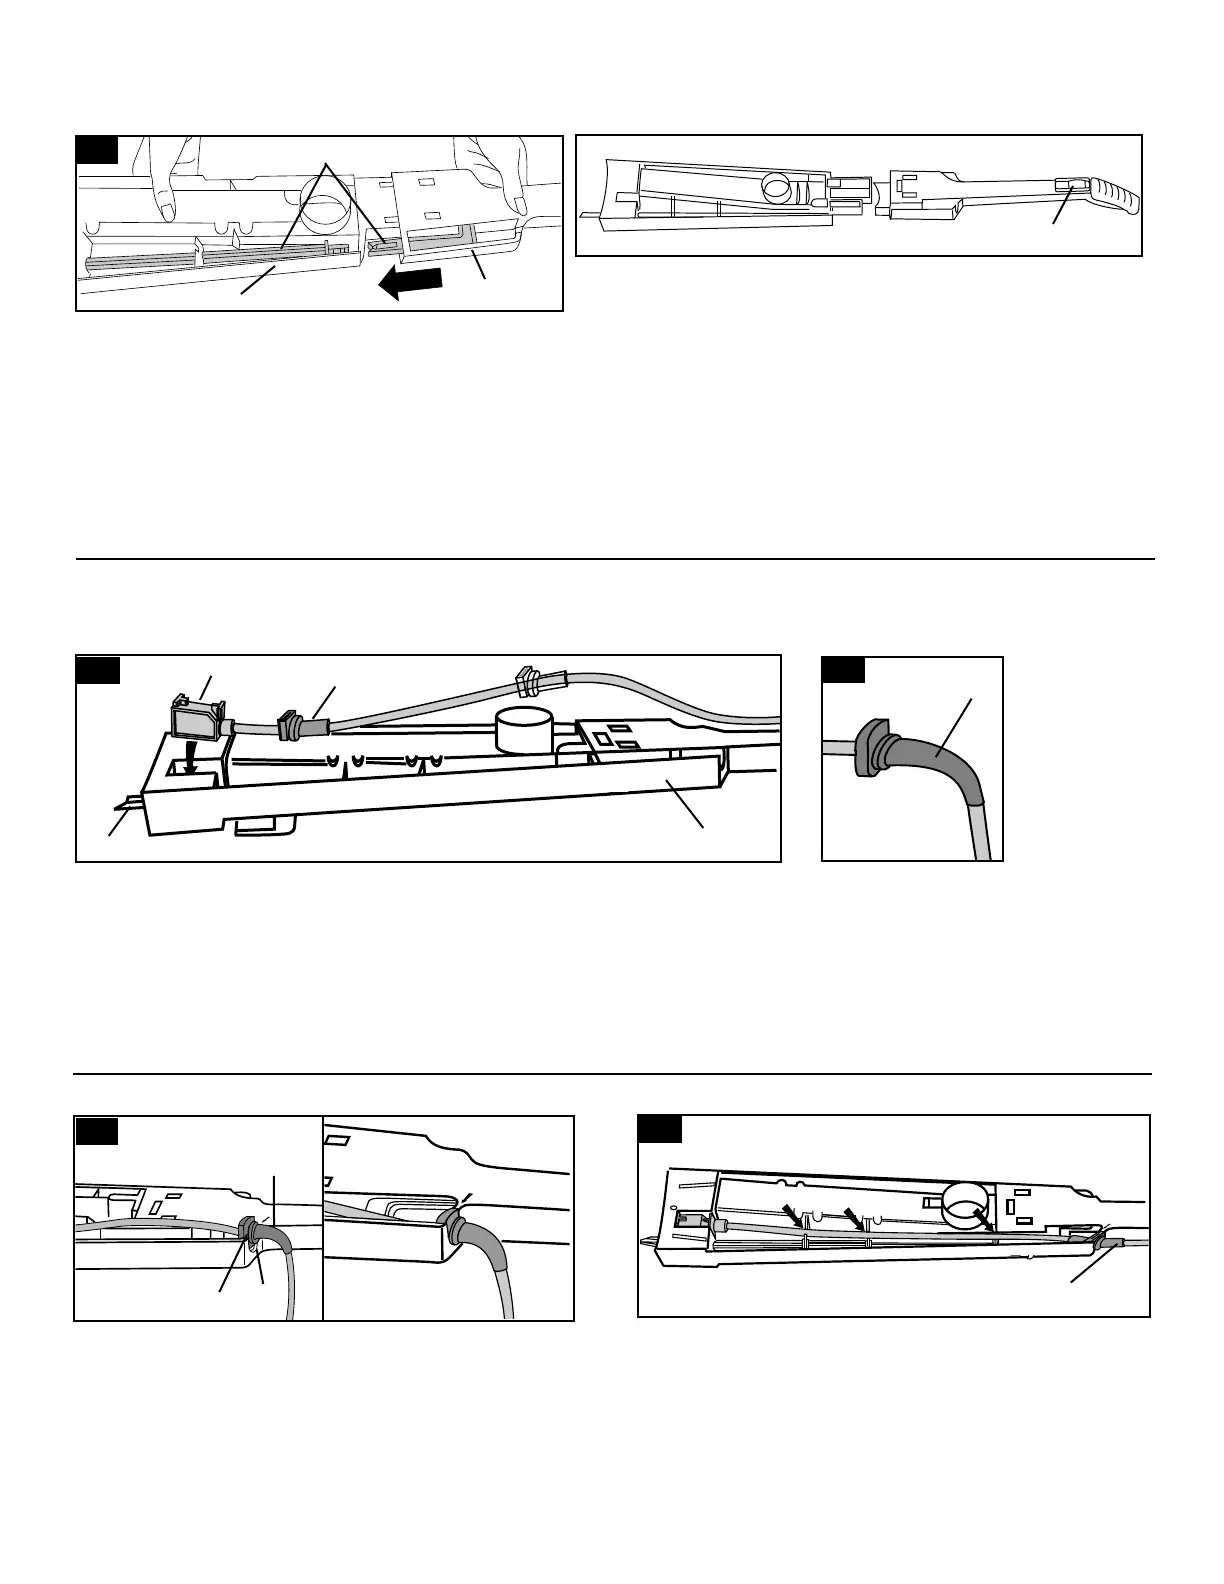
Align upper handle and lower handle as shown.
Place upper (B) and lower (C) handle parts on a flat
surface, aligning rod sections (D). With hand on sides
of handle, push parts together firmly until they “click”
and rod sections lock together.
Do not press against the rod extending from the
lower handle (Fig. 3, “E”). Do not push handle
together with hands on the ends of the sections.
3
A
E
G
D
B
Step 2 Attach cord
Insert large rectangular end of cord into pocket in bottom of handle, with side
marked “UP” visible.
Make sure rectangular end is pushed into handle as far as possible.
Slide cord protector (F) toward upper handle (G).
Rotate cord protector (F) as shown.
With (F) pointing downward (toward back of handle),
press groove (H) into slot (I).
3
Press cord into place at each of the three notches indi-
cated and note correct positioning of (F).
Do not plug cleaner in until assembly is totally
complete.
Step 1 Assemble handle
6
Continued
➜
“UP”
F
F
C
2
4
5
F
F
H
I
Note: The white switch lock above the ON-OFF switch (A)
helps in the assembly of your cleaner. Assembly can be con-
tinued if the switch lock is missing. However, do not remove
the switch lock until assembly is completed.