Pull switch lock (N) above ON/OFF
switch (O) straight out. Dispose of
lock.
Note: If tab has come off during
assembly, make sure switch is in
the OFF position (down) before
plugging cord into an electrical
outlet.
Place nut in recessed area (L) at
back of handle. Hold nut in place
while tightening bolt securely with a
screw driver.
Note: Only one nut is needed on
this model. The extra nut is not
required but has been provided for
your convenience.
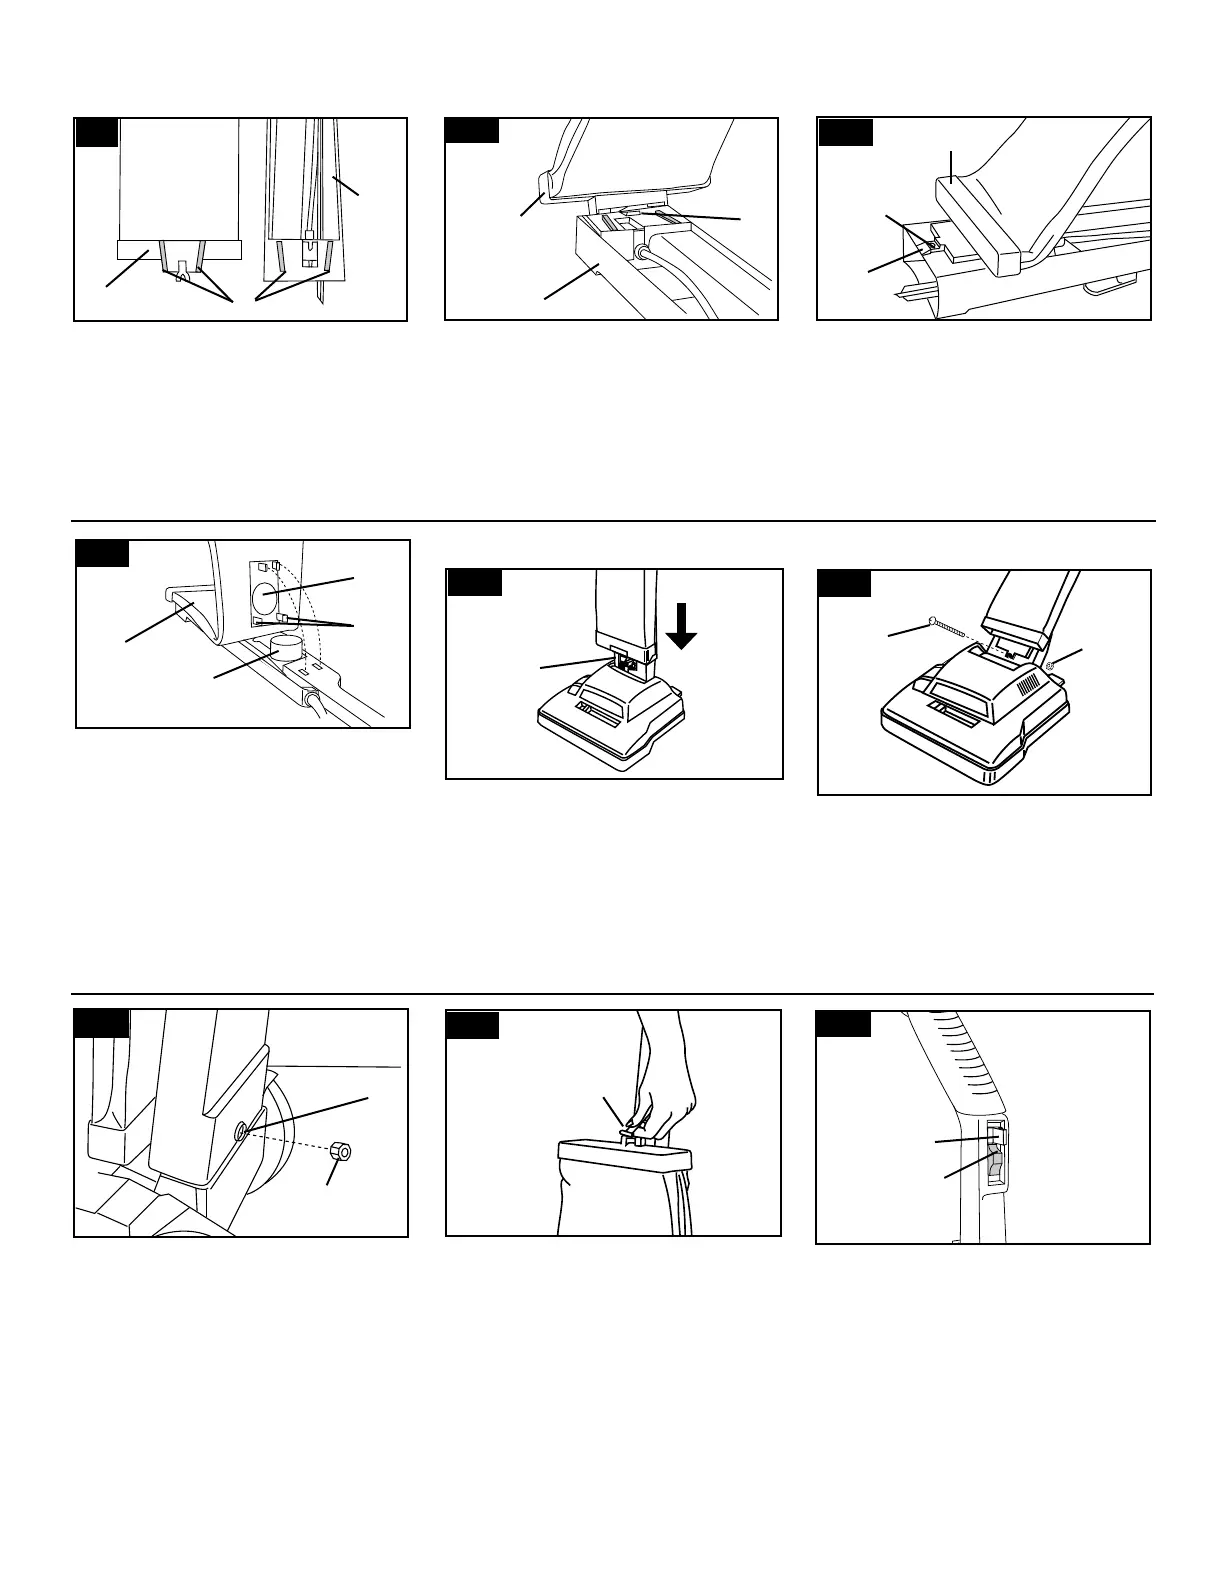
Press the handle release lever to
move handle to the operating or
middle position.
Push bolt (K) into hole on lower
front of handle.
If bolt will not go through hole
easily, handle is not pushed com-
pletely down.
Note round opening (F) and hooks
(G) on back of outer bag (H).
Place opening over dirt tube (I).
Unzip outer bag and place hand
inside. Press down firmly to snap
hooks into handle.
4
12
14
15
Slide rails on outer bag (B) onto rails
on lower handle (C) until outer bag
base snaps past the lock tab (D).
The hole (E) in the handle is visible
through the U-shaped extension on
the outer bag base (B) when the
outer bag base is in position past
the lock tab (D).
Be sure that power cord is pulled
tight and pressed into each of the
three notches (Fig. 6) before com-
pleting the following steps.
With outer bag to the front, place
assembled handle onto handle base
(J) of cleaner body.
Rock handle side to side while
pushing down firmly. Extra push-
ing effort may be required.
11
Step 4 Attach handle
Step 3 Attach cloth outer bag
Note location of tapered rails (A) on
back of outer bag base (B) and on
front of lower handle (C).
7
J
B
H
I
G
F
B
B
D
D
A
C
C
E
NUT
NUT
K
M
O
N
10
8
9
13
L
On upper front handle, grasp bag
clip (M) and pull down firmly. Hook
bag clip into slot in bag cap.