5
Installation
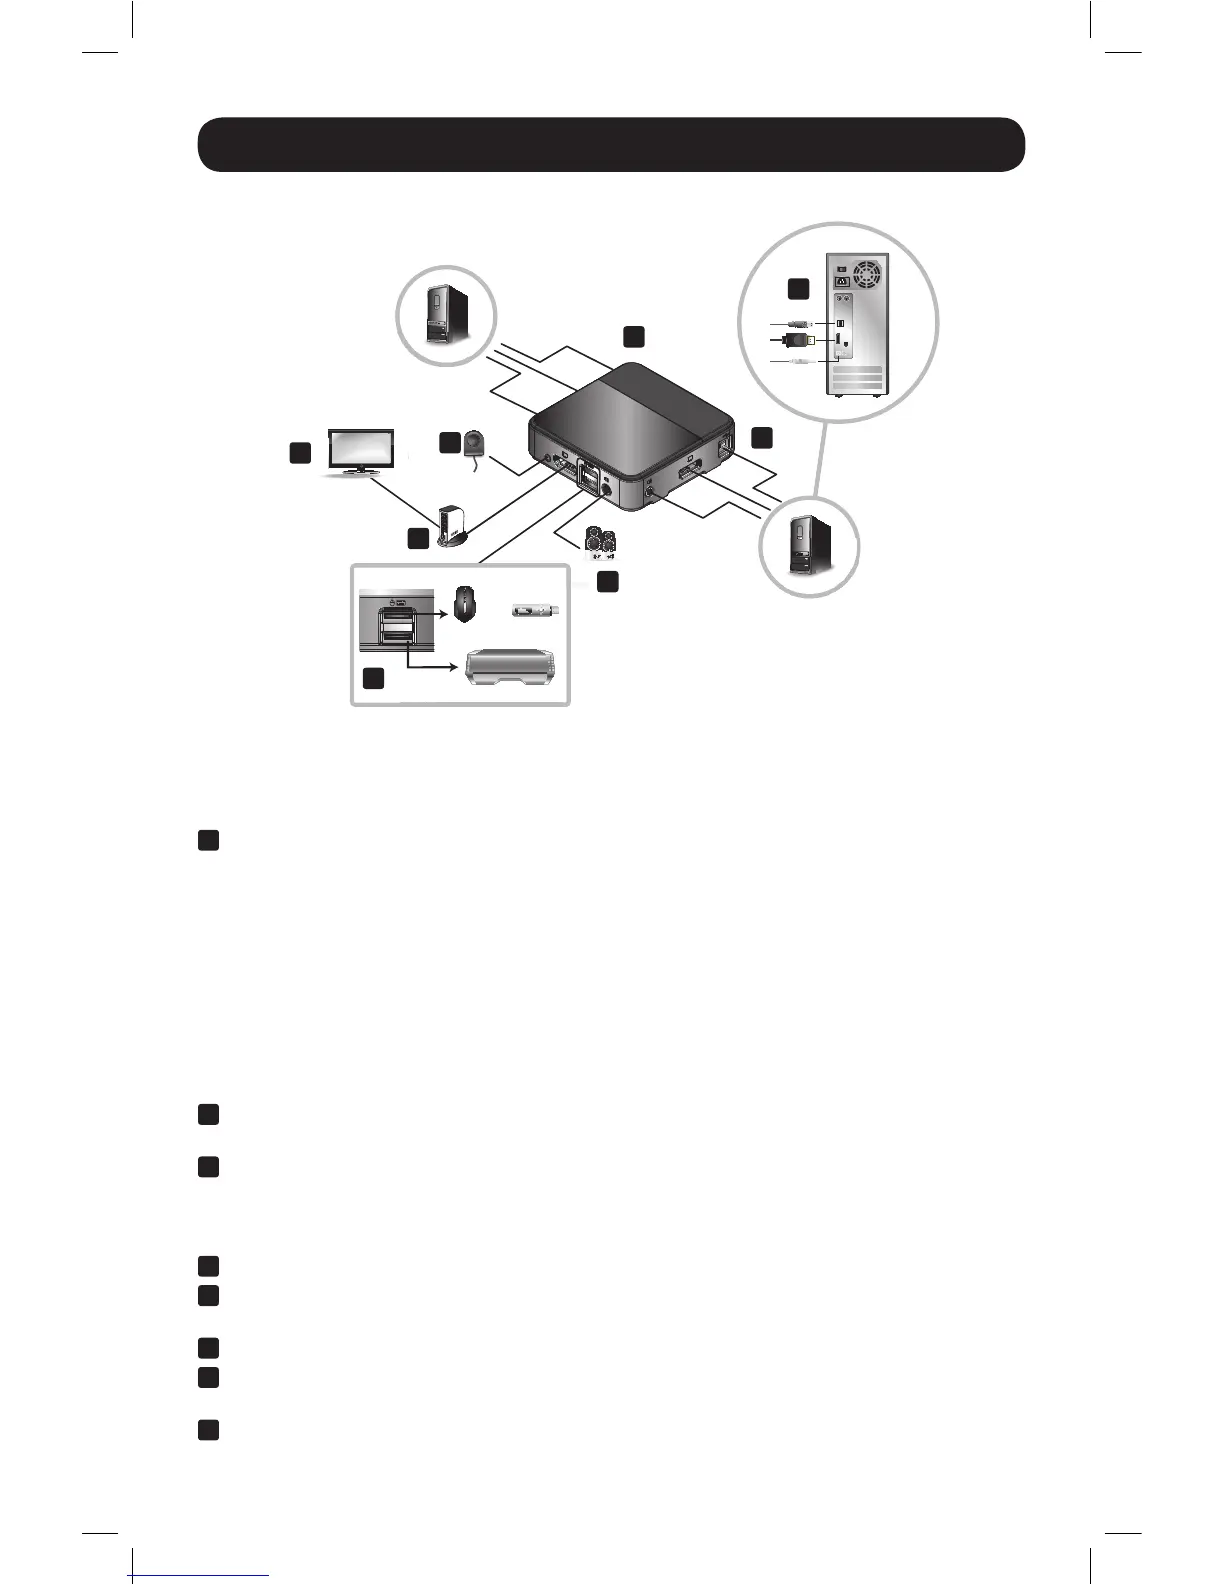
Refer to the following steps and diagram to set up your KVM switch installation.
Note:
• Before making any connections, make sure that power to all devices being connected to the KVM switch is
turned off. Unplug the power cords of any computers that have the Keyboard Power On function.
• It is recommended that the total length between the console monitor and connected computers
(including the KVM) not exceed 10 ft. (3 m).
1
Connect your monitor to the DisplayPort console port on the KVM switch.
Note: You can connect a DVI, HDMI or VGA monitor using a DisplayPort to DVI, HDMI or VGA adapter (see
the Features and Optional Accessories sections of this manual for details).
OR
If the computers you are connecting have graphics cards that support Multi-Stream Transfer
(MST), and you wish to connect multiple monitors, you can connect a Tripp Lite MST Hub to the
DisplayPort console port on the KVM switch. You can then connect multiple monitors to the
monitor ports on the MST hub, and use the computer’s graphics card display settings to
customize how video is being displayed. This can also be achieved without an MST hub when
using DisplayPort monitors that feature MST input and output ports for chaining multiple
monitors together.
2
Connect your USB keyboard and mouse into the corresponding USB console ports of the KVM
switch (the console mouse port is on top, and keyboard port on bottom).
3
Optional – A USB hub can be connected to the USB console mouse port, allowing you to add
multiple USB peripherals to your installation.
Note: To ensure proper functionality, use a hub with an external power supply. Also, the KVM’s Mouse
Emulation Mode must be disabled (see the Hotkey section of this manual for details) when connecting a hub.
4
Connect your speakers to the console audio jack on the KVM switch.
5
Connect a set of computer monitor, keyboard/mouse and audio ports on the KVM switch to a
computer using the included DisplayPort, USB and 3.5 mm stereo audio cables.
6
Optional – Repeat step 5 to connect a second computer.
7
Optional – Connect the Remote Port Selector to the corresponding 3.5 mm jack on the KVM
switch.
8
Turn on the power to all connected devices. The KVM switch focus will automatically switch to
the first computer that is powered on.
1
2
3
4
5
5
6
7
PC 1
PC 2
(optional)
(optional)
(optional)
Console
or
16-01-385-93353A.indb 5 2/17/2016 10:22:40 AM
 Loading...