EasyManua.ls Logo

Tripp Lite B020-016-17 User Manual

Tripp Lite B020-016-17
29 pages
To Next Page IconTo Next Page
Page #1 background imageLoading...
Page #1 background image
Tripp Lite World Headquarters
1111 W. 35th Street, Chicago, IL 60609 USA
(773) 869-1234, www.tripplite.com
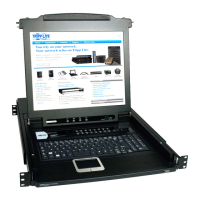
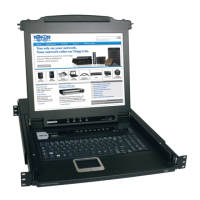
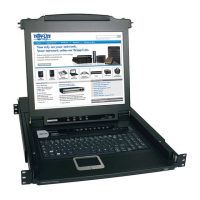
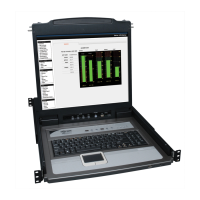
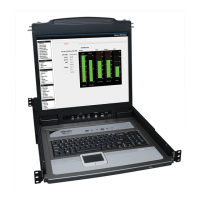
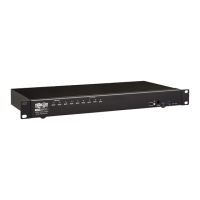
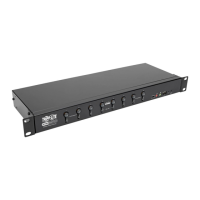
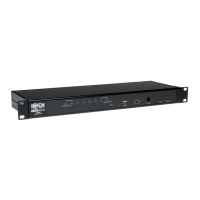
8- or 16-Port 1U Console KVM Switch or
16-Port 1U Rackmount KVM Switch
Model #: B020-008, B020-008-17, B020-016, B020-016-17 or B022-016
NOTE: Follow these instructions and operating procedures to ensure correct performance
and to prevent damage to this unit or to its connected devices.
Copyright © 2005 Tripp Lite. All rights reserved. All trademarks are the property of their respective owners.
The policy of Tripp Lite is one of continuous improvement. Specifications are subject to change without notice.
WARRANTY
REGISTRATION
Register online today for a
chance to win a FREE Tripp Lite
product! www.tripplite.com/warranty
Owner’s Manual
This package should consist of:
• 1 KVM Switch (B020-008, B020-008-17, B020-016, B020-016-17 or B022-016)
• 1 USB Keyboard/Mouse Adapter
• 1 Power Adapter with Power Cord
• Firmware Upgrade Cable
• 1 Owner's Manual with Quick Start Guide
• 1 Rackmount Kit (B022-016 only)
Check to see that the unit arrived undamaged, with all of its contents. Contact your dealer if there is a problem.
200506056 93-2463 Console KVM OM.qxd 6/29/2005 12:30 PM Page 1

Table of Contents

Other manuals for Tripp Lite B020-016-17

Questions and Answers:

Tripp Lite B020-016-17 Specifications

General IconGeneral
BrandTripp Lite
ModelB020-016-17
CategorySwitch
LanguageEnglish

Summary

Overview

System Requirements

Computer Requirements

Specifies hardware requirements for connecting computers to the KVM switch.

Console Requirements (B022-016)

Lists system requirements for the console unit specific to the B022-016 model.

Required Cables

Details the types of Tripp Lite cables required for connecting computers and other devices.

Introduction

Front View of Console KVM Switch

Identifies and explains the components visible on the front panel of the KVM switch.

Front View of B022-016 Model

Details the specific front panel components and indicators for the B022-016 model.

Rear View of Console KVM Switch

Details the rear panel connections and ports for the KVM switch.

Rear View of B022-016 Model

Details the specific rear panel connections and ports for the B022-016 model.

Installation

Single-Station Installation

Provides step-by-step instructions for setting up a single KVM switch installation.

Multiple Station Installation

Guides on how to connect multiple KVM switches in a daisy-chain configuration.

LCD OSD Configuration

Basic Operation

Console Operation

Instructions on how to extend, open, retract, and close the KVM console module.

Port Selection Methods

Explains the methods for selecting which computer the KVM controls.

Hot Plugging Devices

Details how to connect or disconnect devices without powering down the system.

Power Management and Port Identification

Covers powering the unit on/off and the system for numbering ports and stations.

Hotkey Control

Port Control Using Hotkeys

Overview of how to use keyboard shortcuts for KVM port control.

Invoking Hotkey Mode

Step-by-step guide on how to activate the Hotkey mode on the KVM switch.

Selecting the Active Port

How to use hotkeys to directly select and switch to a specific computer port.

Setting Scan Interval

How to configure the dwell time for ports during automatic scanning.

Auto Scan Operation

Instructions for initiating, pausing, and resuming automatic scanning of ports.

Skip Mode Operation

Allows manual sequencing between computers for monitoring, similar to auto-scan.

Hotkey Beeper and Summary

How to control the beeper and a summary table of hotkey commands.

OSD Operation

OSD Overview and Navigation

General introduction to the OSD system and how to navigate its menus and options.

OSD Main Screen Headings

Explains the different columns and information presented on the main OSD screen.

OSD Functions Overview

Details the various functions available for configuring and controlling the KVM via OSD.

F1 Go To and F2 List Ports

How to use F1 for direct port access and F2 for filtering port lists.

F3 Set Environment

Allows users to customize their working environment and OSD settings.

F4 Administrator Settings

Administrator-only function for configuring user access, names, and system settings.

F5 Skip and F6 Broadcast Mode

Navigates ports manually (F5) or sends commands to all computers (F6).

F7 Scan and F8 Log Out

Auto-cycles through ports (F7) or exits OSD control (F8).

Firmware Upgrade Utility

Before You Begin Firmware Upgrade

Preparation steps and prerequisites for performing a firmware upgrade.

Starting the Firmware Upgrade

Step-by-step process for initiating the firmware upgrade using the utility.

Firmware Upgrade Success and Failure

Confirmation of successful upgrade or indication of failure with retry options.

Firmware Upgrade Recovery

Procedures for restoring firmware in case of upgrade failure or interruption.

Appendix A

Computer Connection Table

Table showing the relationship between KVM units and the number of computers they can control.

OSD Factory Default Settings

Lists the default configuration settings for the On-Screen Display.

Troubleshooting

Specifications

Appendix B

Clear Log-in Information

Procedure to reset administrator and user login information if forgotten or corrupted.

Appendix C

KVM Module Removal

Instructions for detaching the KVM module from the main unit chassis.

Keyboard/Touchpad Removal

Steps to remove the keyboard and touchpad module for repair or replacement.

Appendix D

Standard Rack Mounting

How to install the B022-016 unit into a standard 1U rack using included brackets.

Console KVM Rack Mounting

Information on mounting Console KVM models in a 1U rack using an optional kit.

Optional Rack Mounting

Appendix E

FCC Interference Notice

Compliance statement regarding FCC regulations for digital devices and potential interference.

Owner's Manual Addendum

1-Year Limited Warranty

Warranty Registration

Instructions on how to register the product warranty online for a chance to win prizes.

Related product manuals