Do you have a question about the Tripp Lite U344-001-VGA and is the answer not in the manual?
Details the adapter's capabilities including USB 3.0 speed, portability, and resolution support.
Lists all items included in the product package, such as the adapter, driver CD, and manual.
Specifies the minimum hardware and operating system requirements for the adapter to function correctly.
Explains how to configure display settings like Extend, Mirror, or Primary using display properties.
Step-by-step guide to extending the primary display to an additional monitor.
Provides instructions for duplicating the primary display's content onto the add-on monitor.
Details the procedure to set the add-on display as the main monitor for the computer.
Details Tripp Lite's warranty terms and conditions for product defects and limitations.
Instructions on how to register the product for service and entry into a drawing.
Provides information regarding the device's compliance with FCC Part 15 rules.
Details European Union compliance for electronic waste recycling of Tripp Lite products.
This document serves as the owner's manual for the Tripp Lite USB 3.0 to VGA Adapter, model U344-001-VGA. It provides comprehensive instructions for installation, usage, troubleshooting, and warranty information.
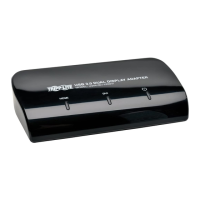
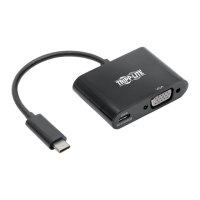
The Tripp Lite USB 3.0 to VGA Adapter is designed to expand your display capabilities by adding an additional monitor, LCD, or projector through a single USB 3.0 port on your computer. This adapter is highly portable, featuring a built-in cable that allows it to easily fit into a laptop bag, making it an ideal solution for users on the go.
One of the key features of this adapter is its utilization of USB 3.0 technology, which offers significantly faster data transfer rates—up to 5 Gbps—compared to USB 2.0. Despite this, it maintains backward compatibility with USB 2.0, ensuring versatility across a range of devices. For Windows PCs, the adapter supports the simultaneous connection of up to six display adapters, enabling extensive multi-monitor setups.
The adapter is designed for user convenience, automatically resuming from hibernation and suspend modes without requiring manual intervention. It supports a wide range of video resolutions, up to 2048 x 1152, and 1080p at 60Hz, ensuring crisp and clear visuals. Video streaming is also supported up to 1080p. Users have the flexibility to configure additional monitors to either extend the primary display, duplicate the primary display (mirroring), or set an additional monitor as the primary display, adapting to various workflow needs.
Installation of the adapter is straightforward. Users are instructed to install the driver software from the included CD before connecting the display adapter. The setup program typically runs automatically, guiding the user through the process. In cases where the setup doesn't start automatically, users can manually launch the driver file from the CD. Important notes during installation include allowing User Account Control pop-ups and continuing with driver signature dialog boxes. If the necessary DisplayLink software is already up to date, the installation process can be skipped, and the user can proceed directly to connecting the adapter. A computer restart is required to finalize the installation. After restarting, the USB 3.0 cable of the adapter is connected to an available USB 2.0 or 3.0 port, and then the display adapter is connected to a monitor using a VGA cable. The computer will then recognize the adapter and complete the setup, displaying video on the add-on monitor. It's noted that the screen may flicker initially or take a few moments to appear, and a restart might be needed if the monitor remains blank.
When using multiple display adapters, the driver software only needs to be installed once. Subsequent adapters can be connected directly. However, there are specific considerations for Mac OS X and Windows Vista XDDM mode users, where limitations on the number of add-on monitors or display modes may apply.
Once installed, the adapter allows for various display configurations through the computer's Display Settings. Users can right-click on the desktop and select "Properties" or "Personalize" to access these settings. A quicker method is to right-click the display adapter icon in the lower-right corner of the screen and select "DisplayLink Manager" or "Video Setup."
The DisplayLink Manager offers several options:
For Windows Vista and 7 users, pressing the [Windows Key] + [P] simultaneously brings up a menu for quick switching between display settings like "Computer only," "Duplicate," "Extend," and "Projector only." It's important to note that only Mirror mode is supported under Windows Vista Display Driver Model (WDDM) mode, and Aero Experience (Flip 3D effect) will be disabled when the adapter is connected in this mode.
To extend video to an add-on display, users open Display Settings, select the add-on monitor icon (primary is always icon 1), check the "extend video" checkbox or select the extension option, and then drag the monitor icons to match their physical arrangement. This ensures smooth mouse movement between displays. After clicking "Apply," the video will be extended. A special note is provided for DVD playback, recommending standard cabling and specific system requirements (2.0GHz Core Duo CPU, 1GB RAM, 800x600 resolution with 32-bit color) if playing DVDs on an add-on monitor, with a limit of one adapter for DVD content in multi-adapter setups.
To mirror video on an add-on display, users follow similar steps: open Display Settings, select the add-on monitor, uncheck "Extend the desktop onto this monitor" or select the duplicate display option, and click "Apply." In Mirror mode, the add-on display's settings are limited by the primary display's capabilities.
To make an add-on display the primary display, users open Display Settings, select the add-on monitor, check "This is my main monitor," and click "Apply." Some computers may require un-selecting the original primary display first. Once set, the add-on display remains primary as long as it's connected; upon disconnection, the primary display reverts to the monitor connected via standard cable.
The manual also includes a troubleshooting section to address common issues:
Maintenance features are not explicitly detailed as separate sections but are implicitly covered through troubleshooting and driver updates. The "Check for Updates" feature in the DisplayLink Manager ensures the software remains current, which is a form of maintenance. The advice to reinstall drivers in case of persistent connection issues also falls under maintenance. The device itself is bus-powered, meaning it draws power directly from the USB port, eliminating the need for an external power adapter and simplifying its setup and maintenance. The portable design also implies ease of handling and storage, contributing to its overall usability and low-maintenance profile.
The manual concludes with specifications, warranty information (1-year limited warranty), and product registration details, encouraging users to register their product for quicker service and a chance to win a free Tripp Lite product. It also includes FCC compliance information and WEEE compliance details for European Union customers, emphasizing Tripp Lite's commitment to continuous improvement and environmental responsibility.
| HDCP | Yes |
|---|---|
| Color depth | 64 bit |
| Connector 1 | VGA (D-Sub) |
| Connector 2 | USB Type-A |
| Power source | USB |
| Certification | CE, FCC, REACH |
| Product color | Black |
| Country of origin | Vietnam |
| Connector 1 gender | Female |
| Connector 2 gender | Male |
| Maximum resolution | 2048 x 1152 pixels |
| Supported video modes | 1080p |
| Connector contacts plating | - |
| Supported graphics resolutions | 2048 x 1152 |
| Sustainability certificates | RoHS |
| Storage temperature (T-T) | -10 - 80 °C |
| Operating temperature (T-T) | 10 - 40 °C |
| Operating relative humidity (H-H) | 0 - 85 % |
| Package depth | 132.1 mm |
| Package height | 23.1 mm |
| Package weight | 20 g |
| Quantity per pack | 1 pc(s) |
| Master (outer) case width | 245.1 mm |
| Master (outer) case height | 145 mm |
| Master (outer) case length | 150.1 mm |
| Master (outer) case weight | 300 g |
| Harmonized System (HS) code | 84733080 |
| Quantity per master (outer) case | 10 pc(s) |
| Master (outer) case GTIN (EAN/UPC) | 10037332186352 |
| Weight | 30 g |
|---|