9
• Keep limbs away from all moving parts
• Wear eye protection and a face mask when using this tool
• Make sure all mobile parts move freely and are free from interference
• Keep blades sharp, aligned and properly secured to the cutter head
• Never turn the machine on with the workpiece in contact with the blades
• Whenever the planer is not in use, switch ‘OFF’ and disconnect from power
• Keep the planer in good order. Follow the maintenance instructions
(see ‘Maintenance’)
• Never use the planer to make partial cuts - allow the planer to cut the full
length of the workpiece
• Do not use the planer to cut recesses, tenons or moulds
Workpiece capacity
• The workpiece must comply with the following minimum and maximum
dimensions:
I. Min thickness: 3.2mm (1⁄8")
II. Min length: 381mm (15")
III. Min width: 18mm (45⁄64")
IV. Max width: 317mm (12 31⁄64")
• Do not use weak, dry or damaged, heavily knotted wood that could break
up in the planing mechanism damaging the mechanism and motor and
causing kickback
• Ensure all wood is free of embedded objects including screws, nails and
staples. Embedded objects can cause major damage to the tool and are a
safety risk if ejected as well as a cause of kickback
• Do not plane badly bowed/warped wood where there is inadequate contact
with the infeed table
• This planer is designed for natural wood material only
• Remove glue and any foreign objects from the workpiece before planing
• Use the entire width of the cutter head to avoid uneven wear of blades
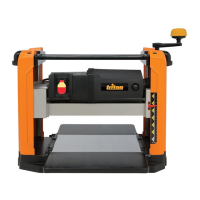
Rollercase height adjustment
• The Rollercase (1) contains the motor, cutting head with blades, and the
in-feed and out-feed rollers
• Rotate the Crank Handle (9) to raise or lower the Rollercase. One complete
turn of the Crank Handle raises or lowers the Rollercase 1.58mm (1/16”)
• The Scale Pointer (4) and Elevation Scale (3) provide a reading, in metric
and imperial graduations, of the height of the cutter head above the Centre
Table (11) – and therefore the approximate thickness of the workpiece
after planing
• The elevation scale is calibrated at the factory. For precision woodworking,
it is recommended that you check the dimension with calipers or a digital
thickness gauge before and after each cutting pass
Setting the depth of cut
• To protect the motor and cutter head, the recommended maximum depth
of cut for a single pass is as follows:
Max Depth of Cut
Width of workpiece Max depth of cut
Up to 125mm (5") 2.38mm (3/32")
From 125mm (5") up to 317mm (12-1/2") 1.6mm (1/16")
To set the depth of cut:
1. Measure the current thickness of the workpiece, and compare with
required thickness
2. Refer to the ‘Max Depth of Cut’ table above to determine whether one or
more passes are required
3. If just one pass is required:
Use the Crank Handle to move the Rollercase up or down until the Scale
Pointer (4) indicates, on the Elevation Scale (3), the finished thickness of
workpiece required
4. If more than one pass will be required:
a) It is recommended that you divide the total required into passes of
approximately equal depth
b) For the first and any intermediate cuts, set the height of the Rollercase at
current workpiece thickness minus depth calculated in step (a) above
c) Check measurements after each cut with callipers or a digital thickness
gauge
Switching ‘ON’ & ‘OFF’
• The ON/OFF Switch (13) is located on the front of the thicknesser
• To turn the planer ‘ON’, pull out the switch paddle to position ‘I’ (Image M)
• To turn the planer ‘OFF’, push the paddle in to the machine
• The ON/OFF Switch (13) has a built in safety lock mechanism; if engaged,
it will stop the thicknesser from being operated
• To engage the safety lock mechanism, with one hand hold the Switch in
the ‘OFF’ position and with the other hand pull the yellow locking tab out of
the Switch (Image N)
Circuit breaker
• A circuit breaker is installed to the left side of the ON/OFF Switch (13)
(Image M)
• If excessive electric current is detected, the circuit breaker will shut off the
power supply to protect the motor
• Before resetting the circuit breaker check the motor, switch, and power
connection for short circuit or faulty components
• To reset the circuit breaker:
• Press the red (0) button so that the machine is turned ‘OFF’
• Press the Circuit Breaker Reset Button (12)
Planer operation
WARNING: Always use adequate protective equipment, including eye
protection, respiratory and hearing protection, when working with this tool.
• For best results, determine desired depth of cut and final thickness of
workpiece before planing. Since there is a limit to maximum depth of cut,
several passes may be required to achieve final thickness
• In general, thin cuts produce a better outcome in terms of smoothness of
finished surface, even thickness, less kickback, less snipe, and less wear
on the cutter head and motor
• To prevent kickback, never make cuts deeper than 2.4mm (3/32”) in one
pass
• If more than one pass is necessary, the Rollercase must be lowered
manually before each pass
• Always set a thin depth of cut for hardwood, wide workpieces and
workpieces with an uneven surface
• Avoid wood stock with many or large knots, or with excessive twisting,
cupping, or bowing
• If necessary, process one side with a jointer or surface planer first to obtain
at least one flat surface before using the planer
• Plane both sides of the workpiece, removing half the total depth from each
side. This will produce two smooth surfaces with equal moisture content
and therefore a board less likely to warp when it dries naturally
• Make a test cut with similar material to check accuracy of the settings
before planing the workpiece
• Feed the workpiece ‘with’ the grain whenever as possible
• Provide suitable support for long or wide workpieces
1. Set up the planer for depth of cut required (see ‘Setting the depth of cut’
above)
2. Stand on the side that the Crank Handle is fitted. Never stand directly in
front of the workpiece, and do not allow anyone to stand or cross in line
with blade rotation. Kickback or thrown debris will travel in this direction
3. Place the workpiece on the In-feed Table (10), with the surface to be
planed facing upwards
636949_Manual.indd 9 28/02/2019 12:15
 Loading...