TW10i
7
Procedure: Turn off the water supply either at the
mains stop tap or the isolating stopvalve.
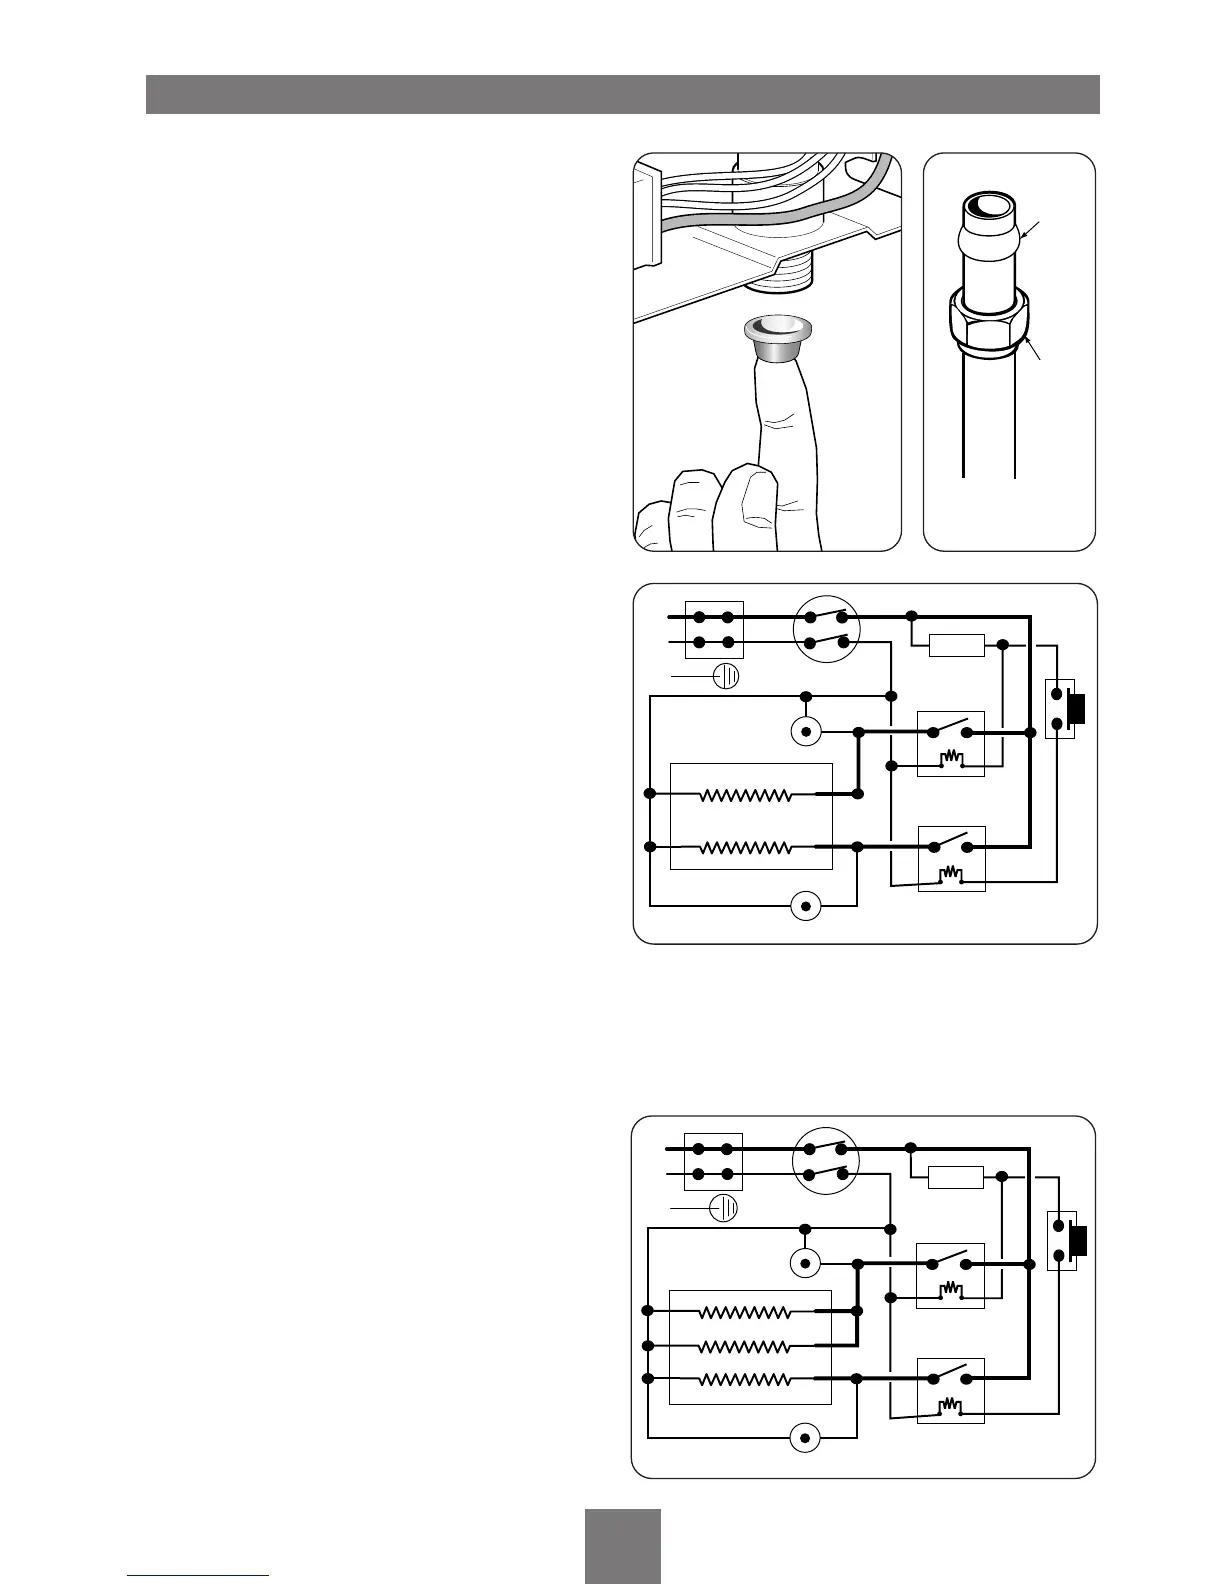
Before connecting the supply pipe to the unit,
push the supplied wire mesh filter into the heater
inlet. This helps to prevent ingress of debris.
Ensure the filter is inserted the correct way as
shown in
fig.9.
Connect the mains water supply to the inlet of the
unit via 15mm copper or stainless steel pipe using
the nut and olive supplied
(fig.10).
Connect the hot water pipe to the outlet side
using the nut and olive supplied.
Ensure the backplate is square on the wall and
tighten the two retaining screws which hold it to
the wall.
Turn on the mains water supply at the isolating
valve, then fully open the sink tap until a smooth
flow of water is obtained. Close the tap and check
for leaks in the pipework connection to the
heater.
ELECTRICAL CONNECTIONS
WARNING: THIS UNIT MUST BE EARTHED.
NOTE: A double pole linked switch with a
minimum contact gap of 3mm in both poles must
be fitted in the circuit. The supply cable must
conform to relevant tables in the current IEE
regulations. The electrical rating of the heater is
shown on the rating label within the unit.
Fig.11 depicts a schematic wiring diagram for the
two relay unit but with a two element heater can.
Fig.12 shows a schematic wiring diagram for the
two relay unit with an optional three element
heater can.
Fig.13 shows a schematic wiring diagram for the
three relay heater.
SWITCH OFF THE ELECTRICITY SUPPLY.
Cable entry points are shown in
fig.1 & 2. The
cable can be surface clipped, hidden or via 20mm
conduit (conduit entry can only be from rear).
NOTE: The cable grommet for top entry can be cut
to suit different sizes. The cable grommet MUST
be used when the supply cable is routed through
the top entry.
 Loading...