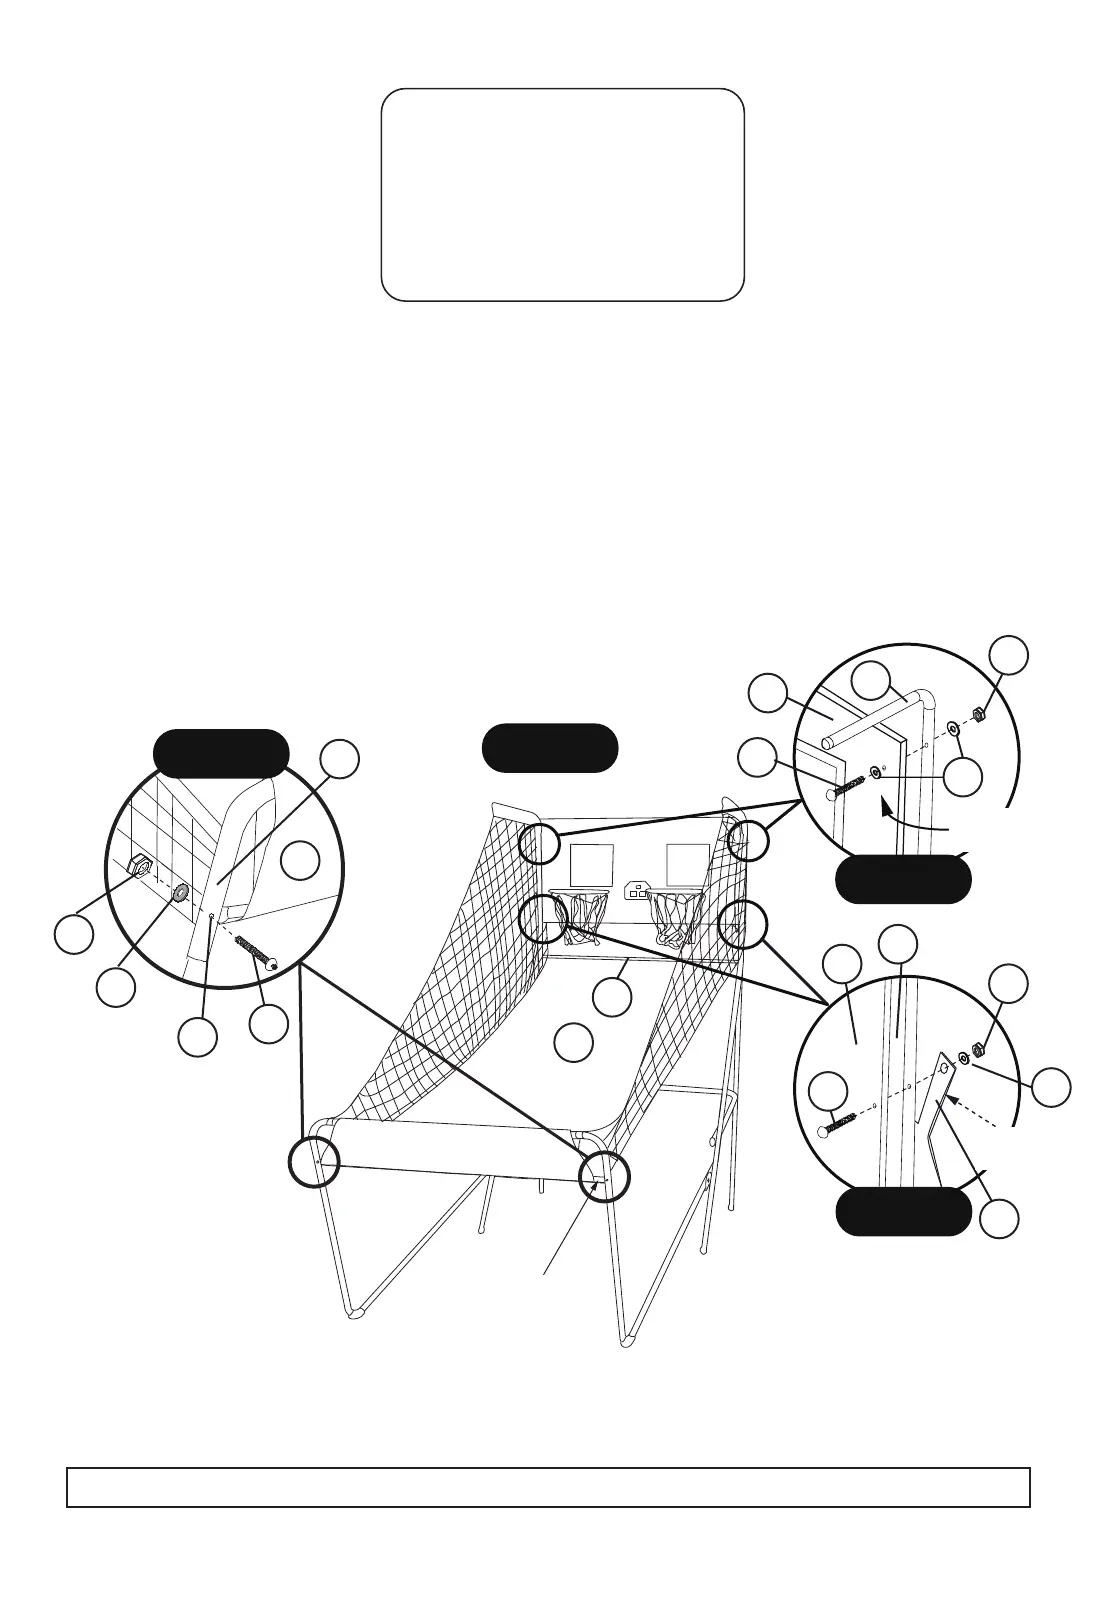
STEP 9
PARTS REQUIRED:
1 pc - #12 Horizontal Tube
8 pcs - #22 M6 x 1 mm Thick Washer
2 pcs - #24 M6 x 50 mm Bolt
4 pcs - #25 M6 x 60 mm Bolt
6 pcs - #27 M6 Lock Nut
1 pc - #31 Wrench
1 pc - #36 Allen Wrench
Place Horizontal Tube (#12) over the lower / front sleeve of Ramp Chute (#13) and then attach it to the
Ramp U-Tube (#11) using Bolts (#24) and Lock Nuts (#27) as shown in FIGURE 9 and DETAIL D.
Use Wrench (#31) and Allen Wrench (#36) to tighten Bolts. Tighten, but do not overtighten.
With the help of another adult, Attach the Backboard (#21) assembly to the Board L-Tubes Top (#1) using
Bolts (#25), Washers (#22)
, Washers (#22)
and Lock Nuts (#27) as shown in FIGURE 9 and DETAIL E.
At the bottom hole of the backboard, bring the ramp up behind the Tube (#12), attach the ramp tabs of
Ramp Chute (#13) using Bolts (#25) and Lock Nuts (#27) as shown in FIGURE 9 and DETAIL F.
Use Wrench (#31) and Allen Wrench (#36) to tighten Bolts. Tighten, but do not overtighten.
1
FIGURE 9
DETAIL E
DETAIL D
DETAIL F
13
21
25
22
27
27
25
21
1
13
12
24
27
22
13
12
11
10
For Customer Service Call 1-888-996-2729
© 2017 Escalade S por t s
All Rights Reserved
Inside
Backboard
assemble this side
Ramp Chute
assemble back side
22
Please study each diagram closely and read all assembly notes to insure correct assembly