Rear Suspension
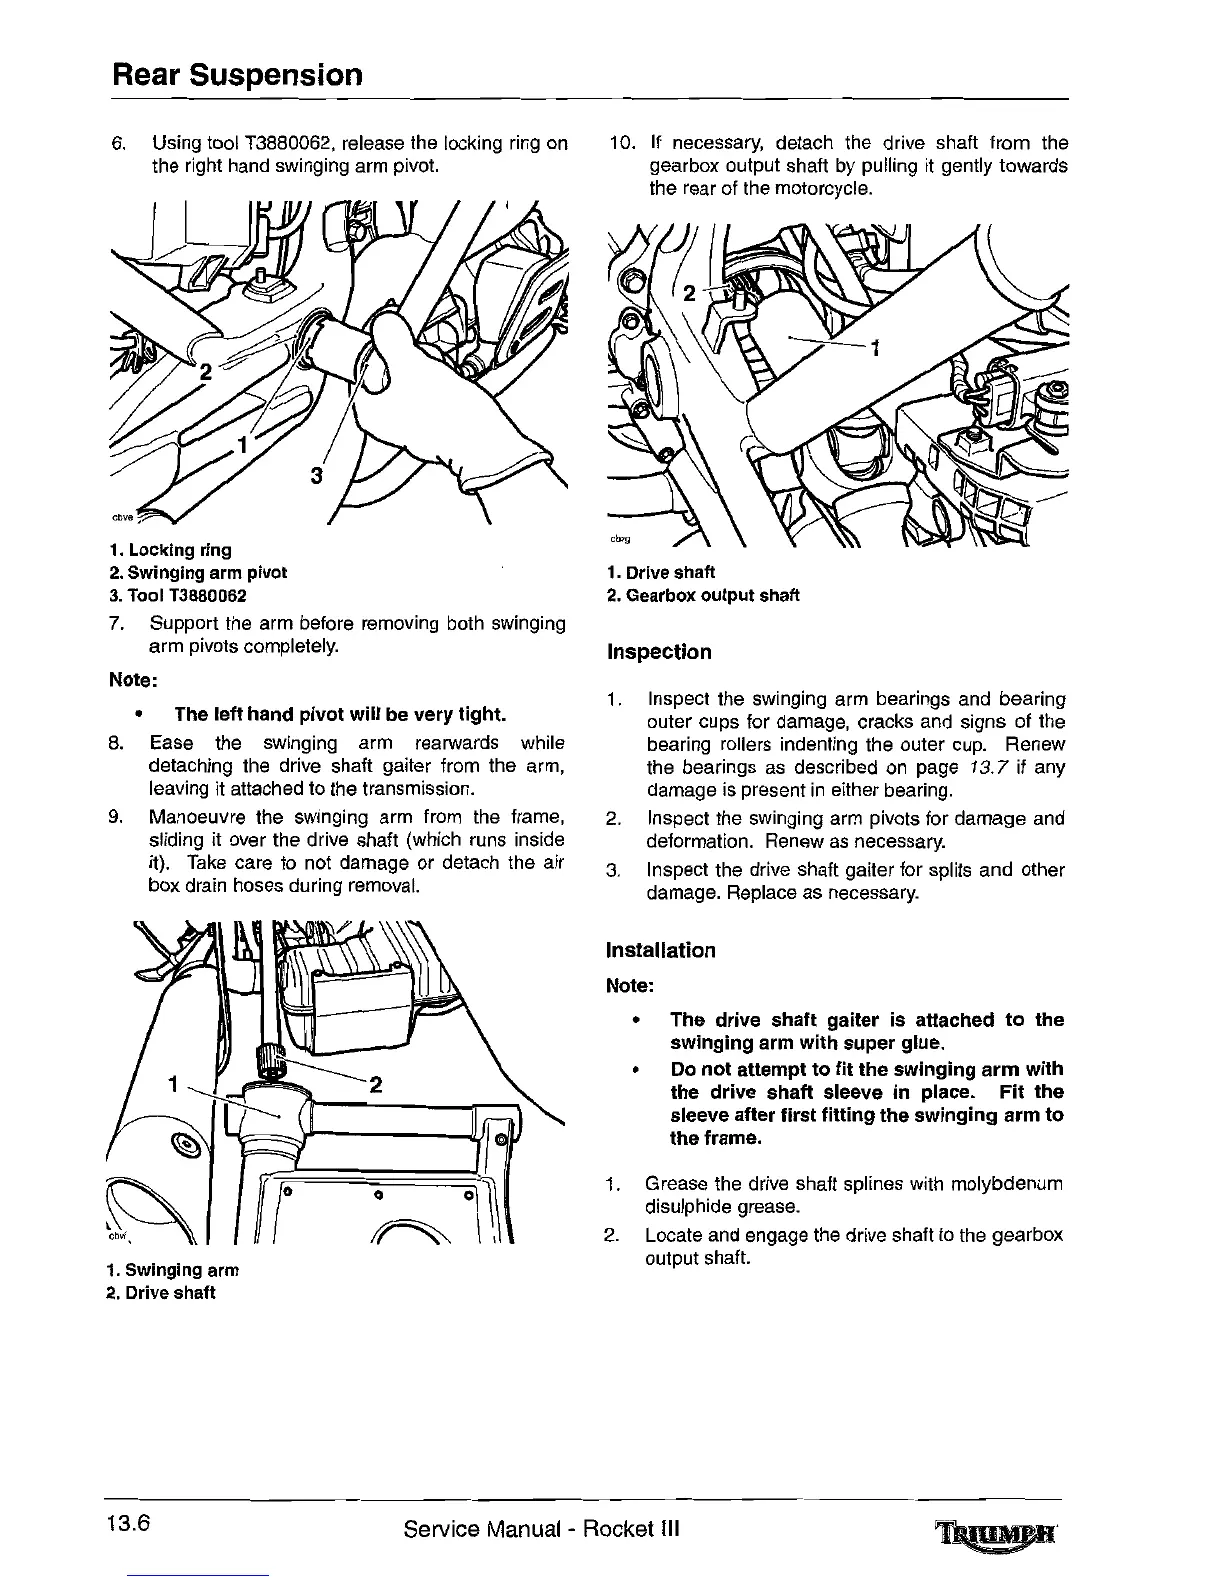
6.
Using tool T3880062, release
the
locking ring
on
the right hand swinging arm pivot.
1.
Locking ring
2.
Swinging
arm
pivot
3. Tool T3880062
7.
Support the arm before removing both swinging
arm pivots completely.
Note:
• The left hand
pivot
will
be
very
tight.
8.
Ease the swinging arm rearwards while
detaching the drive shaft gaiter from the arm,
leaving it attached to the transmission.
9.
Manoeuvre the swinging arm from the frame,
sliding it over the drive shaft (which runs inside
it).
Take
care to not damage or detach the air
box drain hoses during removal.
1.
Swinging
arm
2.
Drive shaft
10.
If necessary, detach the drive shaft from the
gearbox output shaft
by
pulling
it
gently towards
the rear of the motorcycle.
1.
Drive shaft
2.
Gearbox output shaft
Inspection
1.
Inspect the swinging arm bearings and bearing
outer cups for damage, cracks and signs of the
bearing rollers indenting the outer
cup.
Renew
the bearings
as
described
on
page 13.7 if any
damage is present
in
either bearing.
2.
Inspect the
sWinging
arm pivots for damage and
deformation. Renew as necessary.
3.
Inspect the drive shaft gaiter for splits and other
damage. Replace as necessary.
Installation
Note:
• The
drive
shaft gaiter is attached
to
the
sWinging arm
with
super
glue.
• Do
not
attempt
to
fit
the
swinging
arm
with
the
drive
shaft sleeve
in
place.
Fit
the
sleeve after
first
fitting
the
swinging
arm
to
the frame.
1.
Grease the drive shaft splines with molybdenum
disulphide grease.
2.
Locate and engage the drive shaft to the gearbox
output shaft.
13.6
Service Manual - Rocket III

 Loading...