ELECTRICAL
be filled with lubricant. In cases of
extreme urgency, this period may
be shortened by heating the oil to
100
C.
for
2
hours, then allowing
to cool before removing the bear-
ing bush.
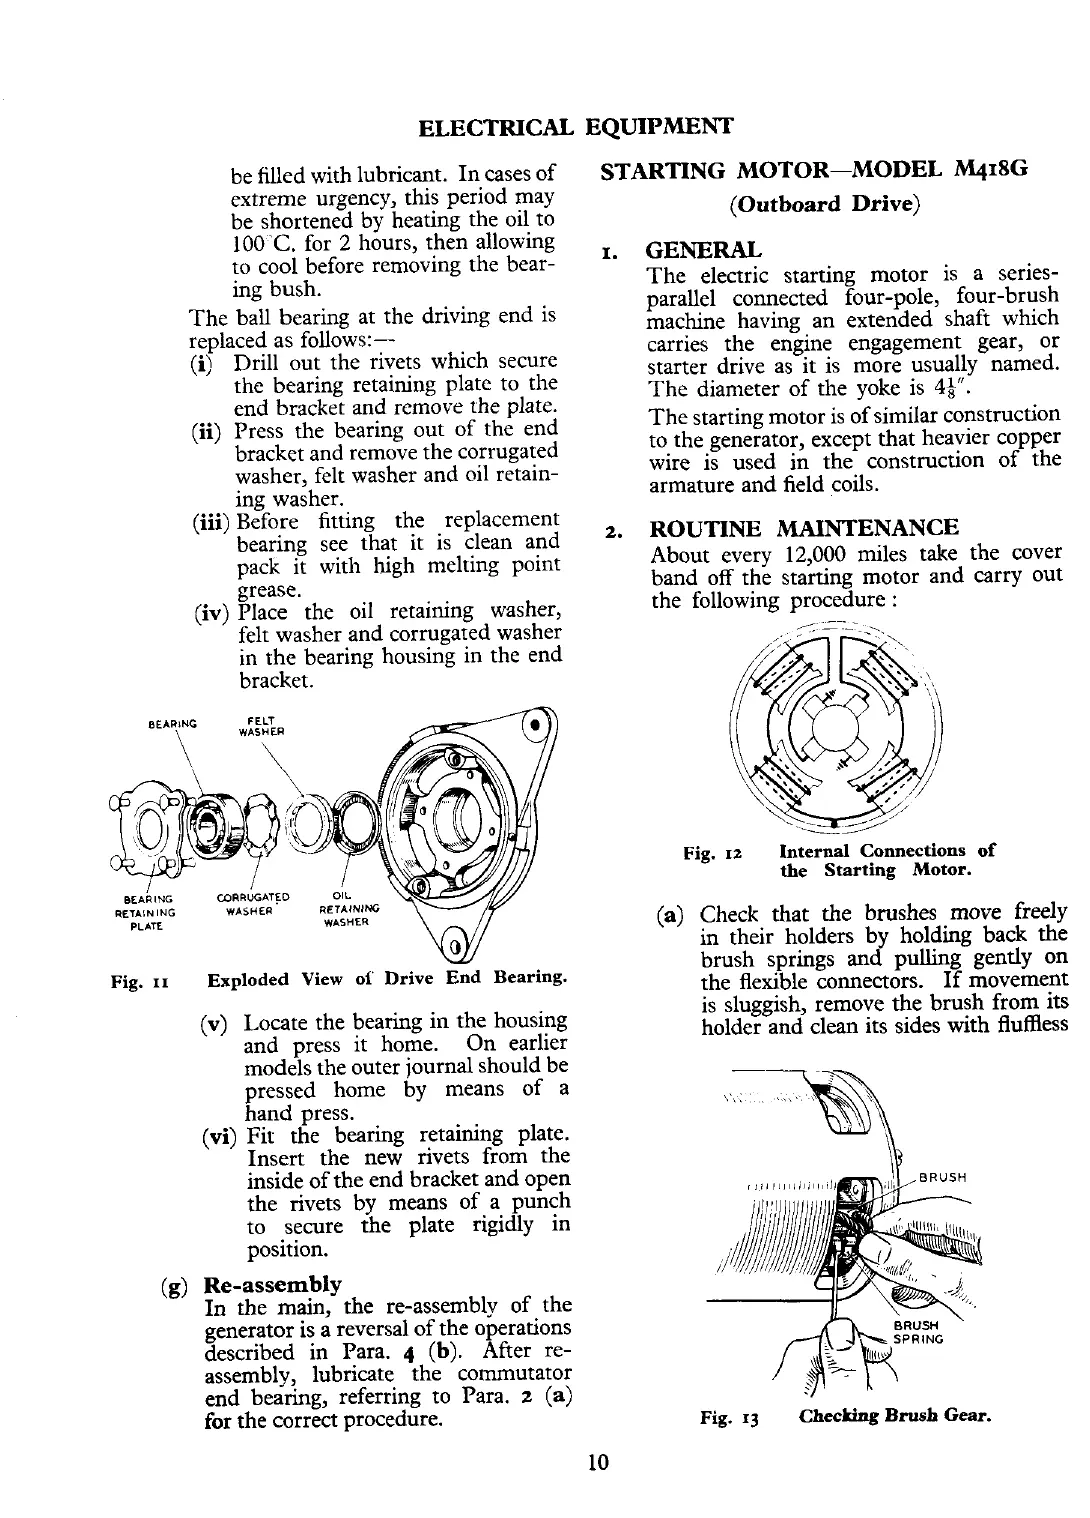
The ball bearing at the driving end is
replaced as follows:--
(i)
Drill out the rivets which secure
the bearing retaining plate to the
end bracket and remove the plate.
(ii)
Press the bearing out of the end
bracket and remove the corrugated
washer, felt washer and oil retain-
ing washer.
(iii)
Before fitting the replacement
bearing see that it is clean and
pack it with high melting point
grease.
fiv)
Place the oil retaining washer,
\-
,
felt washer and corrugated washer
in the bearing housing in the end
bracket.
Fig.
XI
Exploded View of Drive End Bearing.
(v)
Locate the bearing in the housing
and press it home.
On earlier
models the outer journal should be
pressed home by means of a
hand press.
(vi)
Fit the bearing retaining plate.
Insert the new rivets from the
inside of the end bracket and open
the rivets by means of a punch
to secure the plate rigidly in
position.
(g)
Re-assembly
In the main, the re-assembly of the
generator is a reversal of the operations
described in Para.
4
(b).
After re-
assembly, lubricate the commutator
end bearing, referring to Para.
2
(a)
for
the correct procedure.
lTIPMENT
'ARTING MOTOR-MODEL m18G
(Outboard Drive)
GENERAL
The electric starting motor is a series-
parallel connected four-pole, four-brush
machine having an extended shaft which
carries the engine engagement gear, or
starter drive as it is more usually named.
The diameter of the yoke is
46".
The starting motor is of similar construction
to the generator, except that heavier copper
wire is used in the construction of the
armature and field coils.
ROUTINE MAINTENANCE
About every 12,000 miles take the cover
band off the starting motor and carry out
the following procedure
:
Fig.
12
Internal Connections
of
the Starting Motor.
(a)
Check that the brushes move freely
in their holders by holding back the
brush springs
and
pulling gently on
the flexible connectors. If movement
is sluggish, remove the brush from its
holder and clean its sides with fluffless
\
SPRING
Fig.
13
Checking
Brush
Gear.