BODY
Centralise the
"
Hard Top
"
over the
windscreen and tern rarily secure by
tightening the ee attachment
brackets. (Fig 3A.)
Mark the position of the attachment
bracket holes on the underside of the
windscreen top rail (Fig
3B).
Slacken
off the brackets then remove the "Hard
Top
"
from the
car.
Mark the top side of the screen exactly
in line with the markings reviously
made
on the underside Rig. 3C).
Using a No. 11
drill,
carefully
drill
six holes from the above screen and
&"
from the edge. (Fig.
3D.)
Remove the windscreen attachment
5'
brackets from the "Hard Top
"
and
finally secure to the underside of the
windscreen top
rail
by six chromium
plated screws and lock washers. (Fig.
1
\
4.
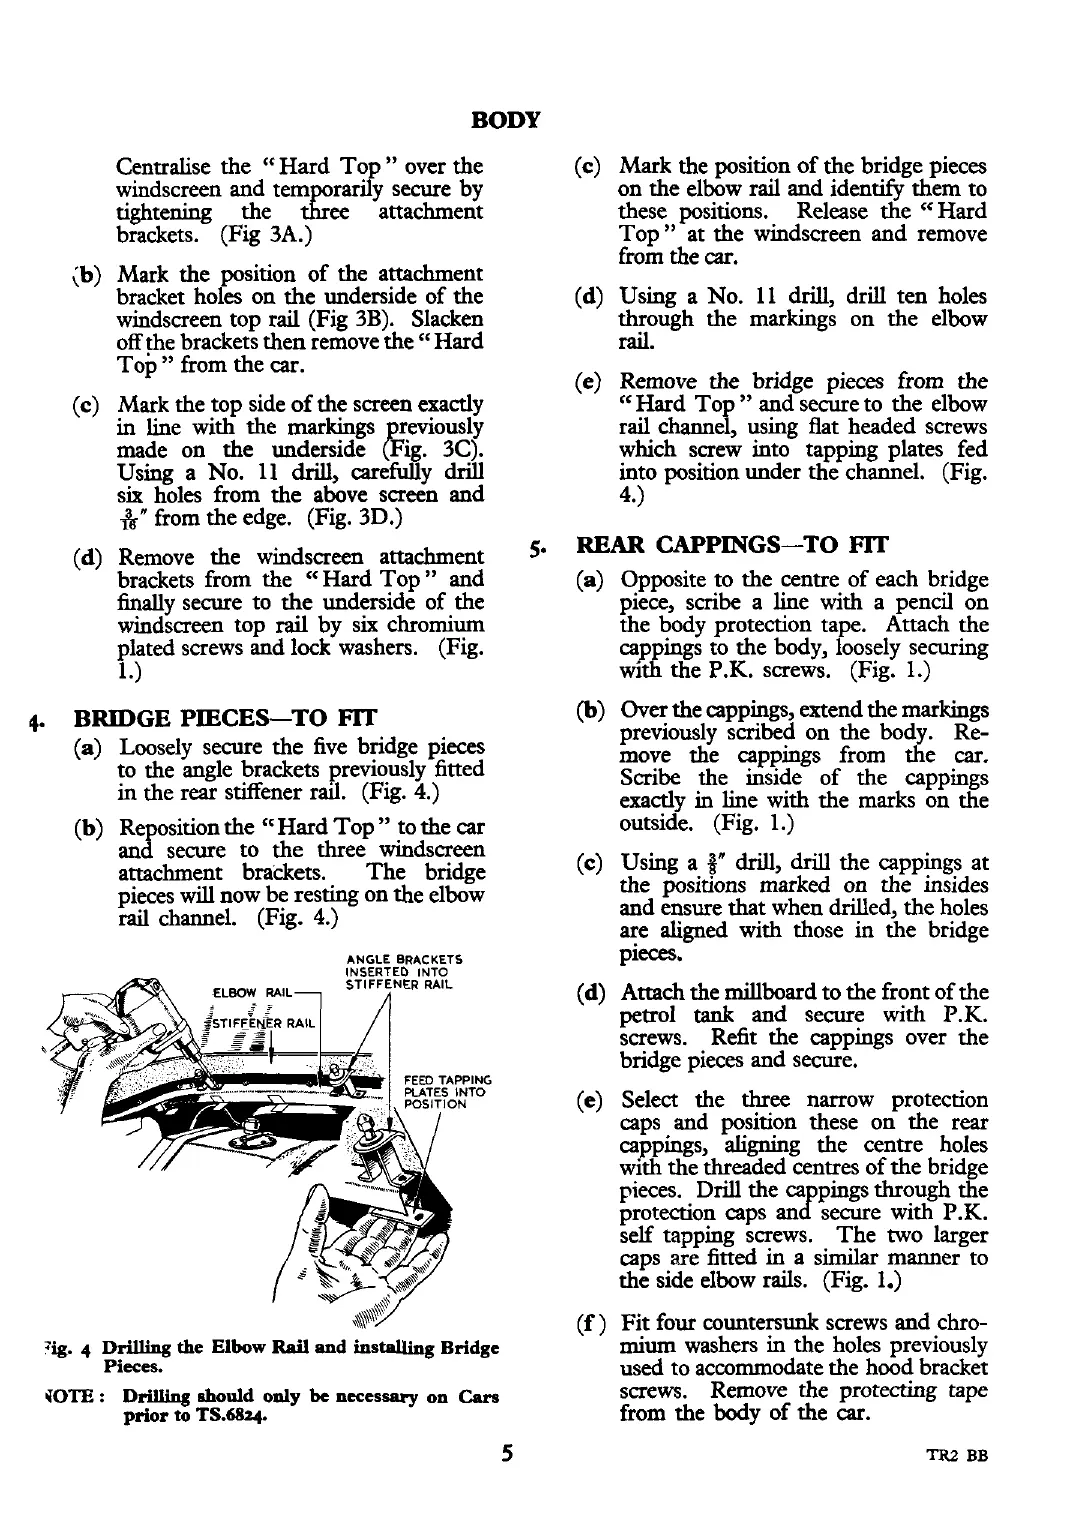
BRIDGE PIECES-TO
FIT
(a)
Loosely secure the five bridge pieces
to the angle brackets previously fitted
in the rear stiffener rail. (Fig. 4.)
(b) Re
sition the "Hard Top
"
to the car
an
X"
secure to the three windscreen
attachment brackets. The bridge
pieces
will
now be resting on the elbow
rail
channel. (Fig.
4.)
3g.
q
Drilling
the
Elbow
Rail
and
installing
Bridge
Pieces.
(OTE
:
Drilling
should
only
be
necessary on
Cars
prior
to
TS.6824
(c) Mark the position of the bridge pieces
on the elbow rail and
identify
them to
these positions. Release the "Hard
Top
"
at the windscreen and remove
from the
car.
(d) Using a No. 11 drill, drill ten holes
through the markings on the elbow
rail.
(e) Remove the bridge pieces from the
"
Hard Top
"
and secure to the elbow
rail channel, using flat headed screws
which
screw into tapping plates fed
into position under the channel. (Fig.
4.)
REAR CAPPINGS-TO
FIT
(a)
Opposite to the centre of each bridge
piece, scribe a line with a pencil on
the body protection tape. Attach the
cappings to the body, loosely securing
with the
P.K.
screws.
(Fig. 1.)
(b)
Over the cappings, extend the markings
previously scribed on the body.
Re-
move the capping~ from the
car.
Scribe the inside of the cappings
exactly in line with the marks on the
outside. (Fig. l.)
(c) Using a
%"
drill,
drill the cappings at
the positions marked on the insides
and ensure that when drilled, the holes
are aligned with those in the bridge
pieces.
(d)
Attach
the millboard to the front of the
petrol
tank
and secure with
P.K.
screws. Refit the cappings over the
bridge pieces and secure.
(e)
Select the
three
narrow protection
caps and position these on the rear
cappings, aligning the centre holes
with
the threaded centres of the bridge
pieces.
Drill
the ca pings through the
B
protection caps an
secure with
P.K.
self tapping screws. The two larger
caps are fitted in a similar manner to
the side elbow rails. (Fig. l.)
(f
)
Fit four countersunk screws and chro-
mium washers
in
the holes previously
used to accommodate the hood bracket
screws. Remove the protecting tape
from the body of the
car.
 Loading...


