GB/IE/NI 15
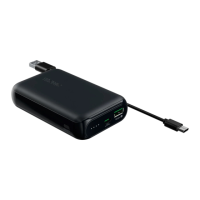
time will be longer. Connect the USB Type C plug of the USB
cable
4
with the PD port
1
and connect the USB Type
A plug of the USB cable
4
to the USB power supply (not
included) (see fig. B).
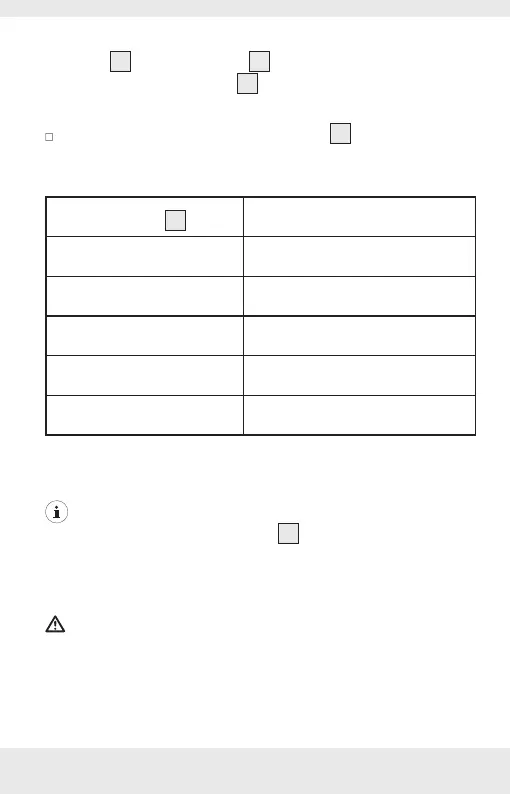
The LED indicator for battery capacity
7
shows you the
approximate charge level of the internal battery via 4 LED
lights as described below:
LED indicator
7
status
Power bank capacity
level
1 LED flash 0 - 25 %
1 LED light up, 1 LED flash 25 - 50 %
2 LED light up, 1 LED flash 50 - 75 %
3 LED light up, 1 LED flash 75 - 100 %
4 LED light up 100%
* This is approx percentage of power bank capacity but not
actual measurement.
NOTE: The 4th LED light will turn green when the power
bank is charged via PD input port
1
using a PD-enabled USB
charger. If a conventional USB charger is used for charging,
the 4th LED will still be the original colour of the battery status
indicator.
WARNING! Do not connect any device to be charged to
power bank as long as the power bank is charging. Remove the
charging cable from the power bank when it is fully charged.
 Loading...