8 EN
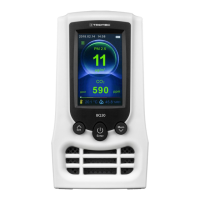
particle measuring device BQ30
Carrying out a measurement
Info
Please note that moving from a cold area to a warm
area can lead to condensation forming on the device's
circuit board. This physical and unavoidable effect can
falsify the measurement. In this case, the display
shows either no measured values or they are incorrect.
Wait a few minutes until the device has become
adjusted to the changed conditions before carrying out
a measurement.
Once you have switched the device on, it automatically
performs the measurement. You can tell whether the device is
currently performing a measurement from the indicated
measurement status(15) on the display.
In addition to the displayed measurement results an indicator
scale for particle contamination(11) further helps you in judging
the measured results (see chapter Information about the device
for more details). When measuring the CO
2
concentration the
device displays the measured result in one of the following
colours:
Air quality CO
2
value in ppm Indicator colour
measured result
1
Good 0 to 800ppm Green
Normal 800 to 1500ppm Orange
Poor 1500 to 9999ppm Red
System settings
The following submenus offering further setting options can be
accessed from the system settings' main menu:
Submenu Function
Date & Time Setting the date and time
AutoOFF Setting the automatic switch-off
Unit Changing the temperature unit
Alarm Configuring and enabling/disabling the
alarm
Brightness Setting the screen brightness
Storage rate Setting the time intervals between particle
measurements
Language Setting the menu language of the device
Info Calling up software information
1. Press the SET/ button(5) for approx. 2s to open the
system settings' main menu.
2. Press the SET/ (5) or the MEM/ button(2) to select
a submenu.
Setting the date and time
You can set the date and time and select whether to display the
time in 24h or 12h format. To do so, please proceed as
follows:
1. Open the submenu Date& Time.
2. Press the MEM/ button(2) to set the desired time
format.
3. Press the ENTERbutton(4) once to set date and time.
4. You can now set year, month, day, hour and minutes one
by one.
ð Use the buttons (5) and (2) to select the desired
value. Confirm each of the entered values by pressing
the ENTERbutton(4).
Setting the automatic switch-off
The automatic switch-off can be adjusted in increments of
10min within the range of 10 to 120minutes. You can also
deactivate the automatic switch-off function be selecting the
value OFF. To do so, please proceed as follows:
1. Open the submenu AutoOFF.
ð Use the buttons (5) and (2) to select the desired
value. Confirm the entered value by pressing the
ENTERbutton(4).
Changing the temperature unit
You can select whether the temperature is to be displayed in °C
or °F. To do so, please proceed as follows:
1. Open the submenu Unit.
ð Use the buttons (5) and (2) to select the desired
value. Confirm the entered value by pressing the
ENTERbutton(4).
Configuring and enabling/disabling the alarm
For the measurement of particles of 2.5µm size a limit value
that triggers an alarm can be defined at the device. You can
choose from the following values: 10µg/m
3
, 35µg/m
3
,
75µg/m
3
, 150µg/m
3
and 200µg/m
3
. The setting "No alarm"
deactivates the alarm. Please proceed as follows to adjust the
alarm settings:
1. Open the submenu Alarm.
ð Use the buttons (5) and (2) to select the desired
value. Confirm the entered value by pressing the
ENTERbutton(4).
Setting the screen brightness
It is possible to adjust the screen brightness. To do so, please
proceed as follows:
1. Open the submenu Brightness.
ð Use the buttons (5) and (2) to set the desired
brightness level. Confirm the entered value by pressing
the ENTERbutton(4).
 Loading...