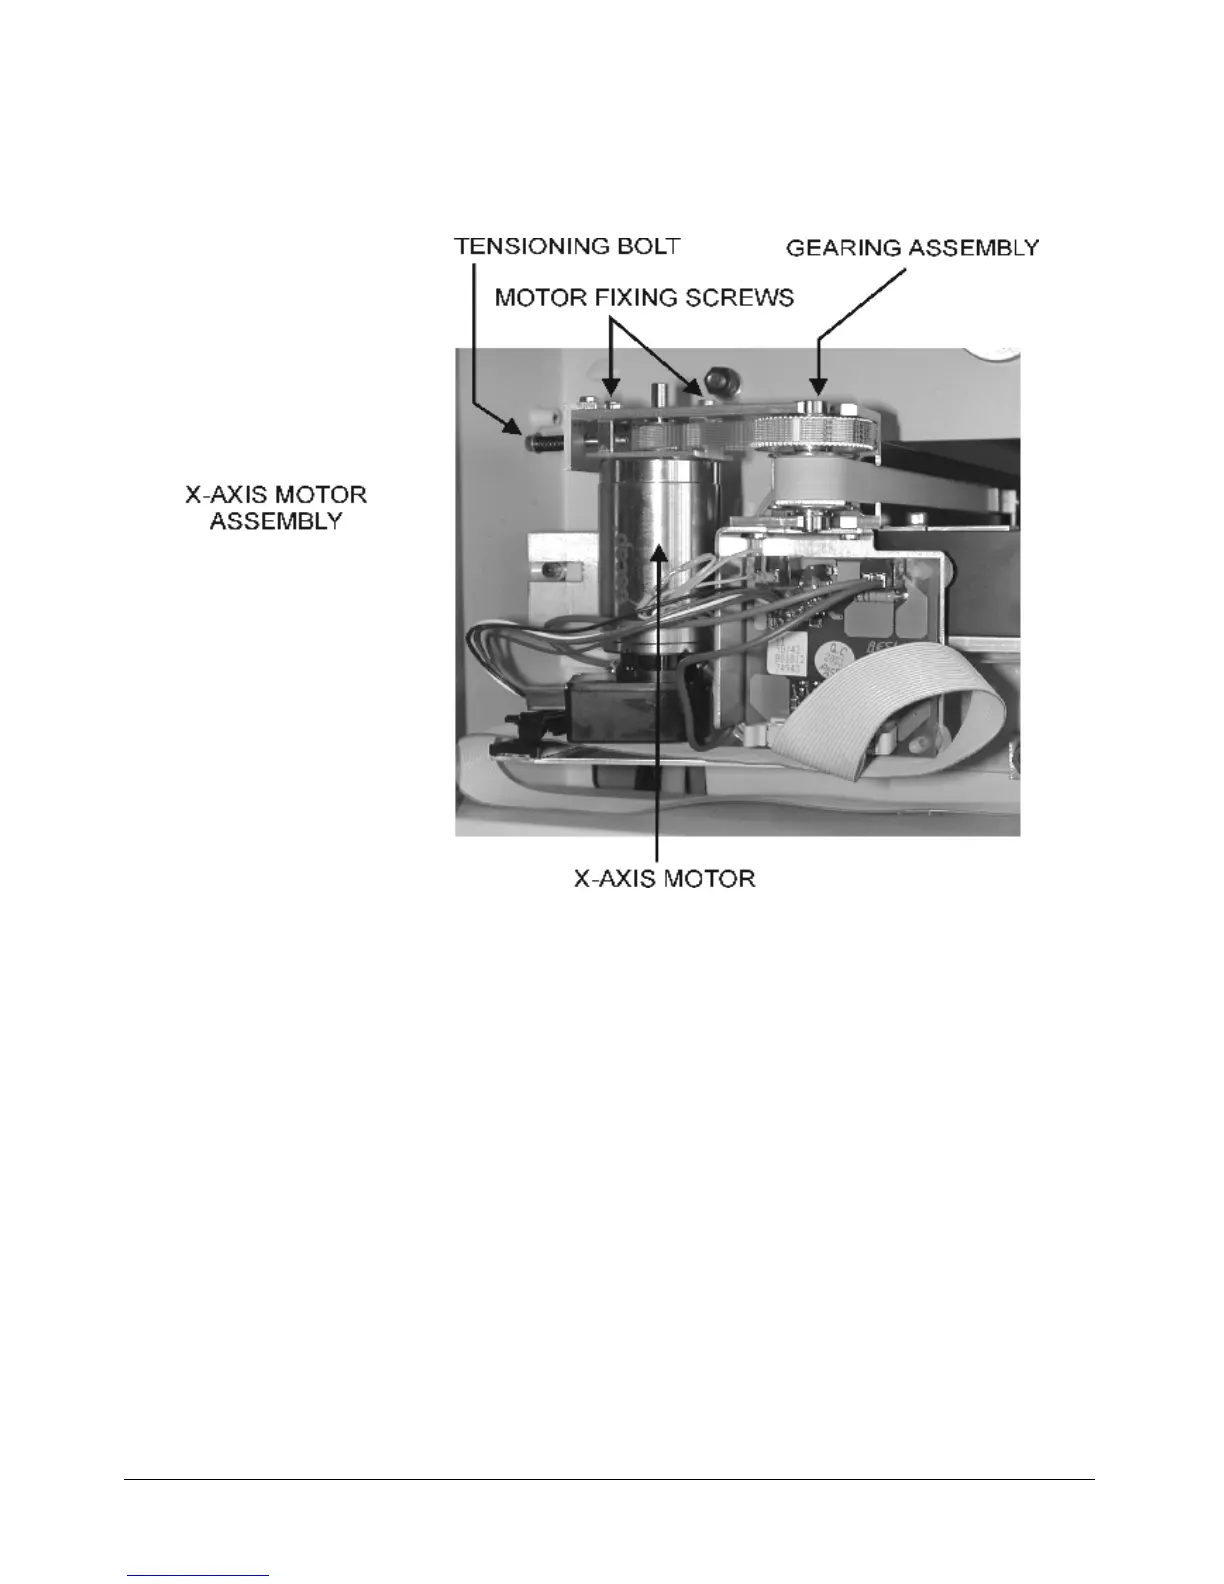
EasyManuals Logo

Trotec Speedy C100 User Manual

Trotec Speedy C100
87 pages
To Next Page IconTo Next Page
To Previous Page IconTo Previous Page
Page #55 background imageLoading...
Page #55 background image
NORMAL.DOT Gespeichert in:G:\Support\Dokumentationen_CDs\8003Speedy\Service Manual\Servicemanual 8003.doc Gespeichert am:2003/03/10
max Version 14
Seite 55 von 87
I N D I V I D U A L M A R K I N G S Y S T E M S
Fig. 3
9. Now the GEARING ASSEMBLY can be removed.
10. Assembling the system is reversed.
Be carefull to bring the MOTOR TENSIONING SCREWS, TENSIONING WEDGE
and TENSIONING BOLTS in their marked position to ensure correct belt tensioning.
The TENSIONING BOLTS must not touch the belt!!
Re- tension of belts is very important to attain good engraving results.
Attention: Do not overtight screws !!

Table of Contents

Questions and Answers:

Question and Answer IconNeed help?

Do you have a question about the Trotec Speedy C100 and is the answer not in the manual?

Trotec Speedy C100 Specifications

General IconGeneral
BrandTrotec
ModelSpeedy C100
CategoryEngraver
LanguageEnglish

Related product manuals