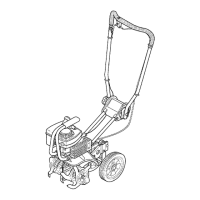
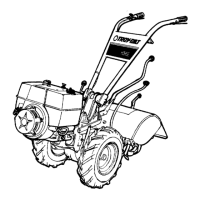
Qperation
THE
PTO
POWER
UNIT
Photo
4-37: The
Kickstand
acces-
sory
prevents
engine
from
tipping.
CAUTION
TO
AVOID
PERSONAL
INJURY
OR
DAMAGE
TO
EQUIPMENT:
•
Stop
the
engine, remove
the
electric
start
key,
discon-
nect
the
spark
plug
wire
and
let
the
engine
and
muffler
cool
before
removing
or
in-
stalling
any
attachment.
•
Do
not
place
hands,
tools,
or
any
object
near
or
inside
the
PTO
access hole
when
the
engine
is
running.
•
When
removing
or
replac-
ing
the
tine attachment,
be
careful
of
the
sharp
edges
on
the
tiller
hood.
Wear
thick
gloves
for
hand
protection.
•
When
the
tine
attachment
is
removed,
always
place
it
in
the
Tine
Cradle
or
prop
it
up
to
prevent
the
attachment
from
falling
forward.
The following steps explain
how
to
remove and replace the tine
attachment. The only tool you will
need is a 3/4" wrench (minimum
12" long for good leverage).
There are two optional acces-
sories that make the following
steps easier. The Kickstand acces-
sory prevents the PTO Power Unit
(engine end) from falling forward
Removing
And
Replacing
The
Tine
Attachment
when an attachment is removed
(Photo 4-37). The Tine Attach-
ment Cradle accessory gives you a
handy support
in
which to rest the
tine attachment when it is removed
from the tiller (see Photo 4-38).
For more information about other
accessories, refer to "Accessories"
at the back
of
this Manual.
VERY
IMPORTANT
Before
operating
your
PTO
Power
Unit
for
the
first time,
make
sure
that
you
have:
•
Read
all
the
safety
instructions
in
Section
1
of
this
Manual
and
in
the
Manual
supplied
with
any
at-
tachment.
•
Read
the
controls information
and
operating
procedures
for
the
tiller
and
engine described in
Sections 3
and
4
of
this
Owner/
Operator
Manual.
•
Read
and
understand
the
assem-
bly
instructions,
controls
informa-
tion,
and
operating
procedures
for
the
attachment
as
described
in
the
Owner/Operator Manual that
is
supplied
with
the
attachment.
As explained on Page 2
of
this
Manual, your tiller
is
really a self-
contained PTO power unit that was
shipped to you with a tine attach-
ment connected
to
it. The tine at-
tachment is quickly removed and
replaced by other attachments that
are available from
us.
The instruc-
tions given here will familiarize
you with your PTO Power Unit.
Please read these pages carefully.
Photo 4-38: The Tine
Attachment
Cradle
accessory
is
a
handy
option.
To
Remove
Tine
Attachment:
1. First be sure the engine is
stopped, the electric start key is re-
moved,
and
the spark
plug
wire is
disconnected.
2.
Place tiller on level ground.
3. Place the Wheels/Tines/PTO
Drive Lever in NEUTRAL (refer
to
Photo 4-39).
Photo 4-36: The PTO
Power
Unit
with the tine attachment removed.
40


 To Next Page